How to repair a rounded (bullnose) drywall corner that has a big dent in it

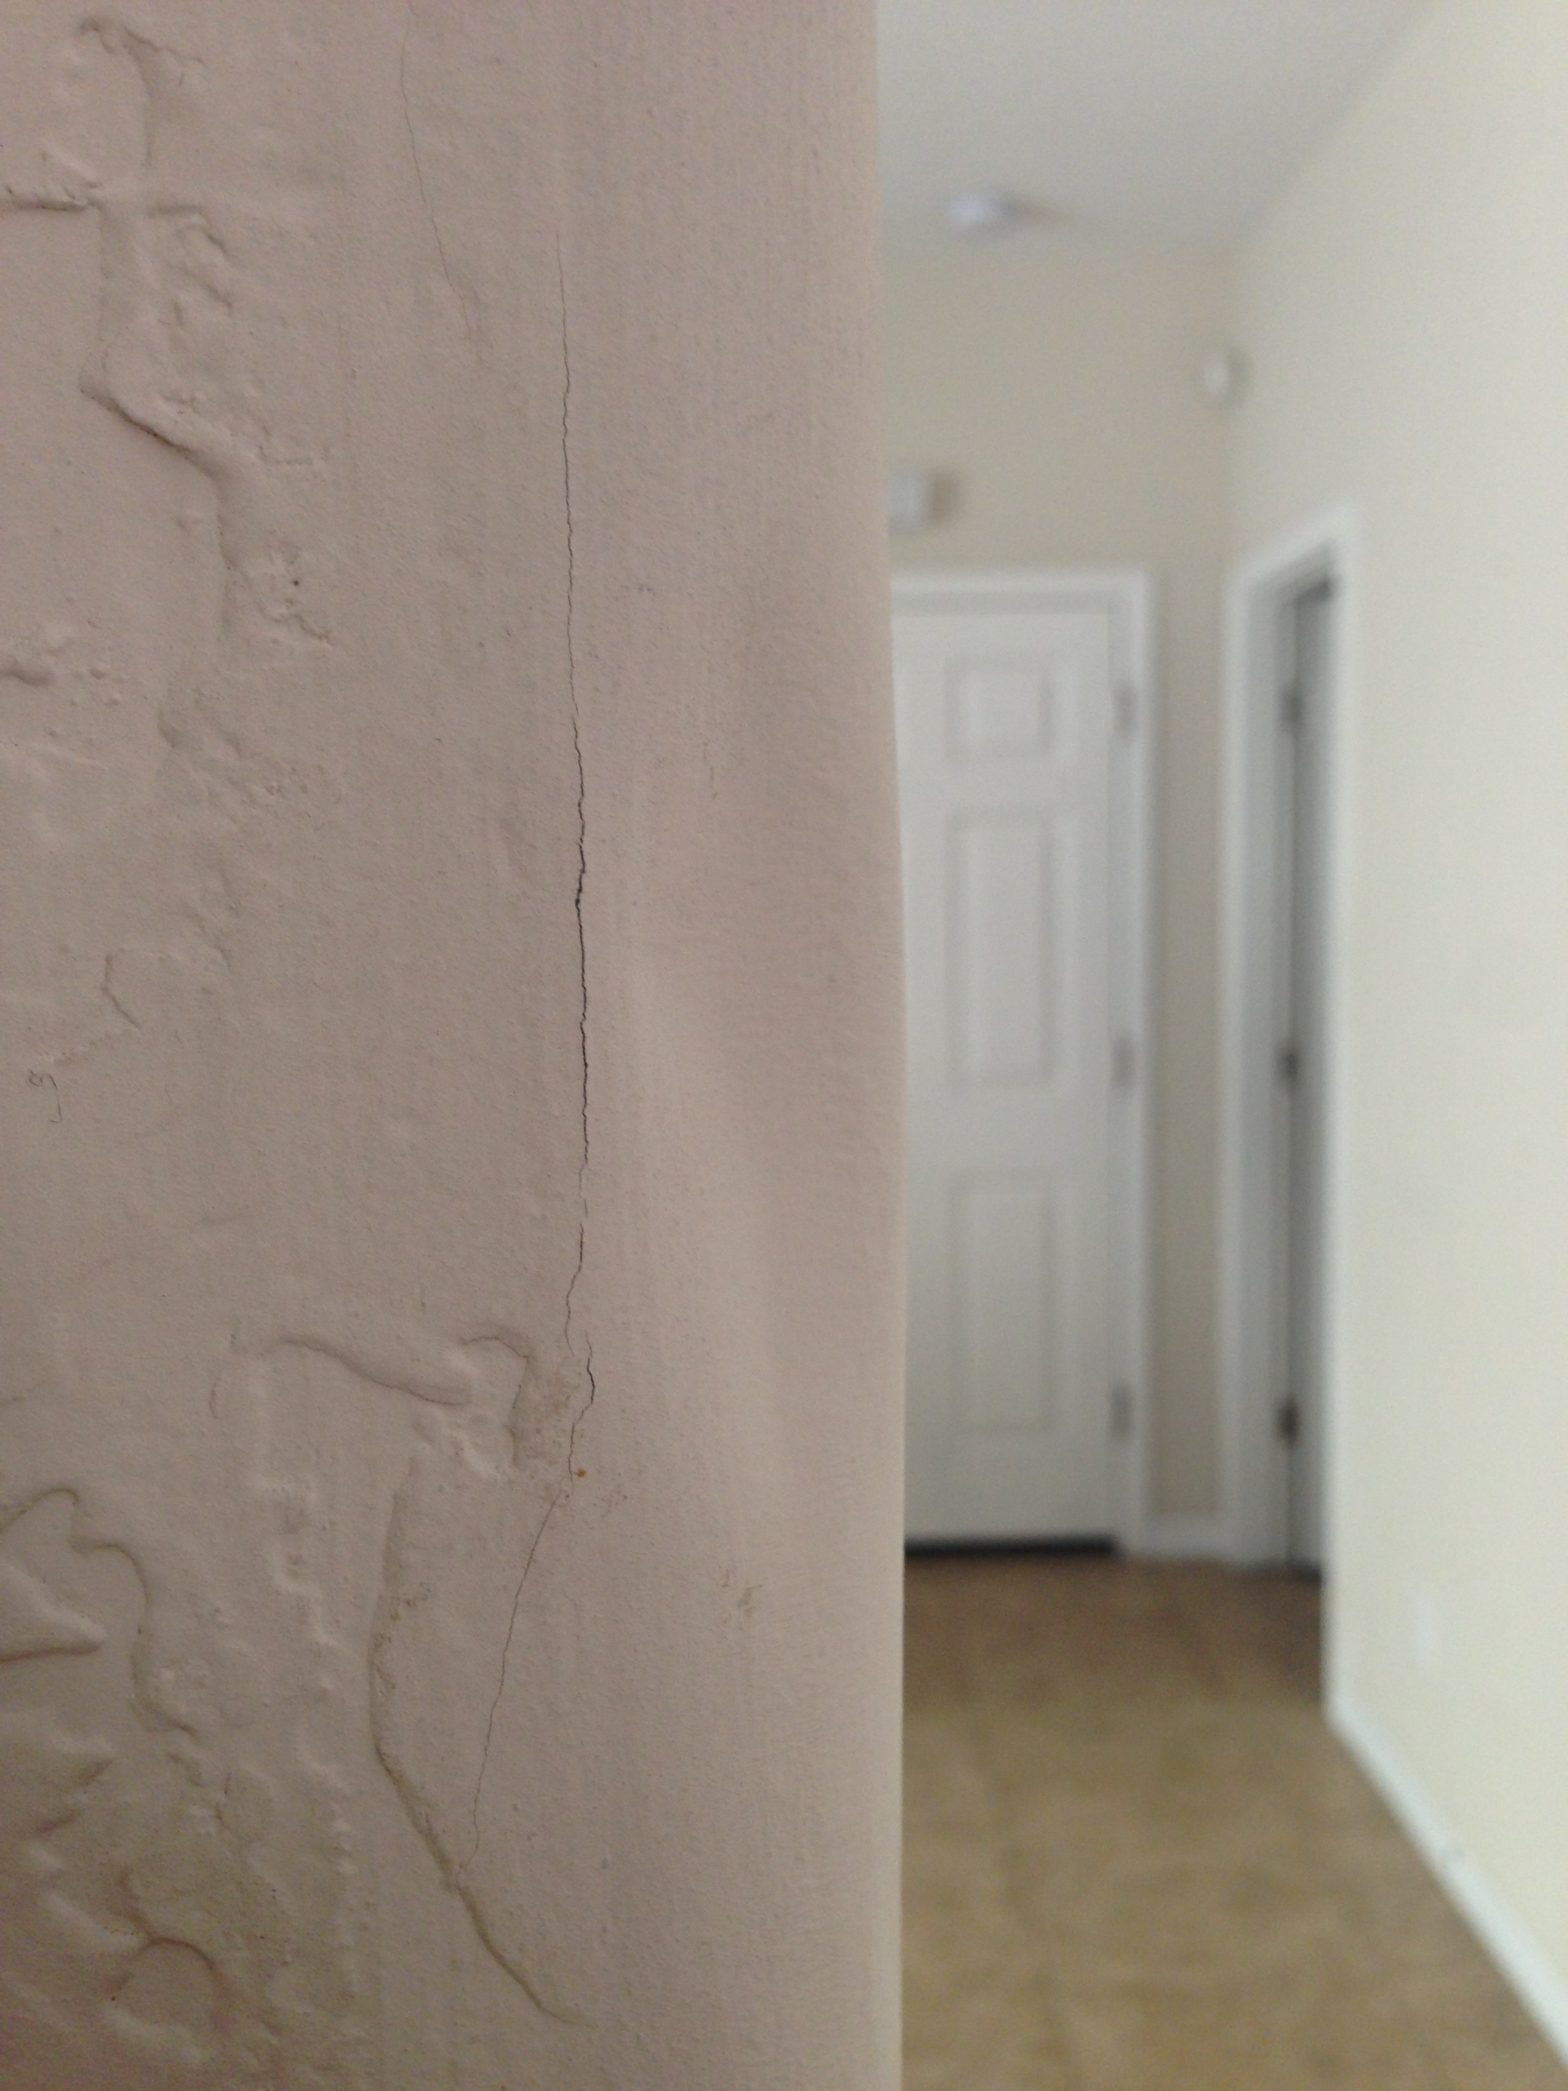
About 6 years ago, I bought my first house and interestingly, one of the first issues I saw when I first walked in was there were dents in the rounded / bullnose corners in the front entryway.
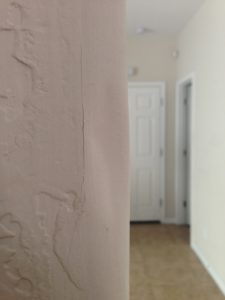

To my (now) wife's dismay I never fixed the dents. But when it came time to sell the house, I realized (or more so - I was informed) I needed to repair the dents in the rounded bullnose drywall corners if I wanted to sell my house for its fully appraised value. And to make it worse, this was deemed necessary just 2 days before we were to put the house on the market.
When I searched for articles on how to "repair a bullnose rounded drywall corner", I was amazed there wasn't a good step-by-step article with clear instructions and pictures to make the repair process crystal clear. All I could find in the top search results were poorly written instructions without any pictures to make the steps clear and obvious. Plus most of them talked about cutting out the metal bullnose piece and replacing it - which is too much work for such a simple problem.
So this article is my attempt to remedy this void on the interwebosphere along with a little extra info on my learning curve.
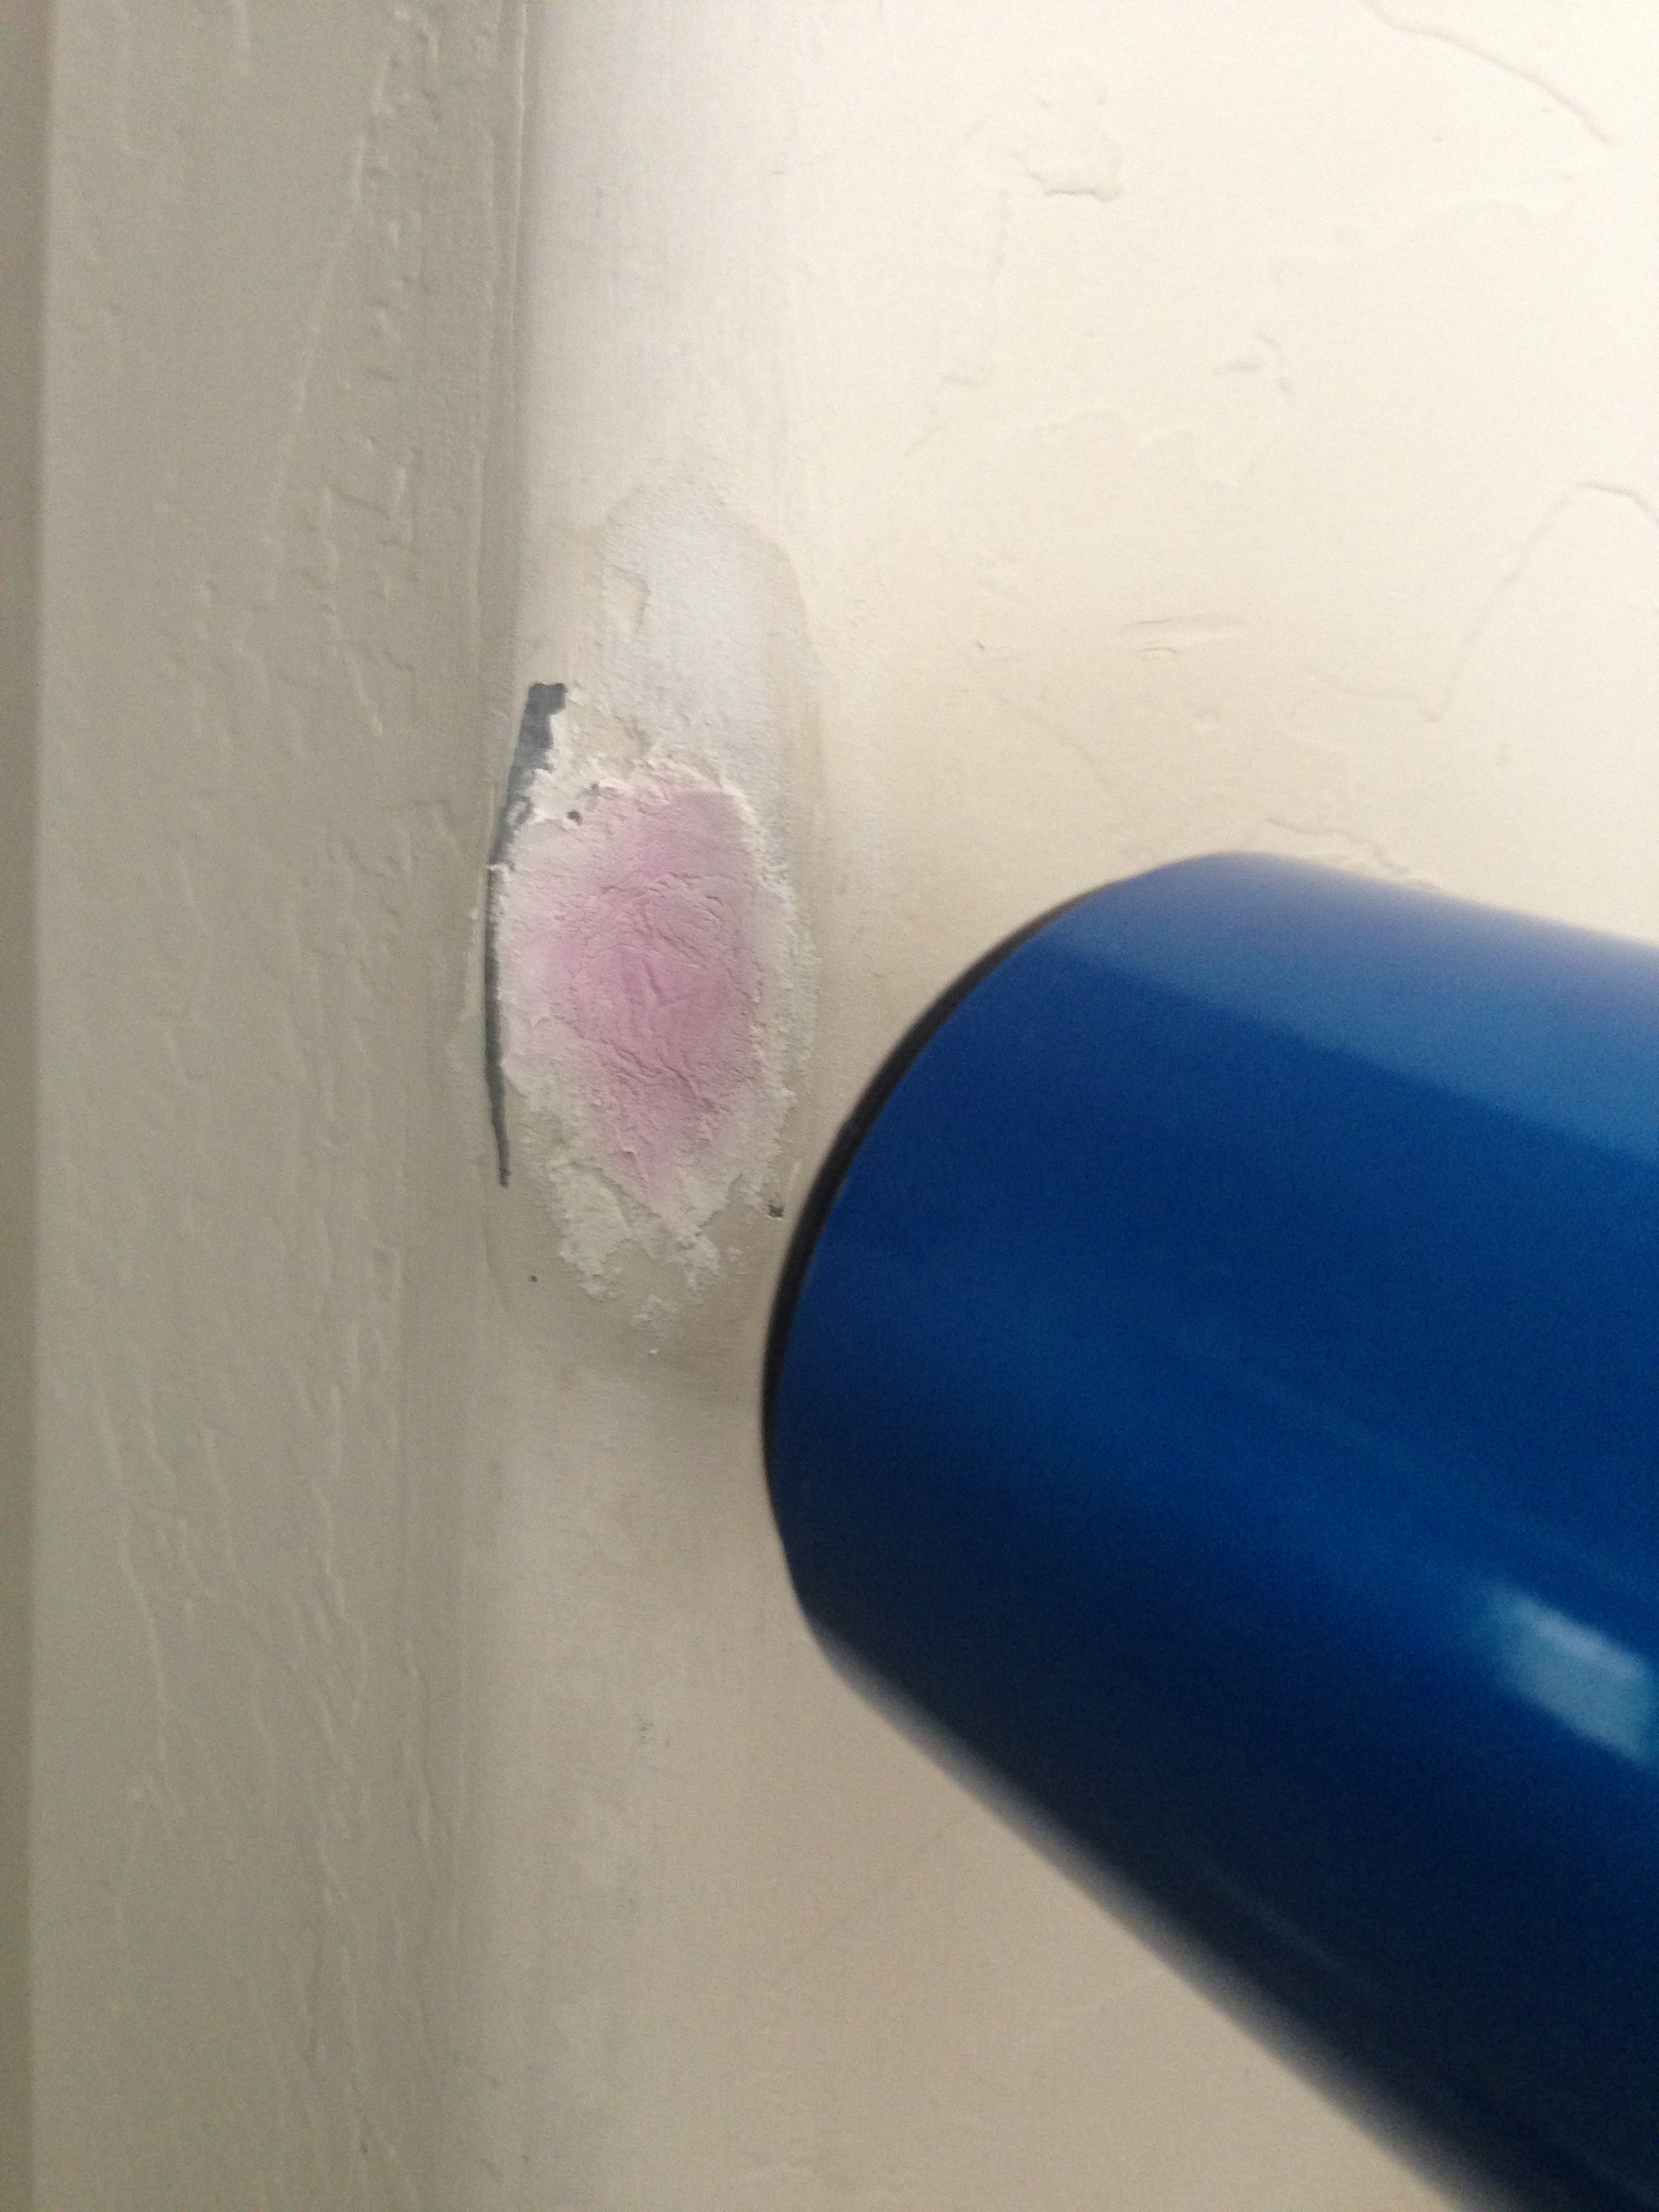
As a first attempt, I took some spackle and put it in the dent to fill it. I didn't sand down the paint to the metal bullnose corner piece as I figured the spackle would stick better to the paint than to metal.
I also figured to repair the dent, I'd over fill the dent (unfortunately I didn't take a picture), wait 24 hours for the spackle to dry, then sand it down with a piece of sandpaper in a motion like I was buffing a shoe to achieve the rounded corner.
Unfortunately, 24 hours later, when I started to sand the spackle, after a few back-and-forth motions past the dried outer crust, the spackle came right off in a couple clumps, right down to the bottom of the dent. As I was sanding, I couldn't easily tell that the spackle was still wet as wet spackle looks pretty similar to dry spackle - especially when there's tons of dust on it from sanding.
Because the dent was so deep, the spackle hadn't dried past the outer crust and was still soft in the inside. I figured I would need to to let it dry for a week before it would get solid all the way through, and I didn't have that kind of time.
So I headed to the hardware store to get some supplies. While there I came across a tough looking guy who was talking about his job in construction. So I went up to him, rudely interrupted his conversation and politely asked if he new anything about repairing a dented drywall bullnose rounded corner.
His first thought was to do the same as some of the articles said - to cut out the damaged area and buy a new aluminum (or whatever metal) bullnose piece and cut it to fit the space. Then place it in and mud over it.
For me, that was too difficult of a solution. I didn't want to have to cut up the wall and also have to cut metal, let alone have to cut one the perfect size.

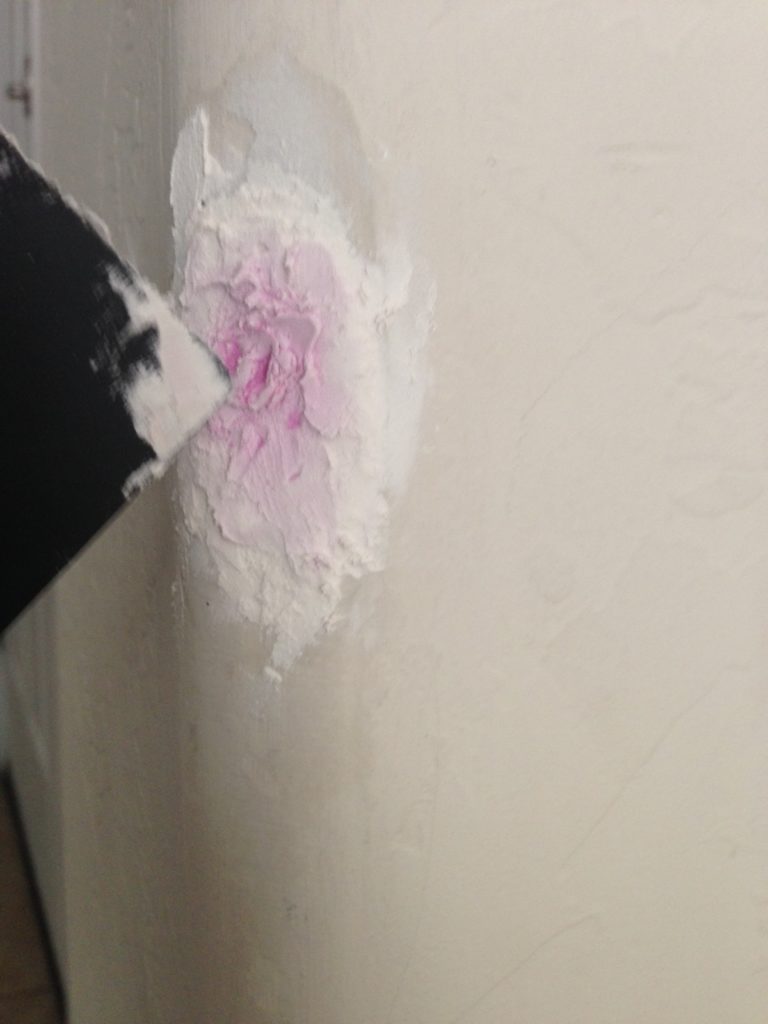
So we started talking about mud and how the good stuff only came in huge 25lb bags and he ended up telling me about DryDex with Time Dry Indicator, the pink spackle that dries white, so you know when its dry.
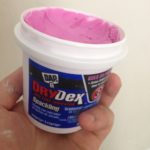
That sounded good to me as I figured I'd build up the spackle in the dent one layer at a time, drying each layer with a hair dryer. As the spackle would turn from pink to white when it was dry, I would have a great visual indicator on when the spackle was dry and I could safely put on another layer.
I also figured by layering on the spackle I'd get better adhesion to the paint on those first few layers with it shrinking quickly under the hairdryer (as opposed to the spackle slowly drying to the paint under the dried surface of my original thickly-applied spackle job where no air would get at it).
ASIDE: I'm not sure that last paragraph is good science. I'm sure its quite flawed, but it was part of how I convinced myself to go this route. I also figured if It didn't work, I could just scrape off all the spackle and the wall would be no worse than before. If I was to go the cutting route, I may make things worse, increasing my expense should I finally need to call a professional.
So I bought the pink stuff and headed to the house. I borrowed a hair dryer from a neighbor (we had just moved to the new house so this old house was empty) and got started.
I put a thin layer on and started shooting it with the hair dryer.
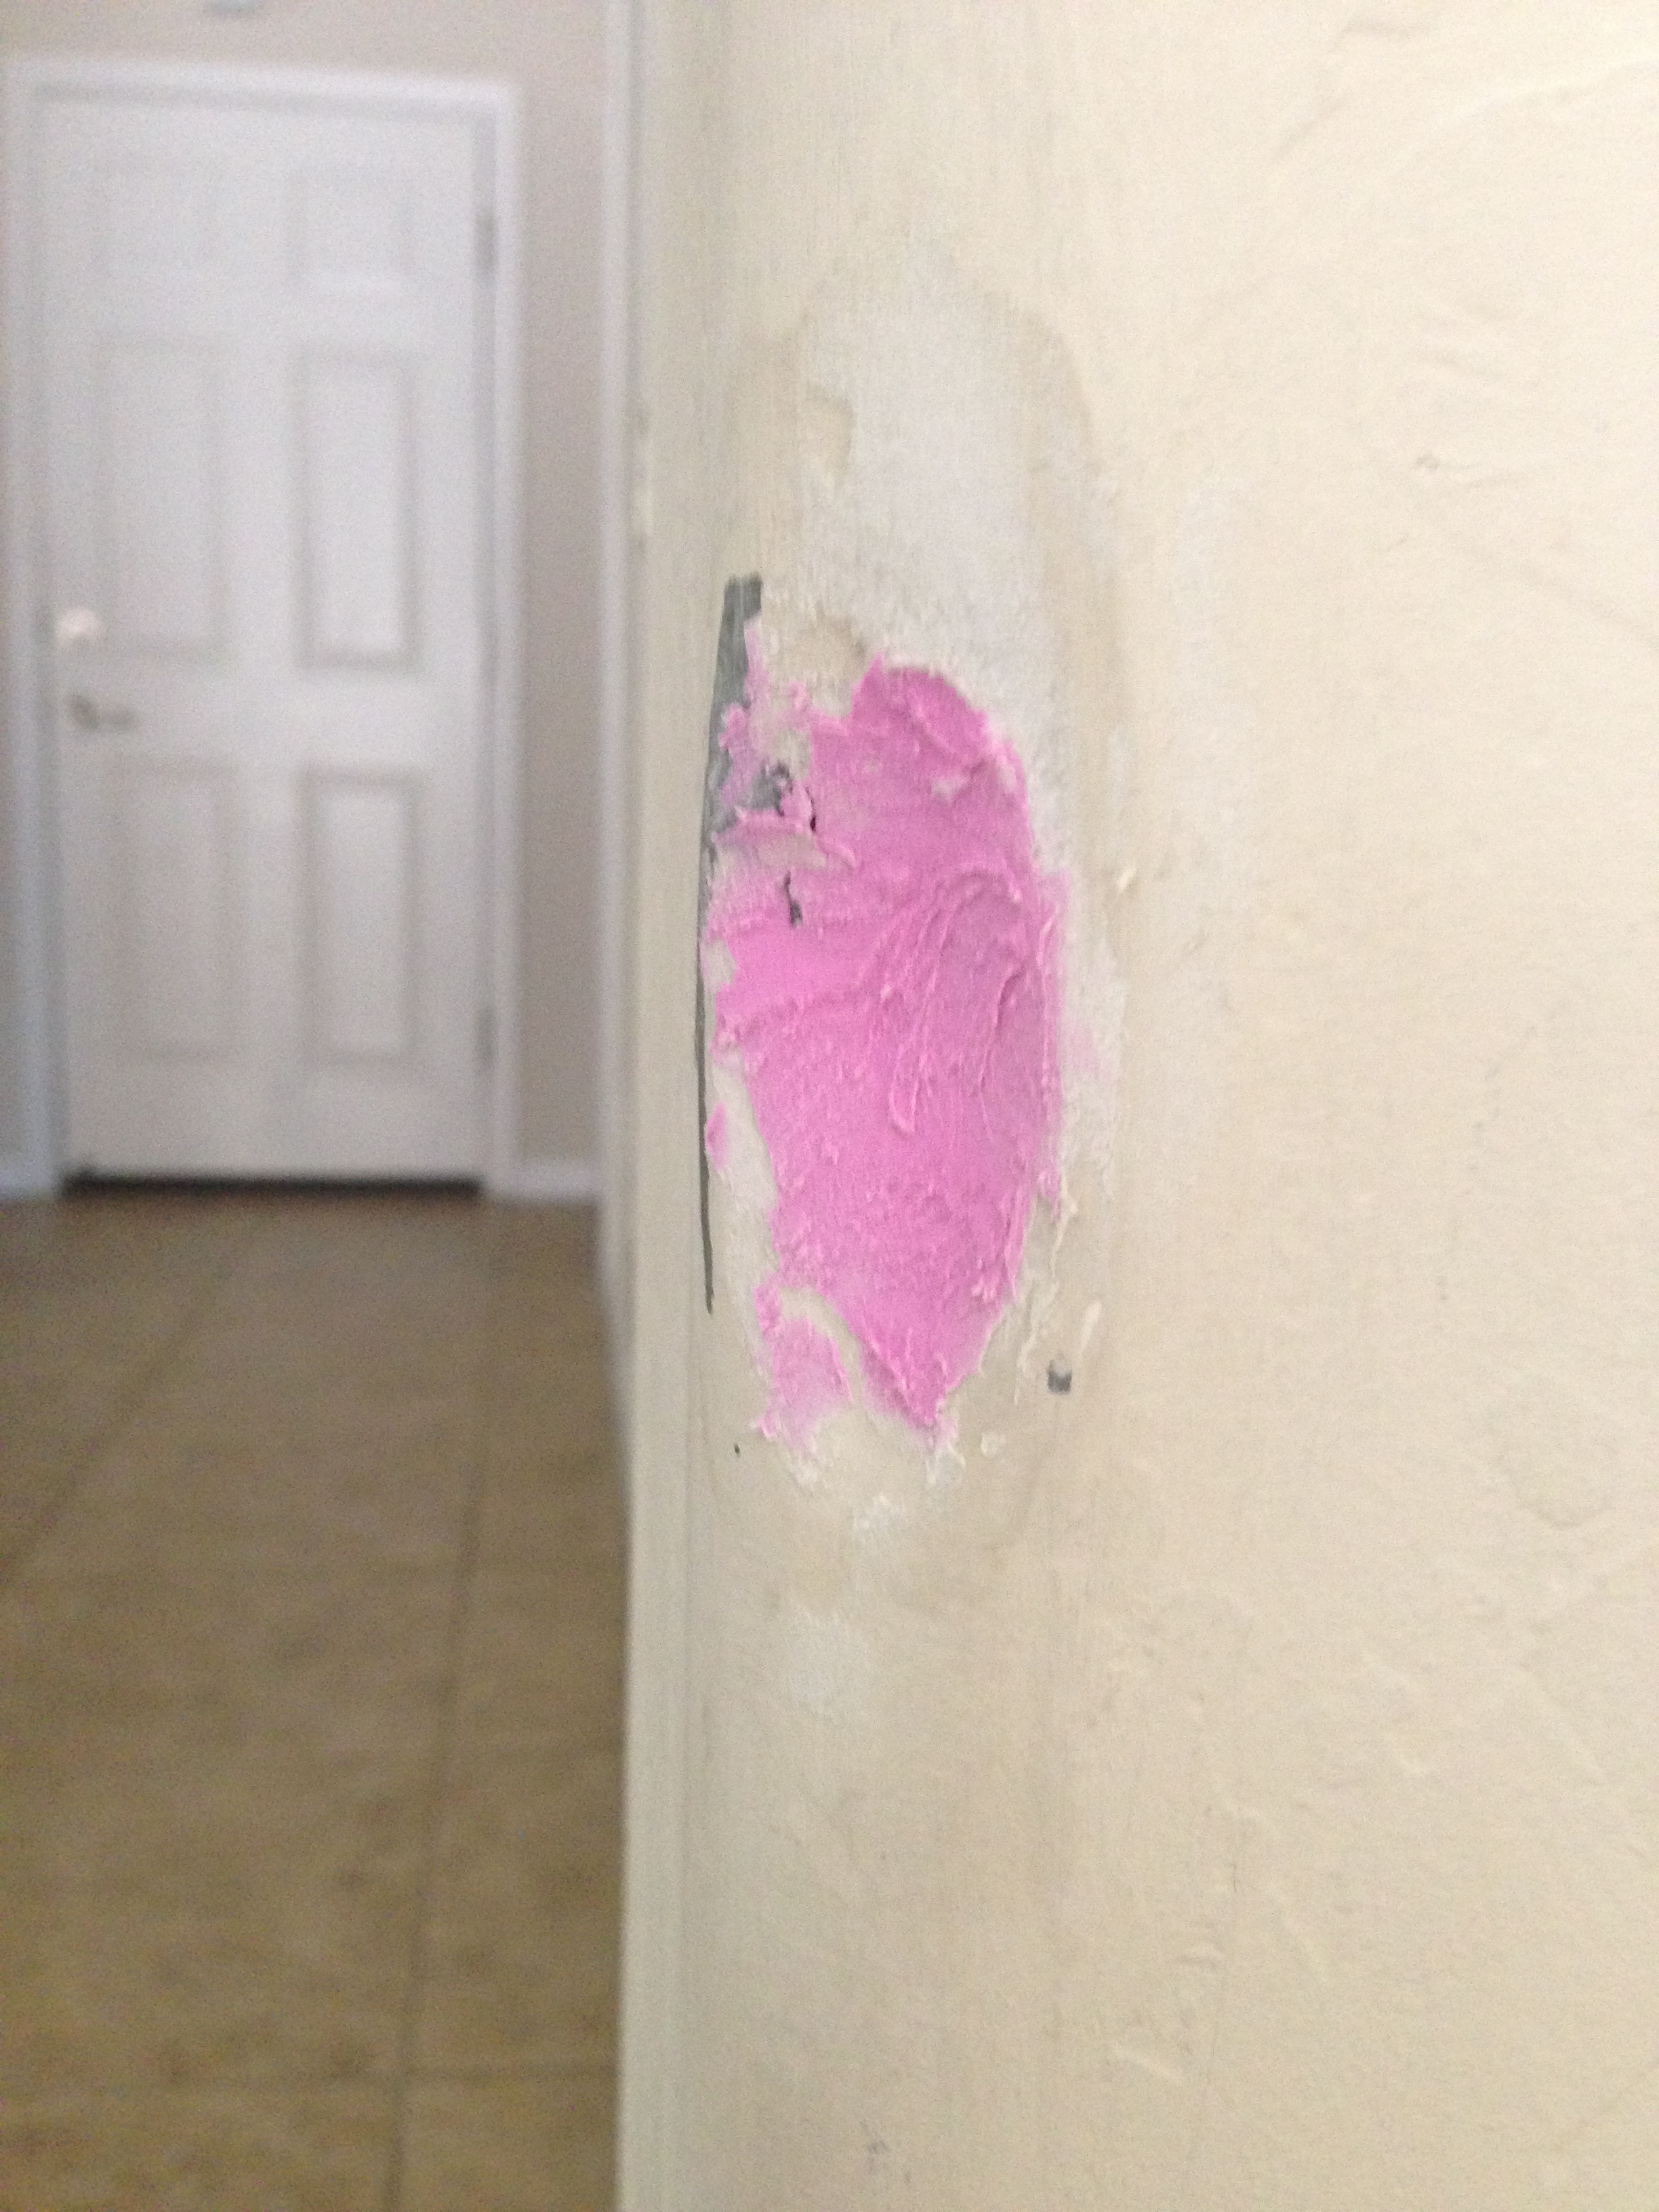

I was fairly amazed to watch the spackle turn from pink to white as it dried.
And I was also glad to find that after being dry the spacke was well bonded to the paint within the dent.
But the drying process, even with the hair dryer, took longer than I wanted; about 3-4 minutes for a thin layer. My mind started calculating during the boring drying periods and I estimated that at my current rate it would take at least 2 hours per dent. And there were 4 of the big ones. Eight hours would be too long!
So I started taping the the spackle as I was drying it to make ridges.
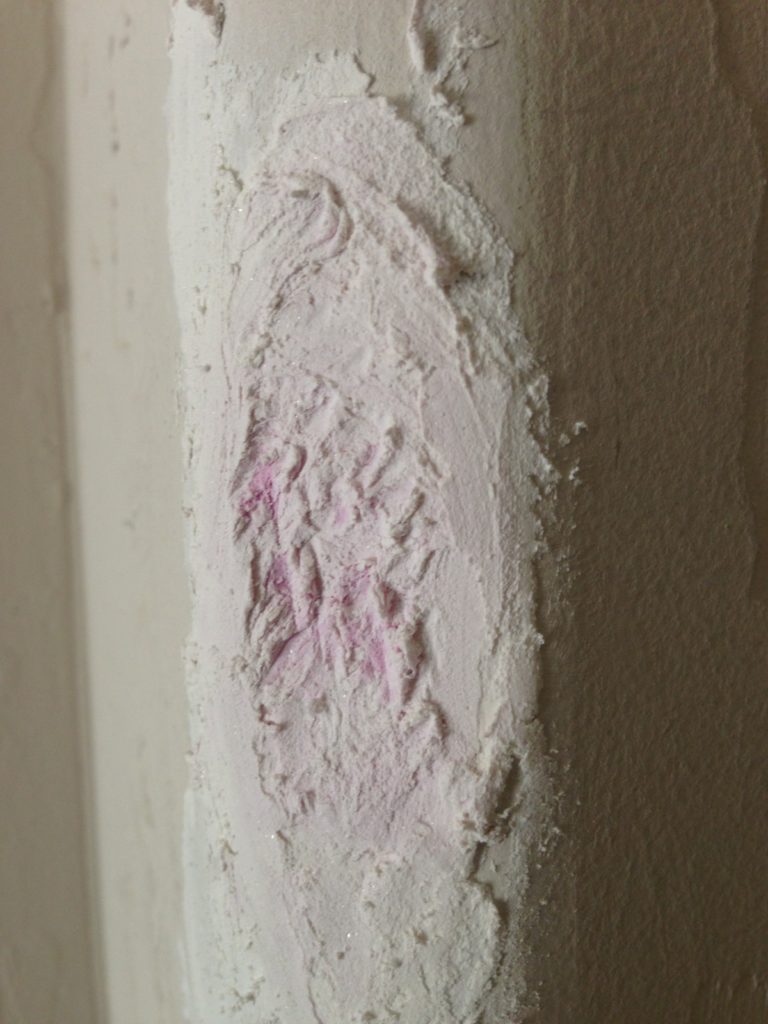
My thinking was that by creating little lumps and ridges I was increasing the surface area, allowing me to get a thicker layer on and dry it faster.
I timed this process and it did seem to be quite an improvement. My new estimate was that I could have the deep dent filled in about 30 minutes
That was acceptable. Two hours, with another hour (3 hours total) to sand them all down and paint was not ideal, but it was good enough for me to get the dents fixed that day and be ready to show the house.
So I filled all the holes, slightly over filling them, so I could sand them down using my un-patented shoe-buffing technique. (This is not shown in the picture because I had to hold the camera with my other hand. To do my simple technique, just hold the left and right side of the sand paper and rub back and forth like you'd buff a shoe.)
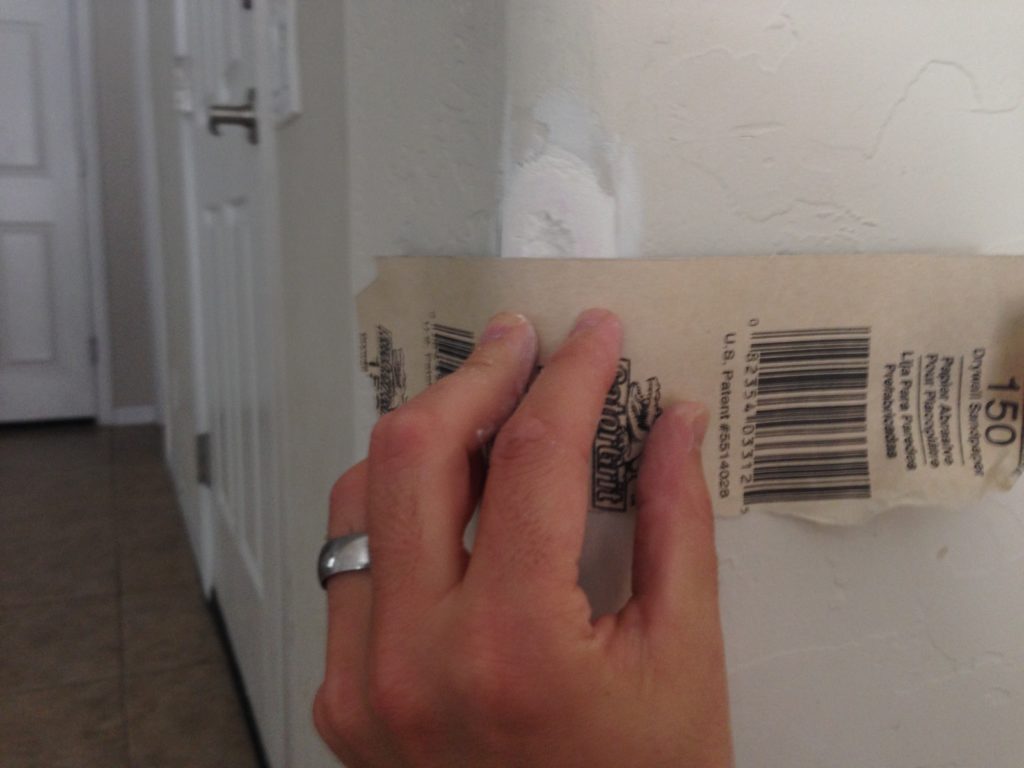
I found 150 grit sandpaper to work the best.
It worked well.
I got a beautifully rounded bullose corner that blended in perfectly and seamlessly with the wall.
I added a layer of paint and I was done!
Here's the before, during, and after pictures:


4 comments on “How to repair a rounded (bullnose) drywall corner that has a big dent in it”
Leave a Reply
Recent Posts

Reolink Argus 2 Review: From an Owners Perspective
I Made the World a Little Safer!
A Typical Parenting Moment from the Parent of a Child with FASD
Volunteering
We Were Sent Home From the Hospital with Instructions that Could Have Killed Our Son

After School Programs: Your Child May Not Be As Safe As You Think
FAS - You Wouldn't Say That About My Child If It Was Autism
VicTsing Filterless Cool-Vapor Humidifier Review
Increasing the Life of Your Air Conditioner: How to Install a 'Hard Start' Kit

A/C Hard Start Kit: A $1,600 Per Hour Story
Amazing. I too did not notice this problem until I needed to sell a house and you made this nightmare (or what I thought was going to be one) just a small fix that took only a few hours. Thank you for this article and all the work you did.
I was amazed when I went to repair my bullnose corners that there wasn't an article out on the web to help! So I'm very happy to hear you found my article helpful and it was worth my time! Best of luck on the sale of your home!
You could of just used the white spackle and let thoroughly dry, then sand very slowly. It can be completed in 2 to three apps and 48 hours.
Thanks for the post. Yeah, like I said, I was in a hurry to get it repaired and painted. Using white spackle wasn't even close to being dried in 24 hours. The surface was dried, but when I went to sand, it was mush underneath and all just fell off. I bet if I could have let it dry for a week, it would have been good.