Backyard Discovery Montpelier Cedar Wooden Swing Set Assembly Tips

This article is part of a series of articles on my experience purchasing and building a swingset from Walmart.com.
PLEASE NOTE: This article is not fully complete. Additional edits, clarifications, pictures, etc still need to be added as I'm able to find time.
As I've written in virtually all my other posts on putting together your own backyard swing set, this project was far beyond my expectations when I added one to my cart and checked out on Walmart.com.
The goal of this post is to help the next person that buys the same set or one similar to the Backyard Discovery Montpelier Cedar Wooden Swing set which I assembled. Below are the various issues I came across along with ideas I had to make the assembly easier and more efficient.
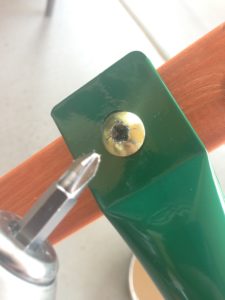
Some Bolts Strip Easily
Be aware that even though most of the bolts have a Torx like head, they, along with the few Phillips heads, can still strip fairly easily. So use a good cordless drill and learn to control the speed with which you drive the bolt into the wood. Start driving them in slowly and learn to develop a touch for how hard to press, how fast you can go, and when to let up on the trigger.
Backyard Discovery includes the Torx drivers with the hardware, but does not include the proper Phillips drivers. I was using too small of a Phillips head on the first few and easily stripped a couple bolts before realizing I needed a bigger head. Even with the bigger head, I could still partially strip the heads, and I also stripped a few of the Torx heads before I developed my touch to drive the bolts in without causing damage to the bolt head.

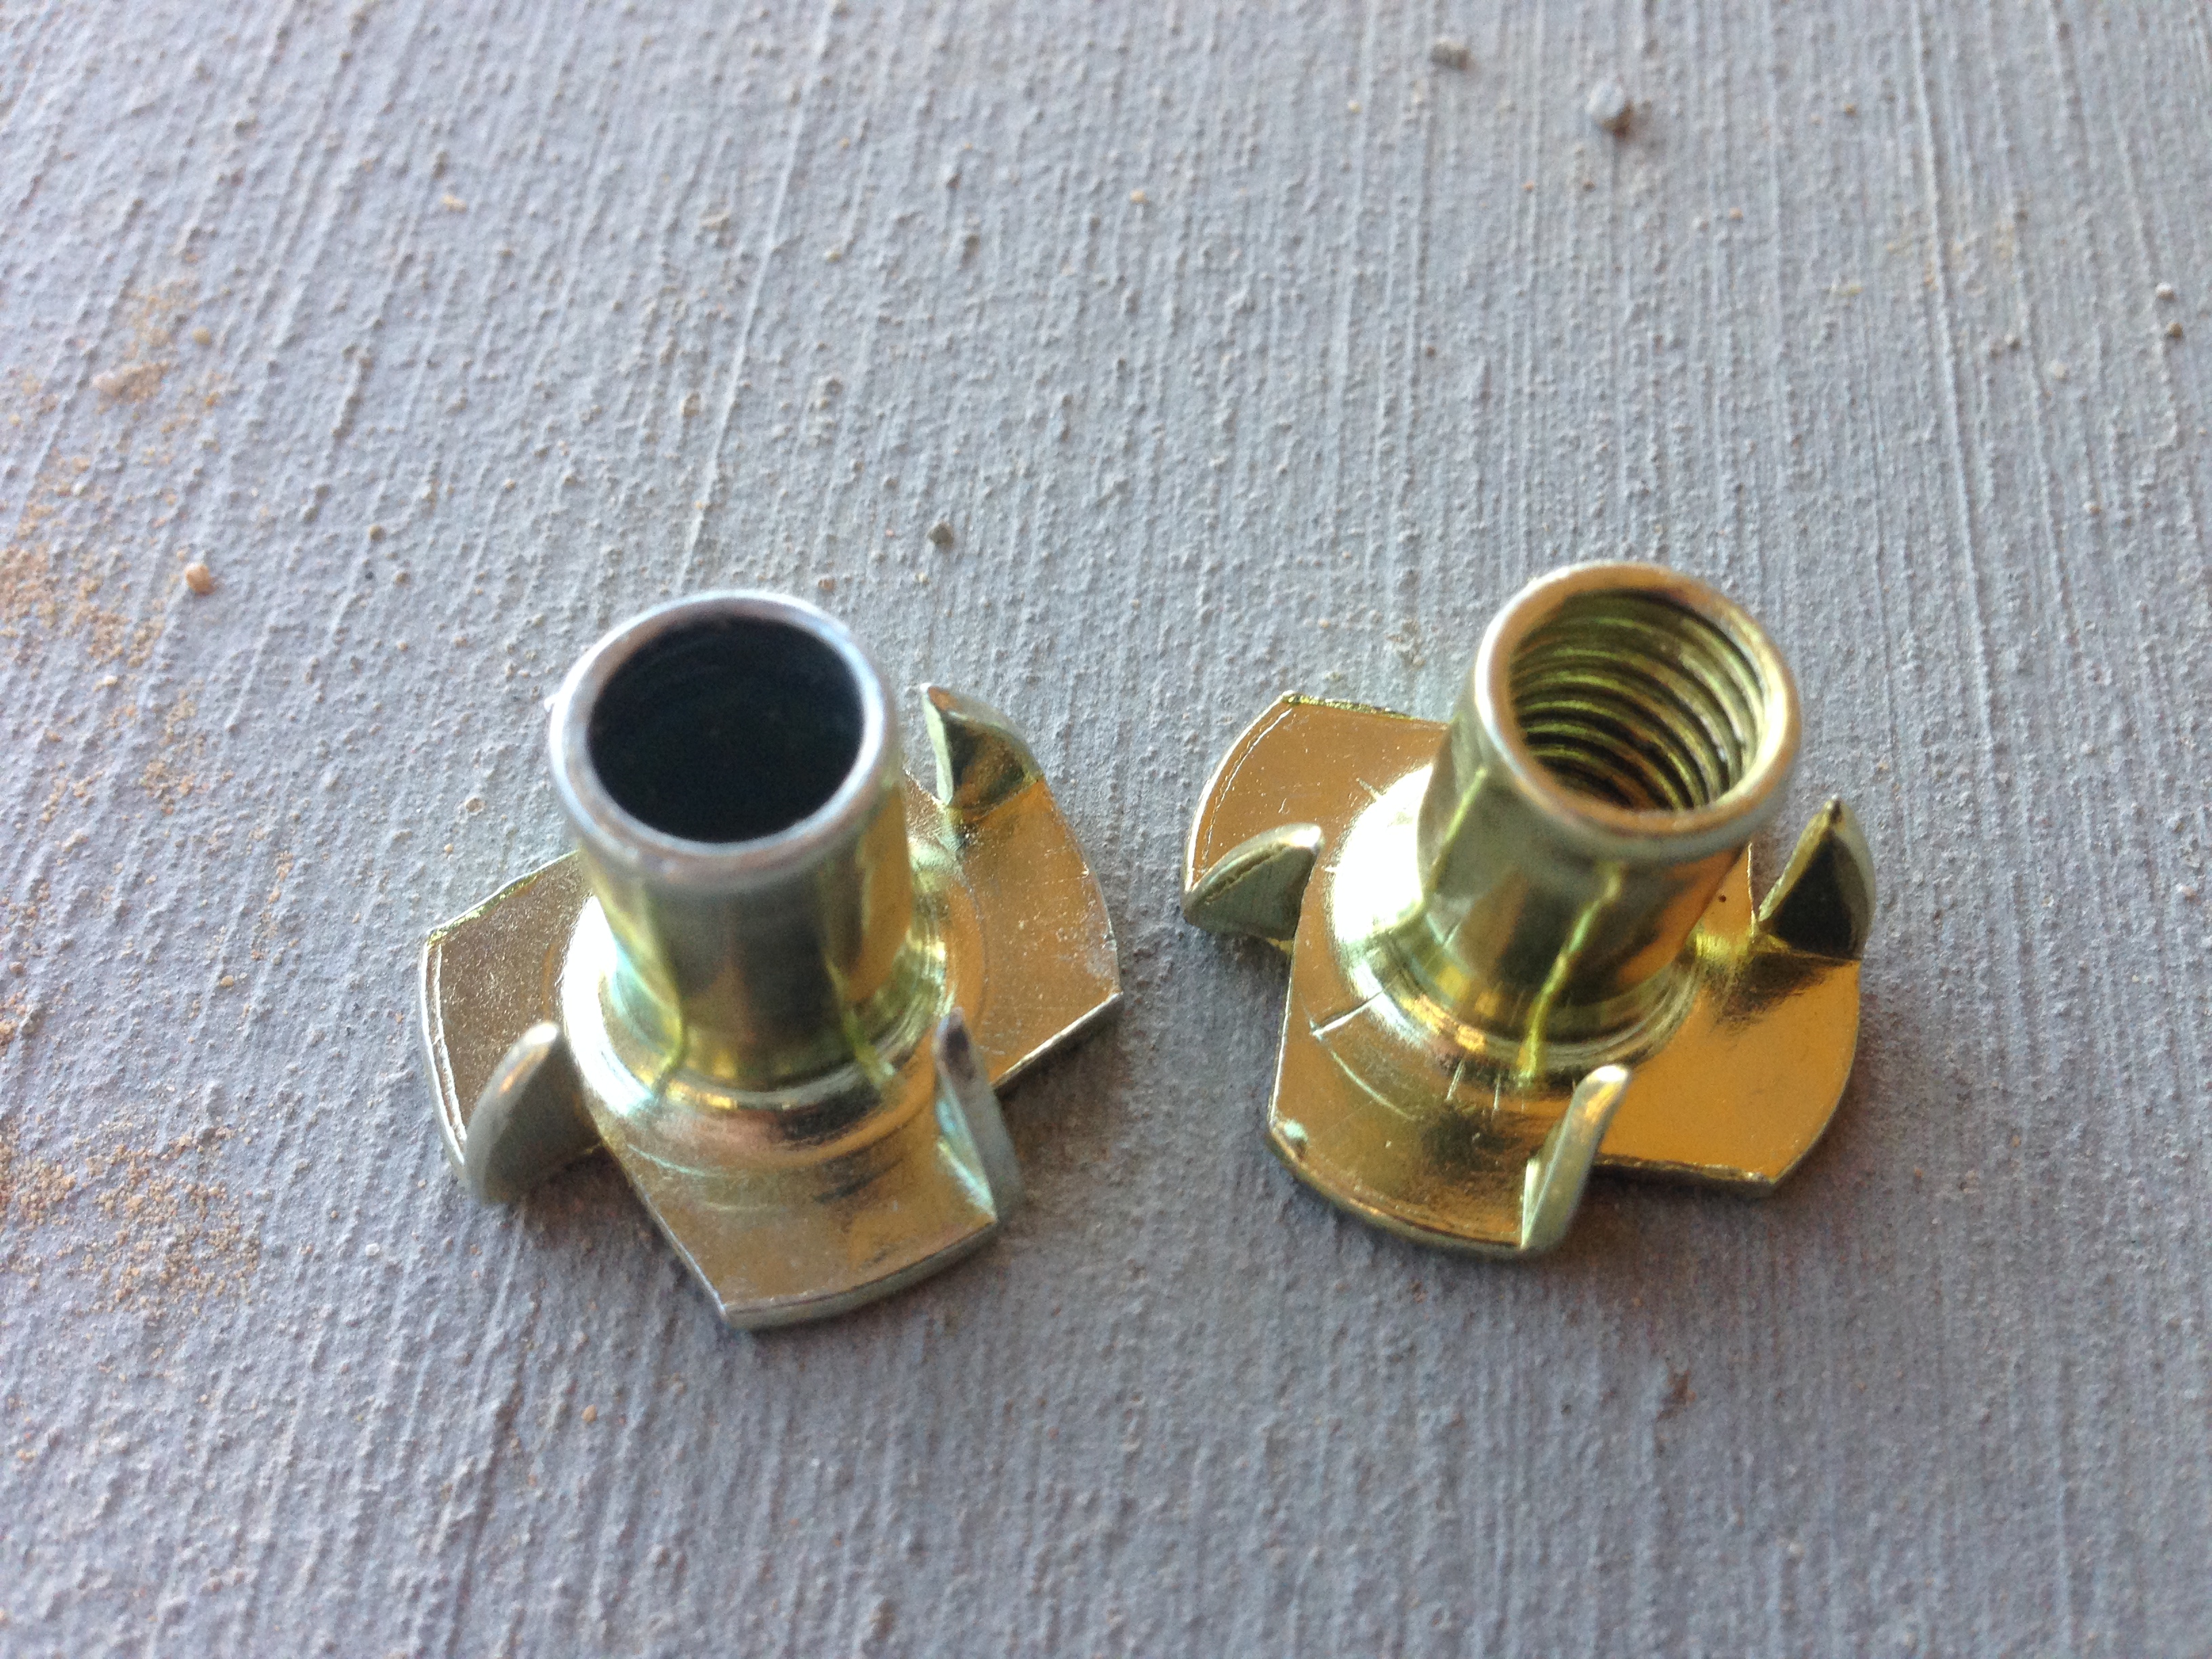
Some parts come deformed or missing threads
Be aware that some of the parts may be deformed. A deformed screw head is not too big of a deal, because you can't screw it in and you'll choose another one before it becomes a problem. I think the Big Backyard manufacturer is aware that some of the parts come deformed and that you'll potentially lose a few, because they include extra screws, bolts, washers, etc.
The big thing to watch out for is the potential for a deformed T-Nut. These nuts can be hammered into the wood in one step and buried by another before you finally drive the intended bolt into it in yet another step. I happened to get a T-Nut that was never threaded. Luckily mine was only covered by a cosmetic board that was easily removed so I could replace the T-Nut, but there are some T-Nuts that are much more buried and would be more difficult to replace. This is probably quite unlikely to happen to you, but you may want to check all your T-Nuts for deformities.
Make Alignment Marks
There are a few times where you need to blindly screw or drill into a board and you don't want the screws to go in sideways, too far to one side, or crack the board. This is most critical on boards that are structural (as opposed to cosmetic), for if you don't secure the structural components properly, your swing set won't be as safe and last as long as it possibly can.
The instructions don't state to do so, but you should make marks to be sure the boards are aligned before drilling and/or screwing into them.
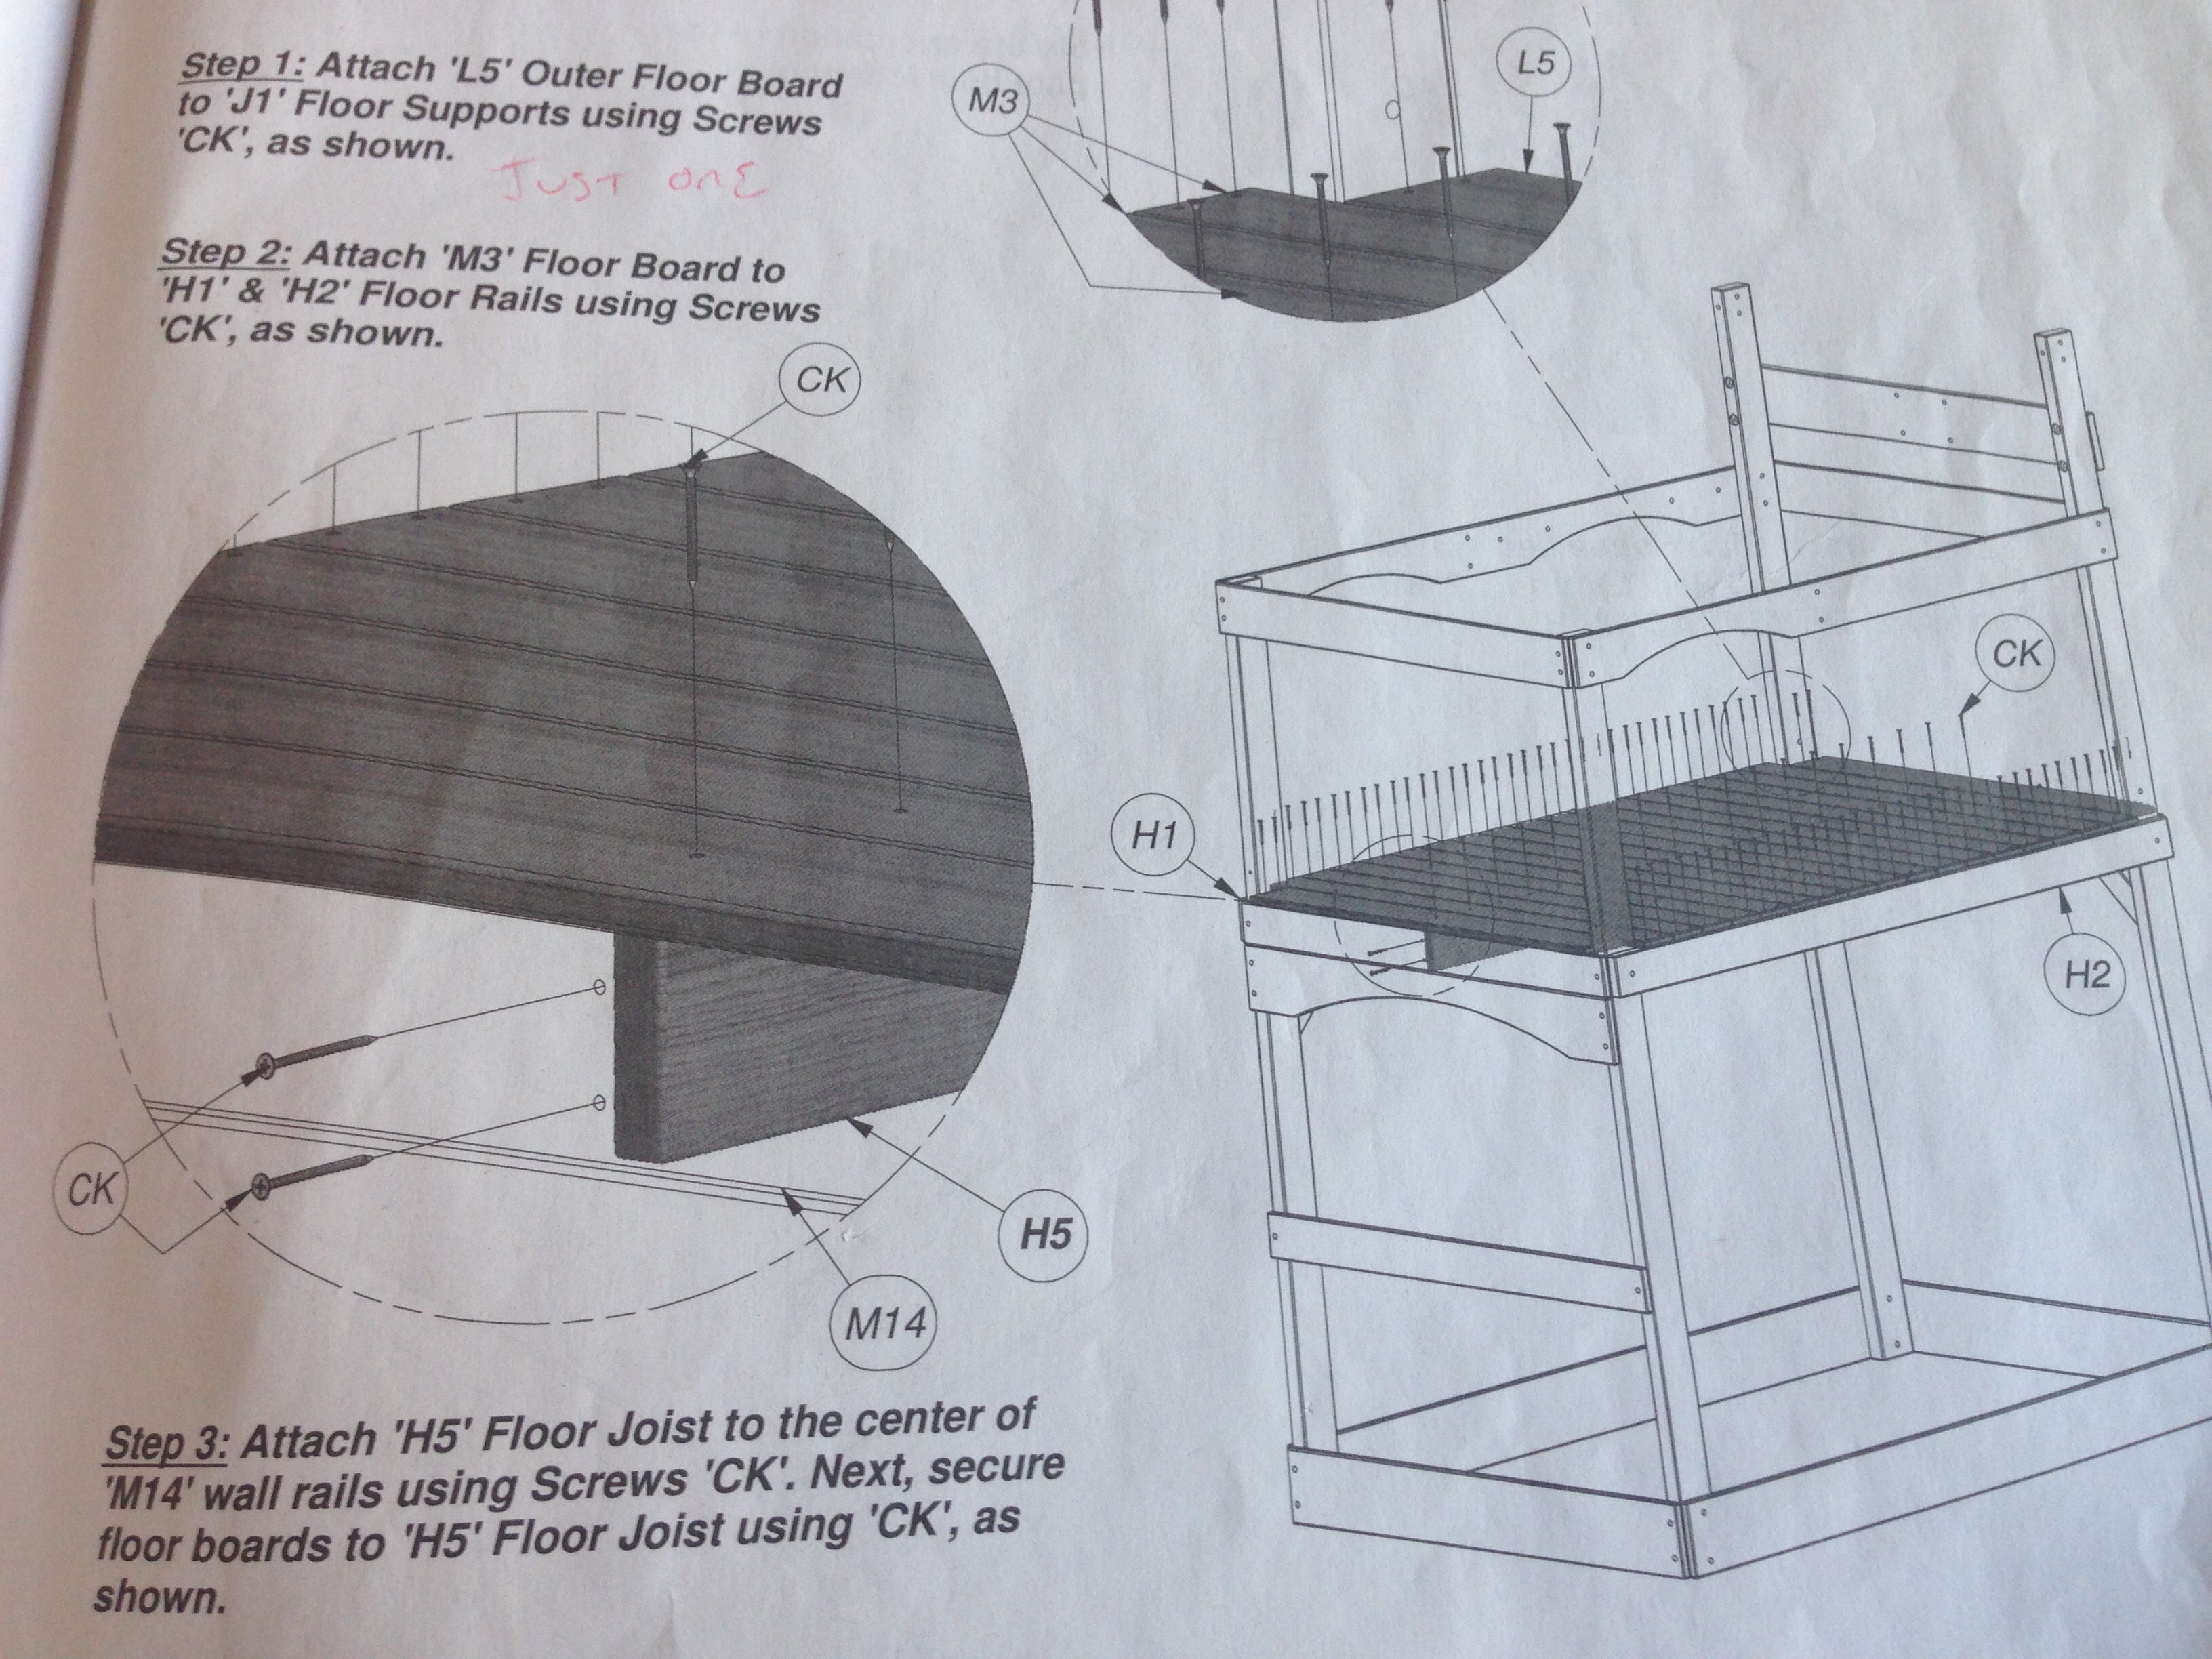
In Step 3 of this instruction, I was to Attache the "H5" Floor Joist to the center of the "M14" wall rails. The holes on the "M14" wall rails were pre-drilled, but there are no pre-drilled holes in the perpendicular floor joist board. Those screws need to go into the center of the "H5" floor joist without much room for error. With poor alignment, you may drill/screw into the edge of the board and split it, hampering the quality of your support structure.
Before put the floor joist in place to begin drilling holes in the end, I drew a couple lines with a strait-edge on both sides of the pre-drilled holes in the "M14" wall rails at about the width of the floor joist board.
Then I inserted the floor joist, which luckily for me, fit snugly in place, such that I didn't need to hold it in place. If it hadn't held itself, I likely would have used duct-tape to hold the weight while I aligned the board between the marks (or having a 2nd person helps too!).
Next, I aligned the floor joist between my marks and drilled the holes from the outside, knowing the holes would be going into the center of the board before finally driving in the screws.

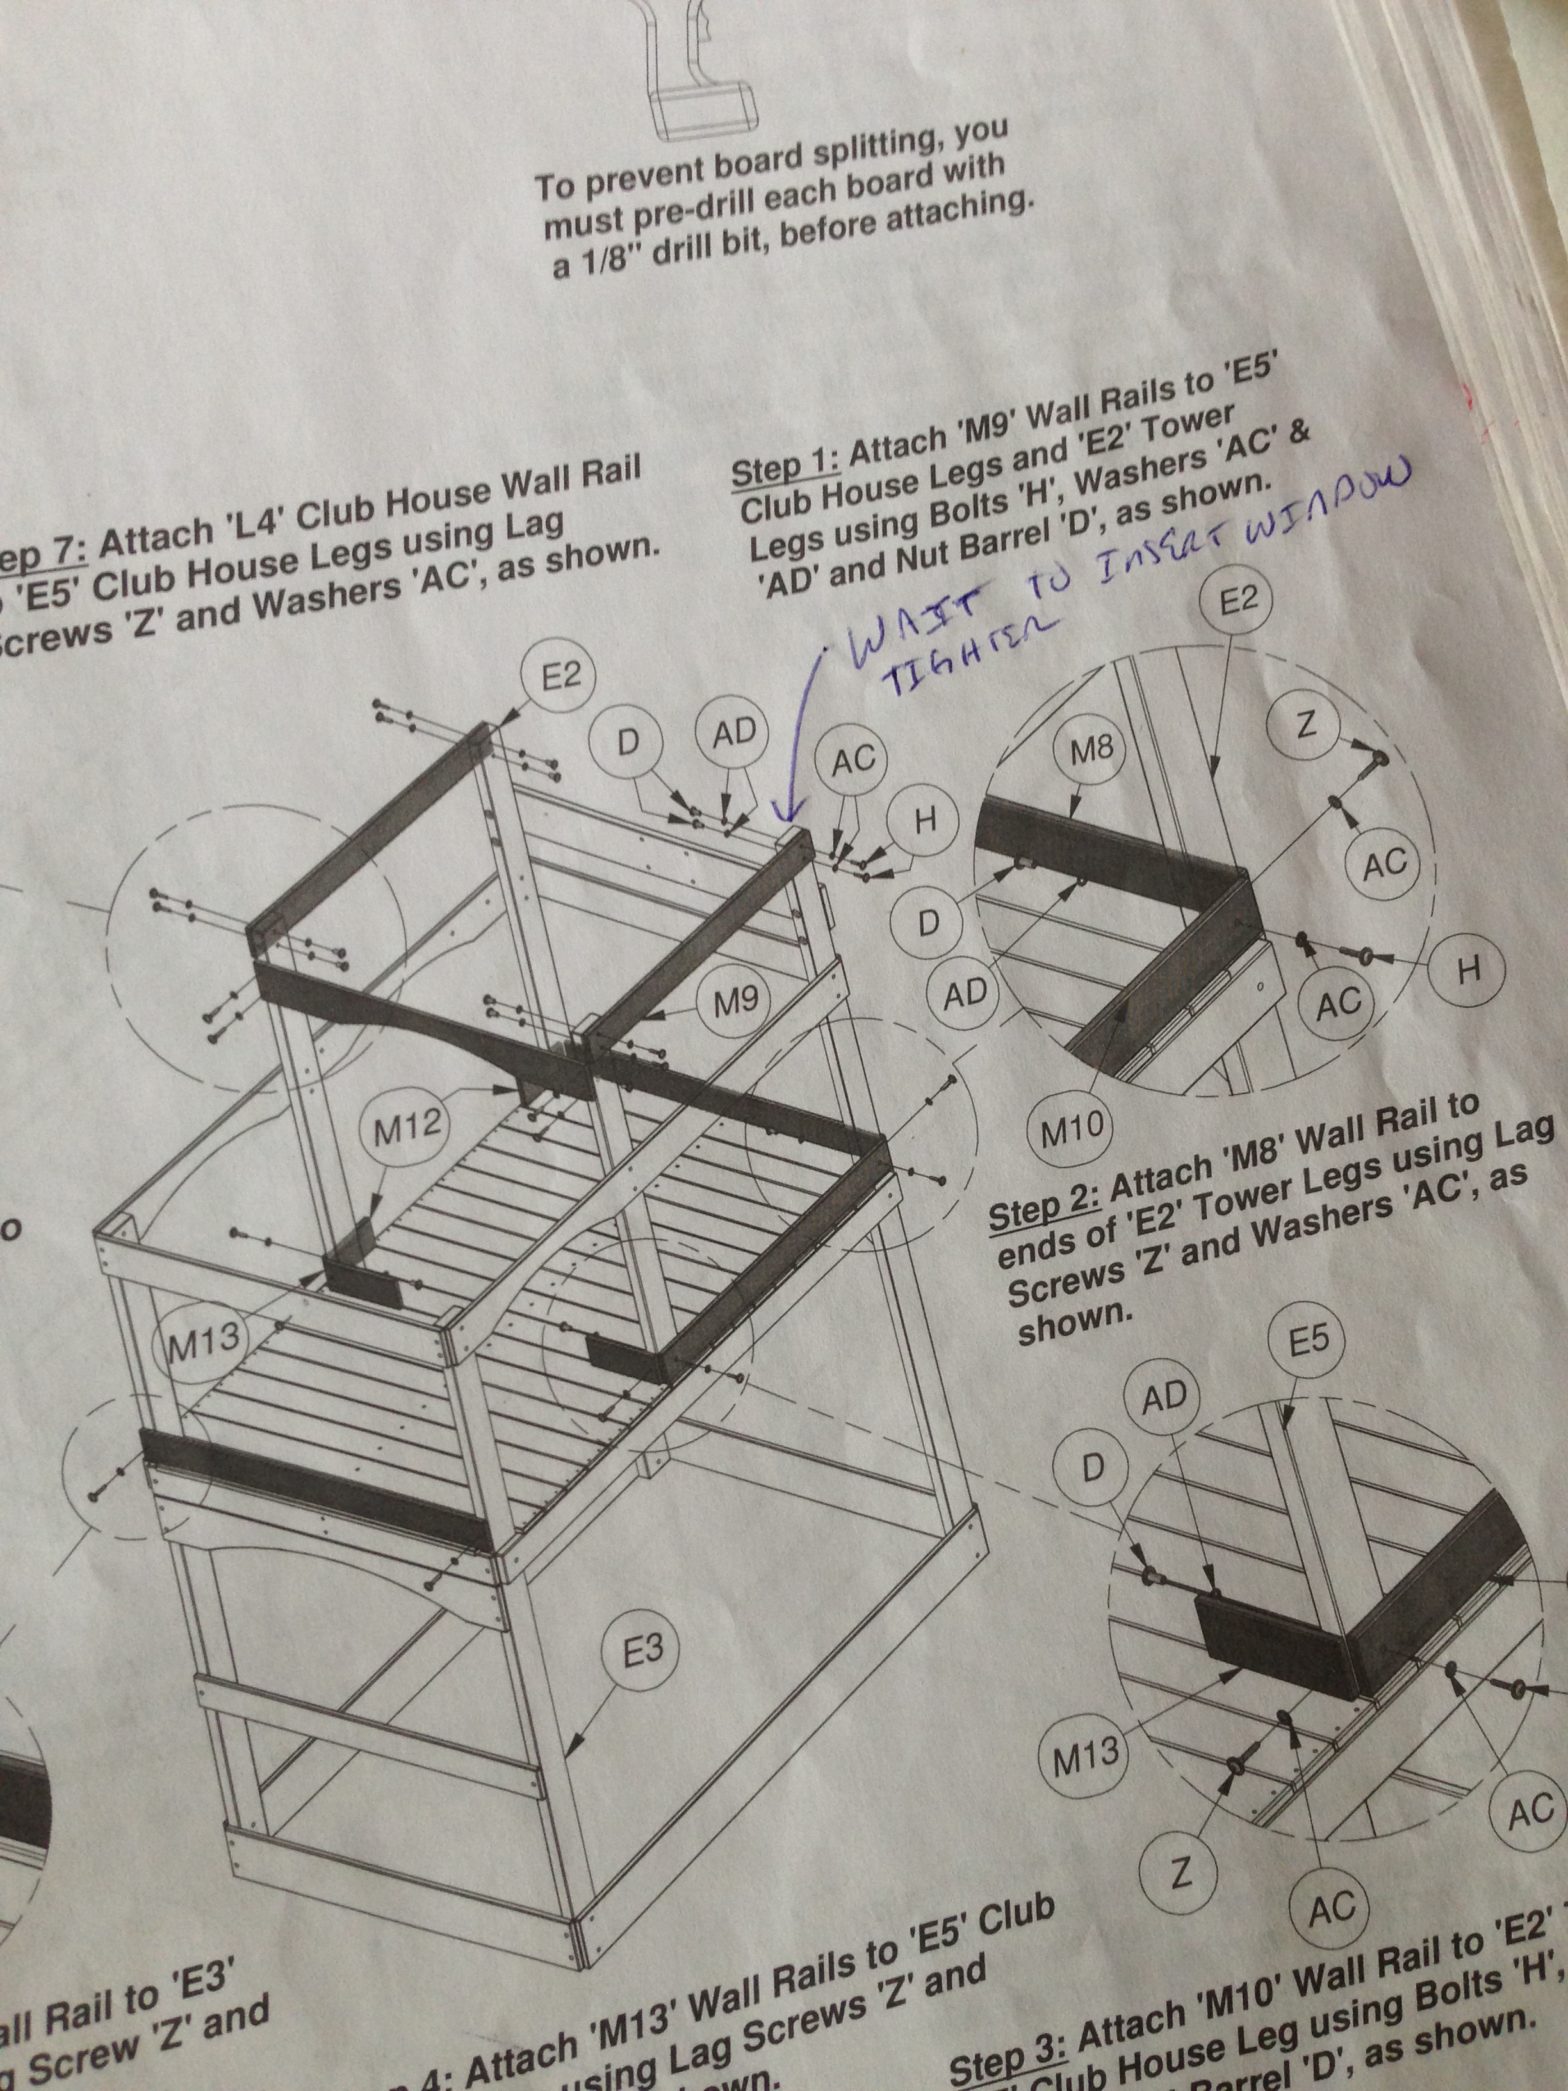
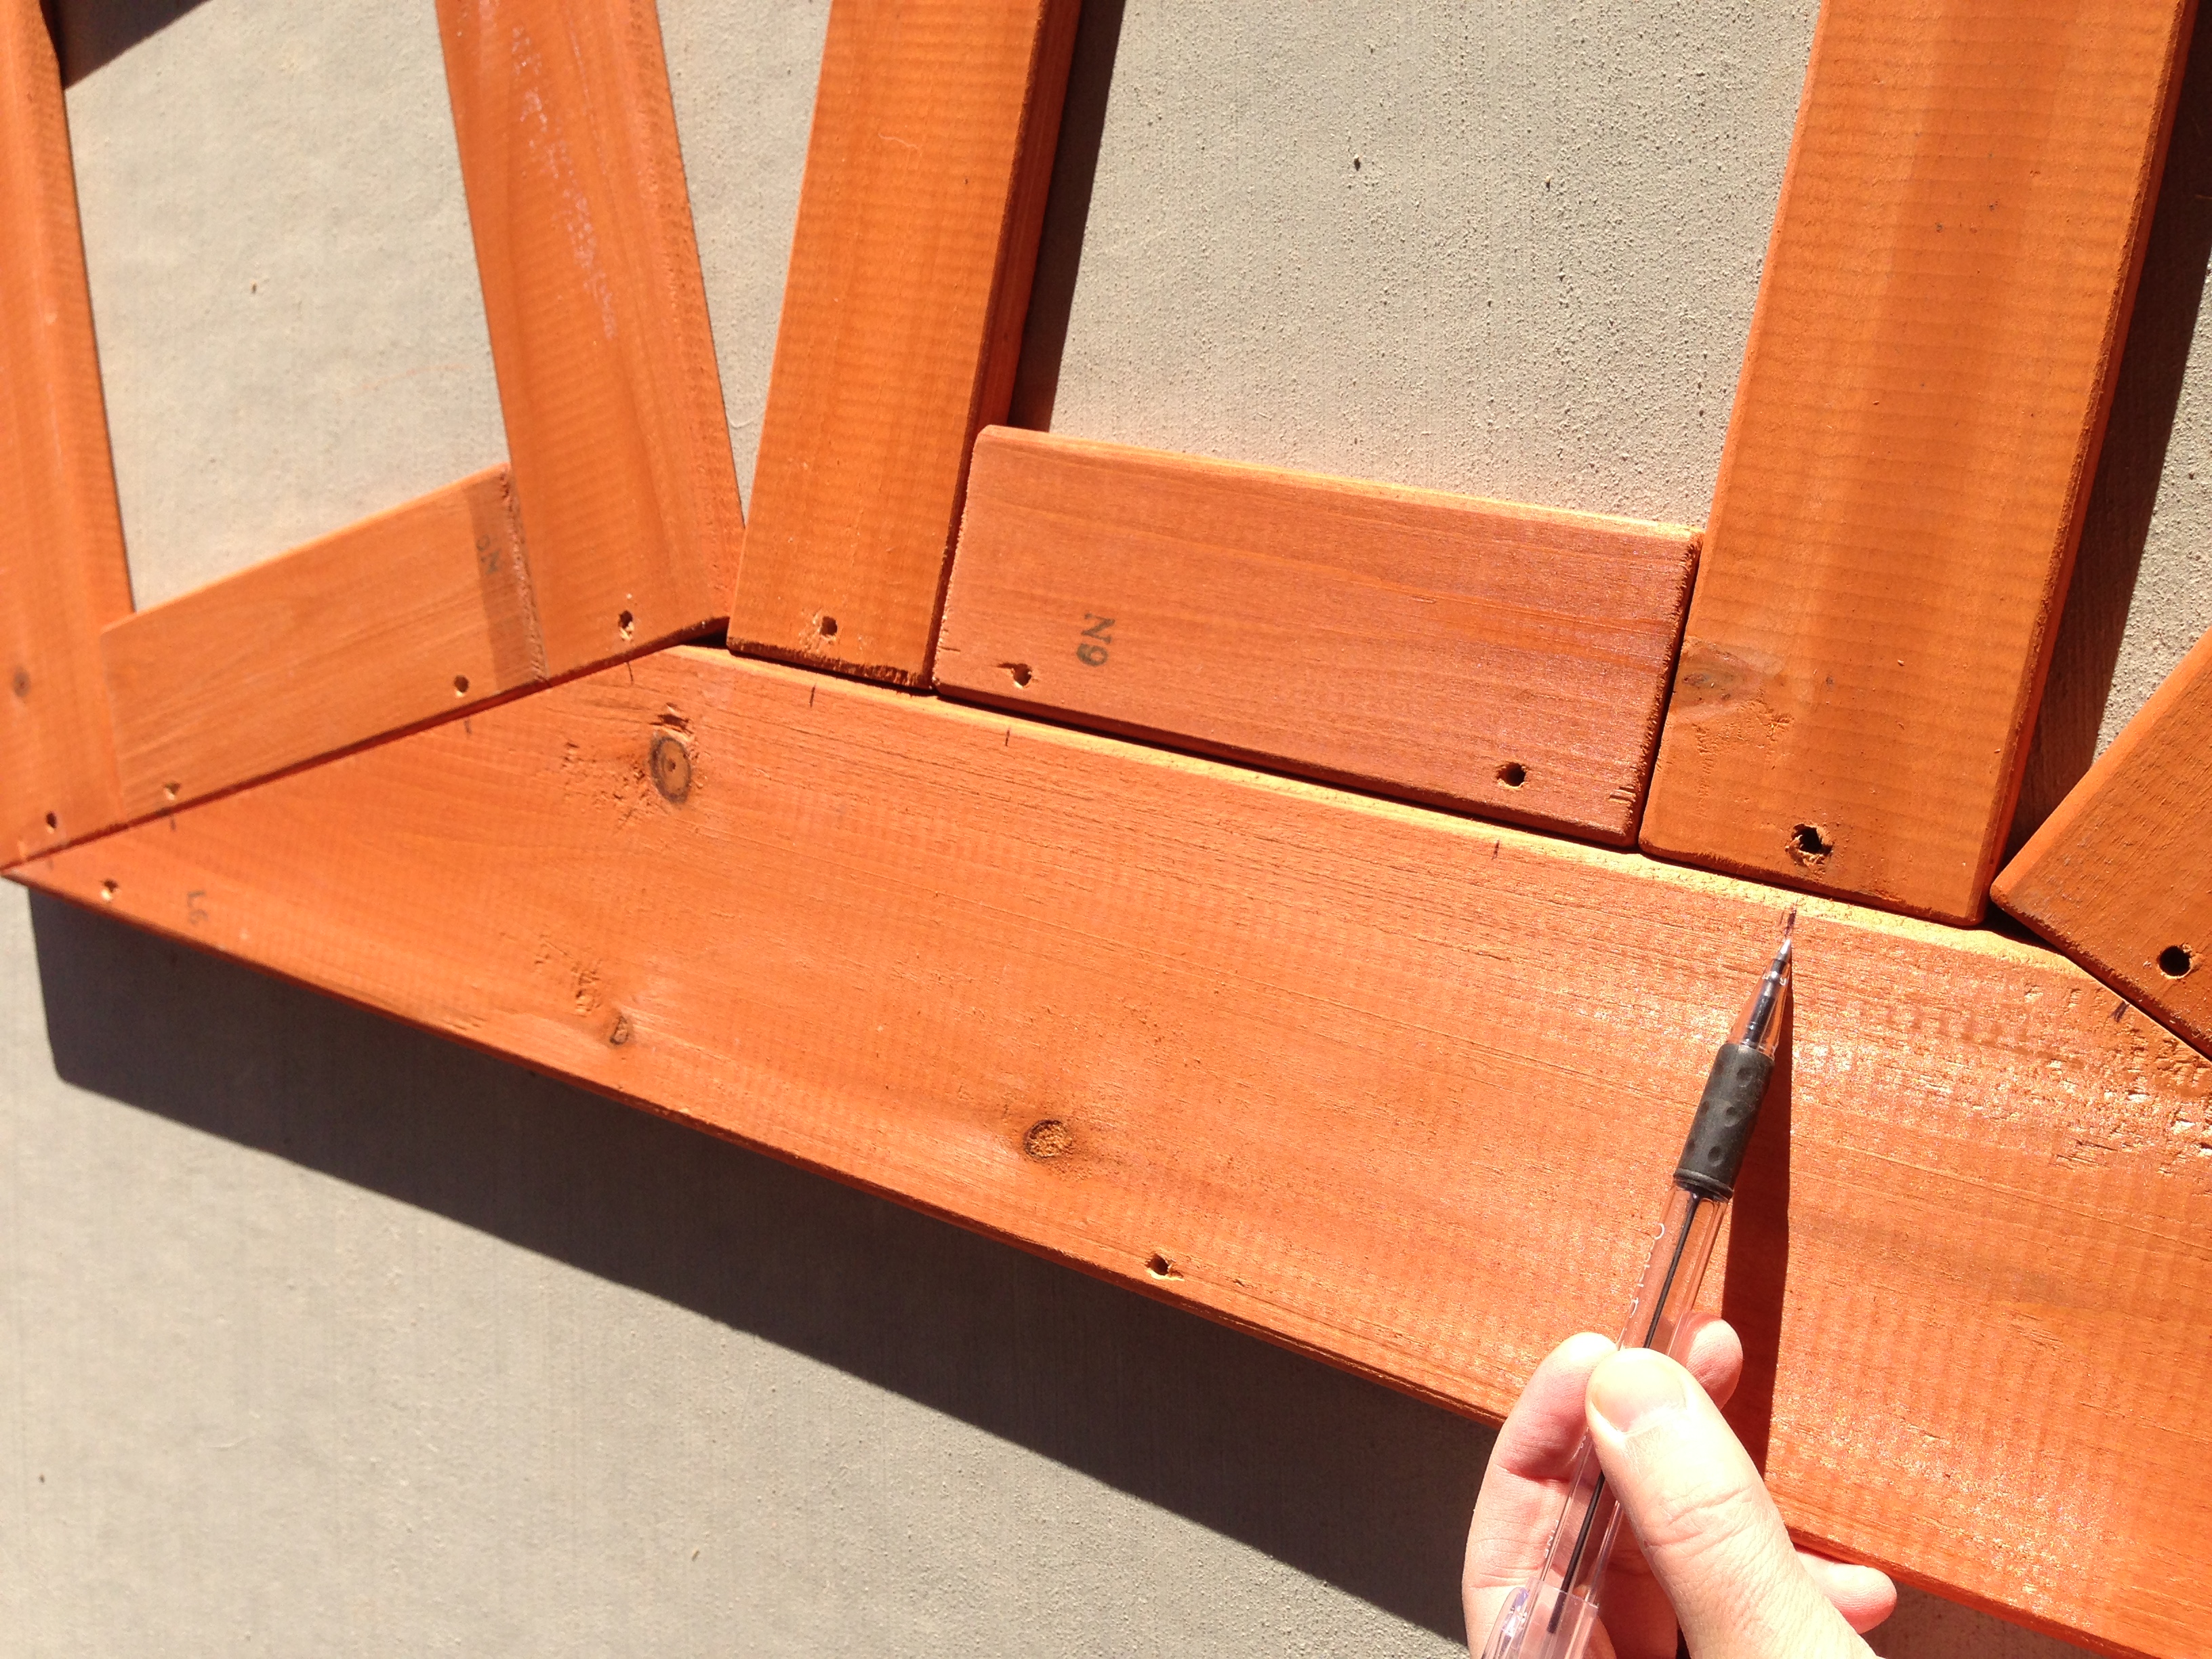
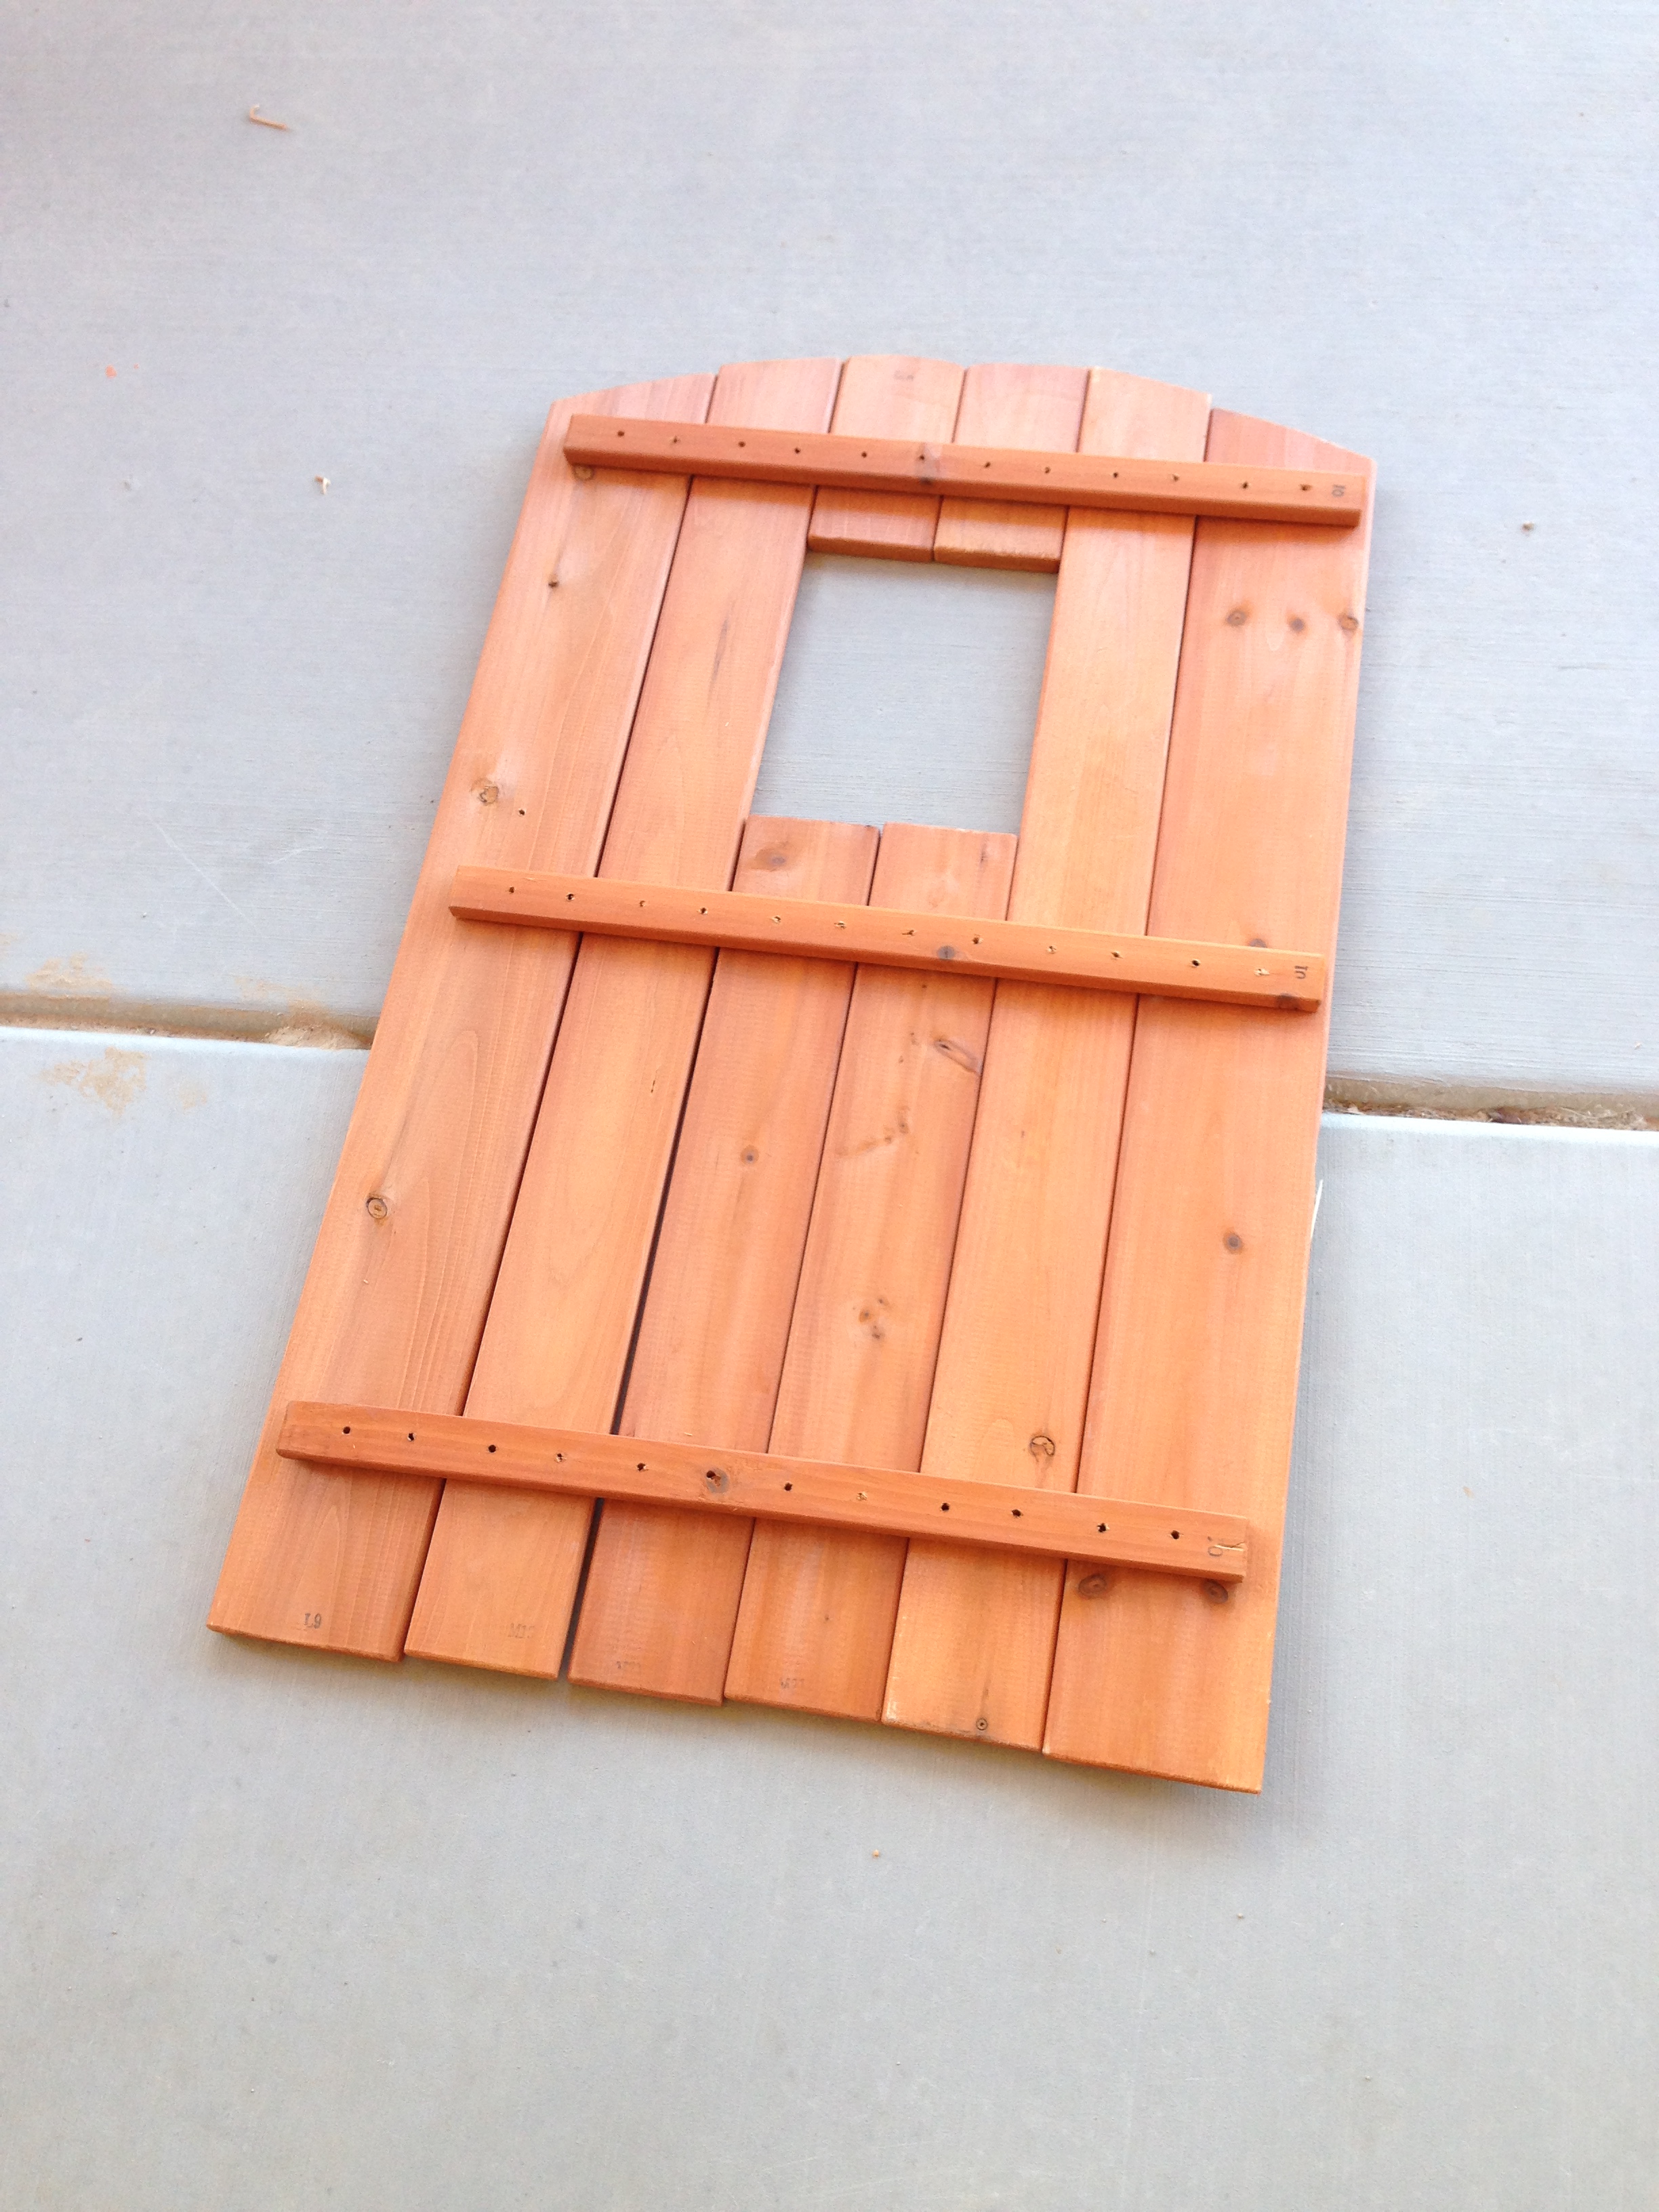
In the picture below, I laid out the pieces for the Bay Window and marked where each of the holes should be for the most accurate alignment.
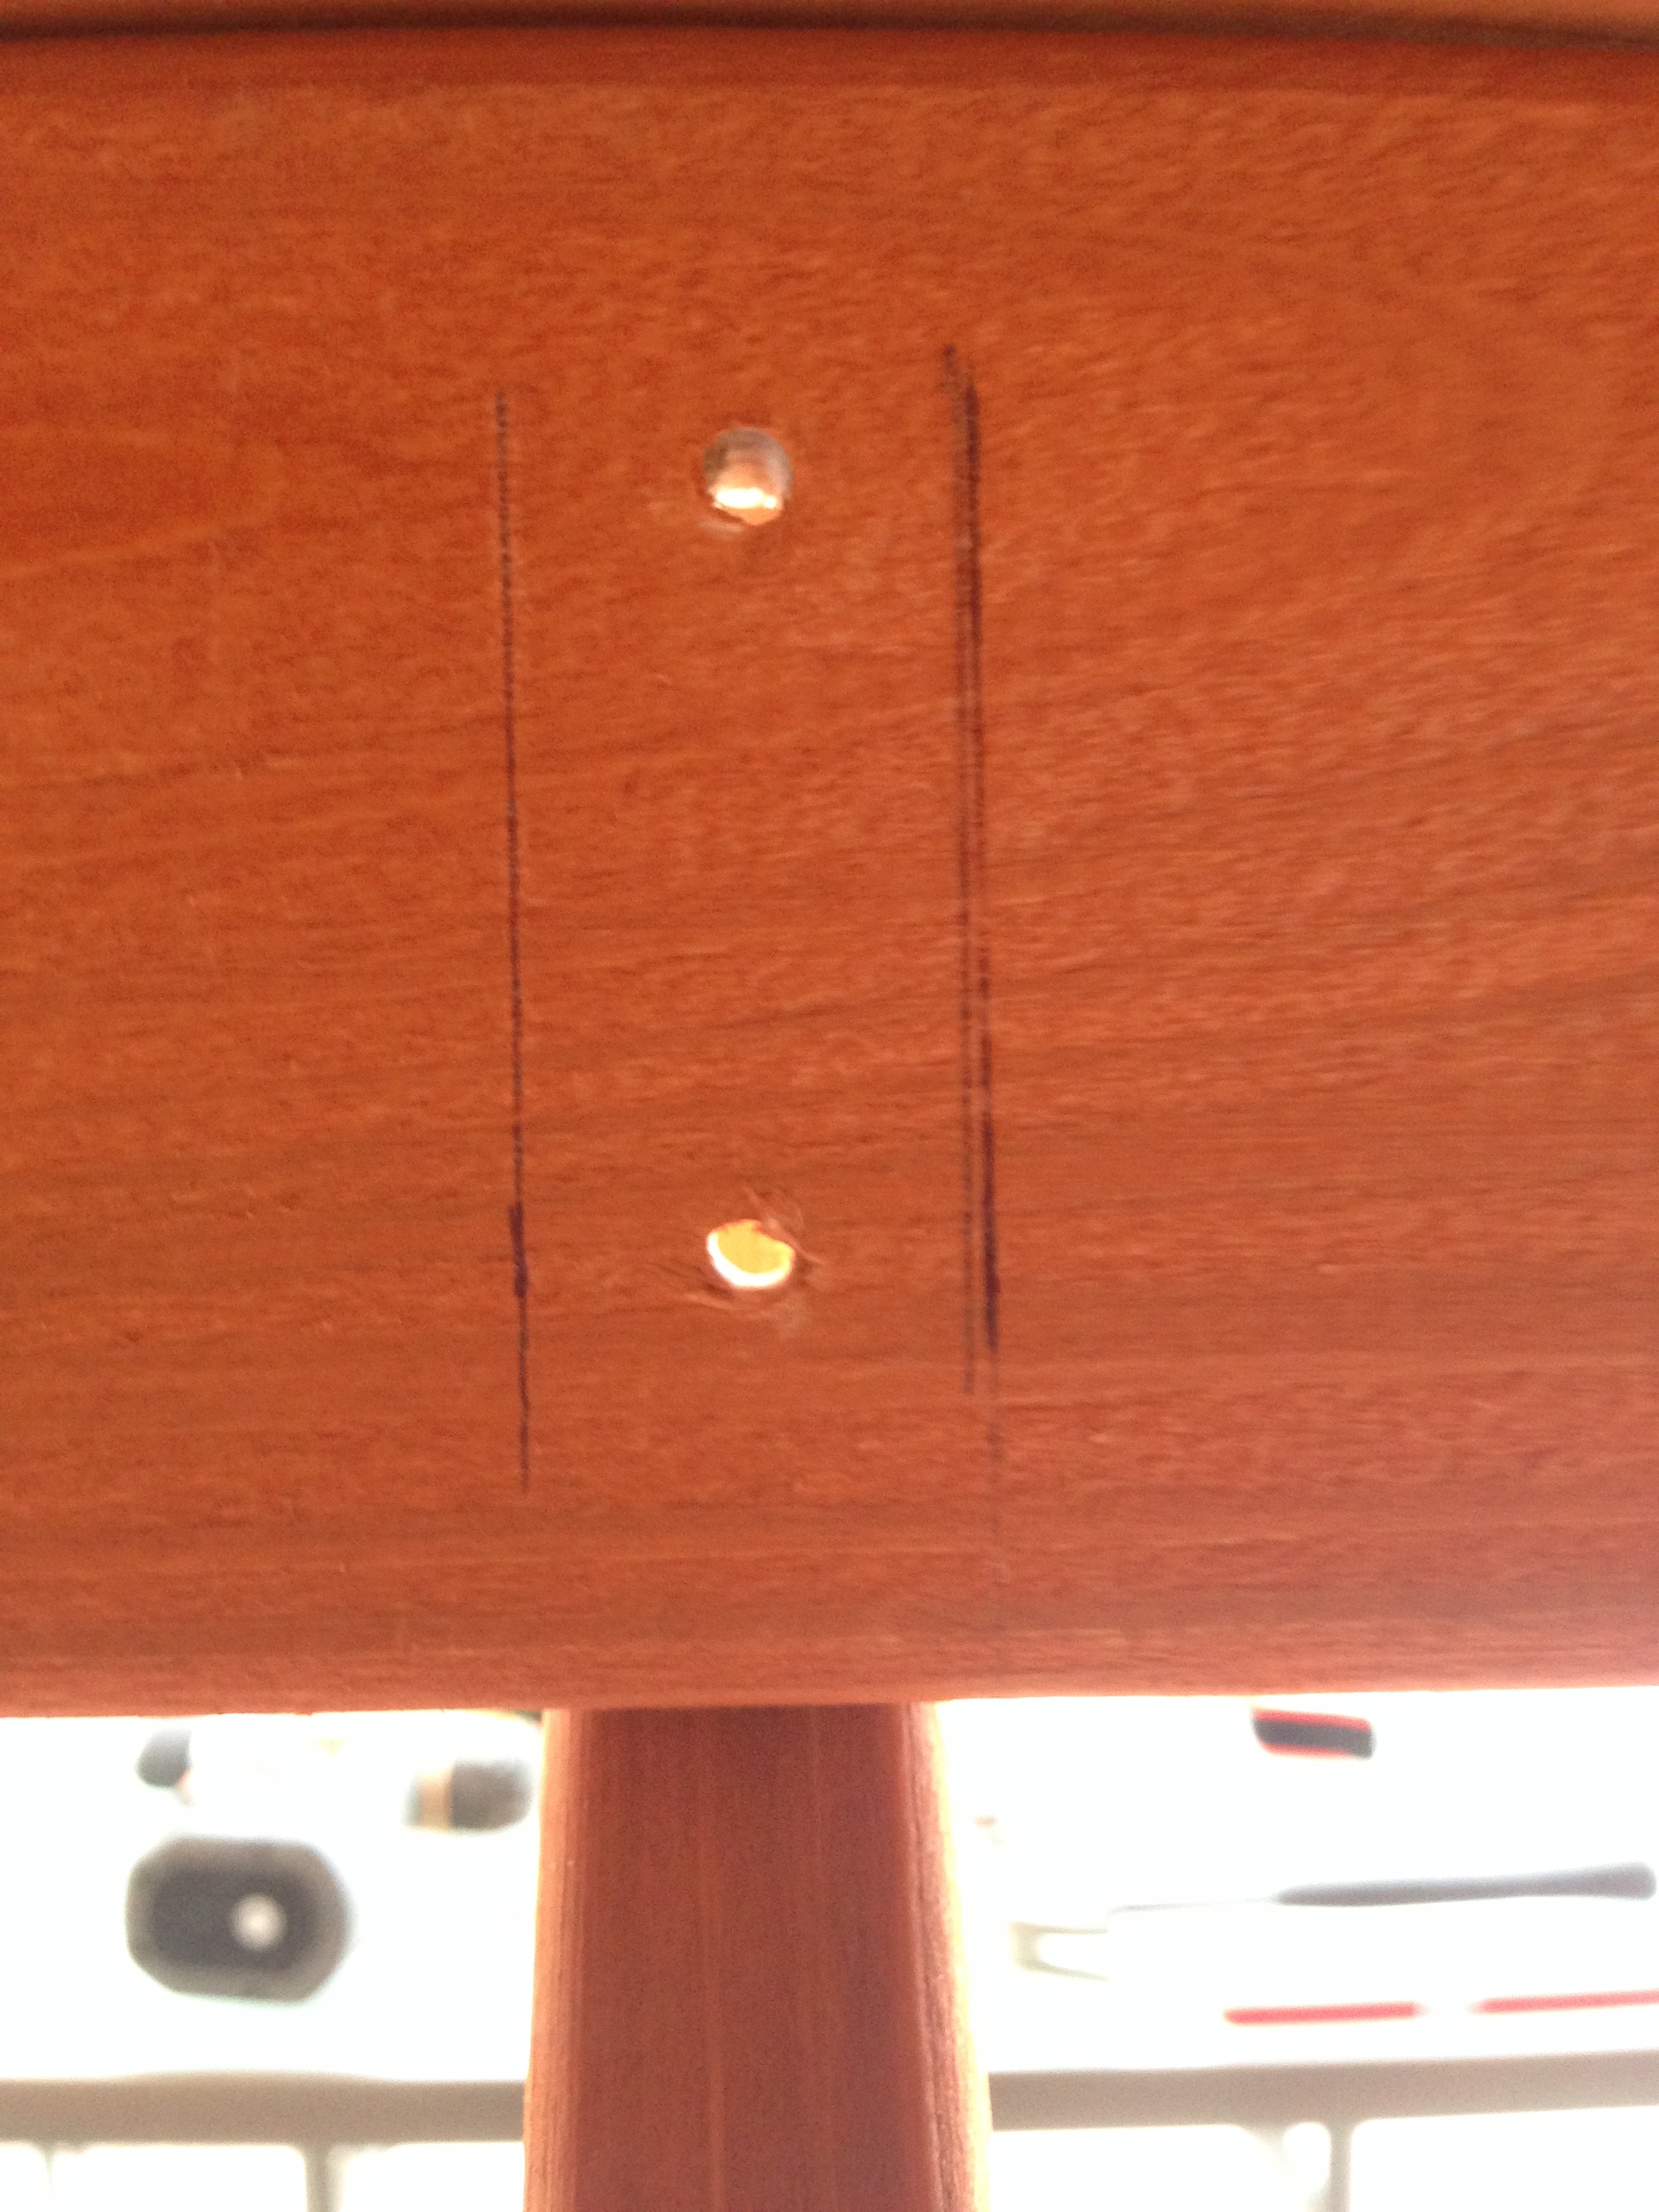
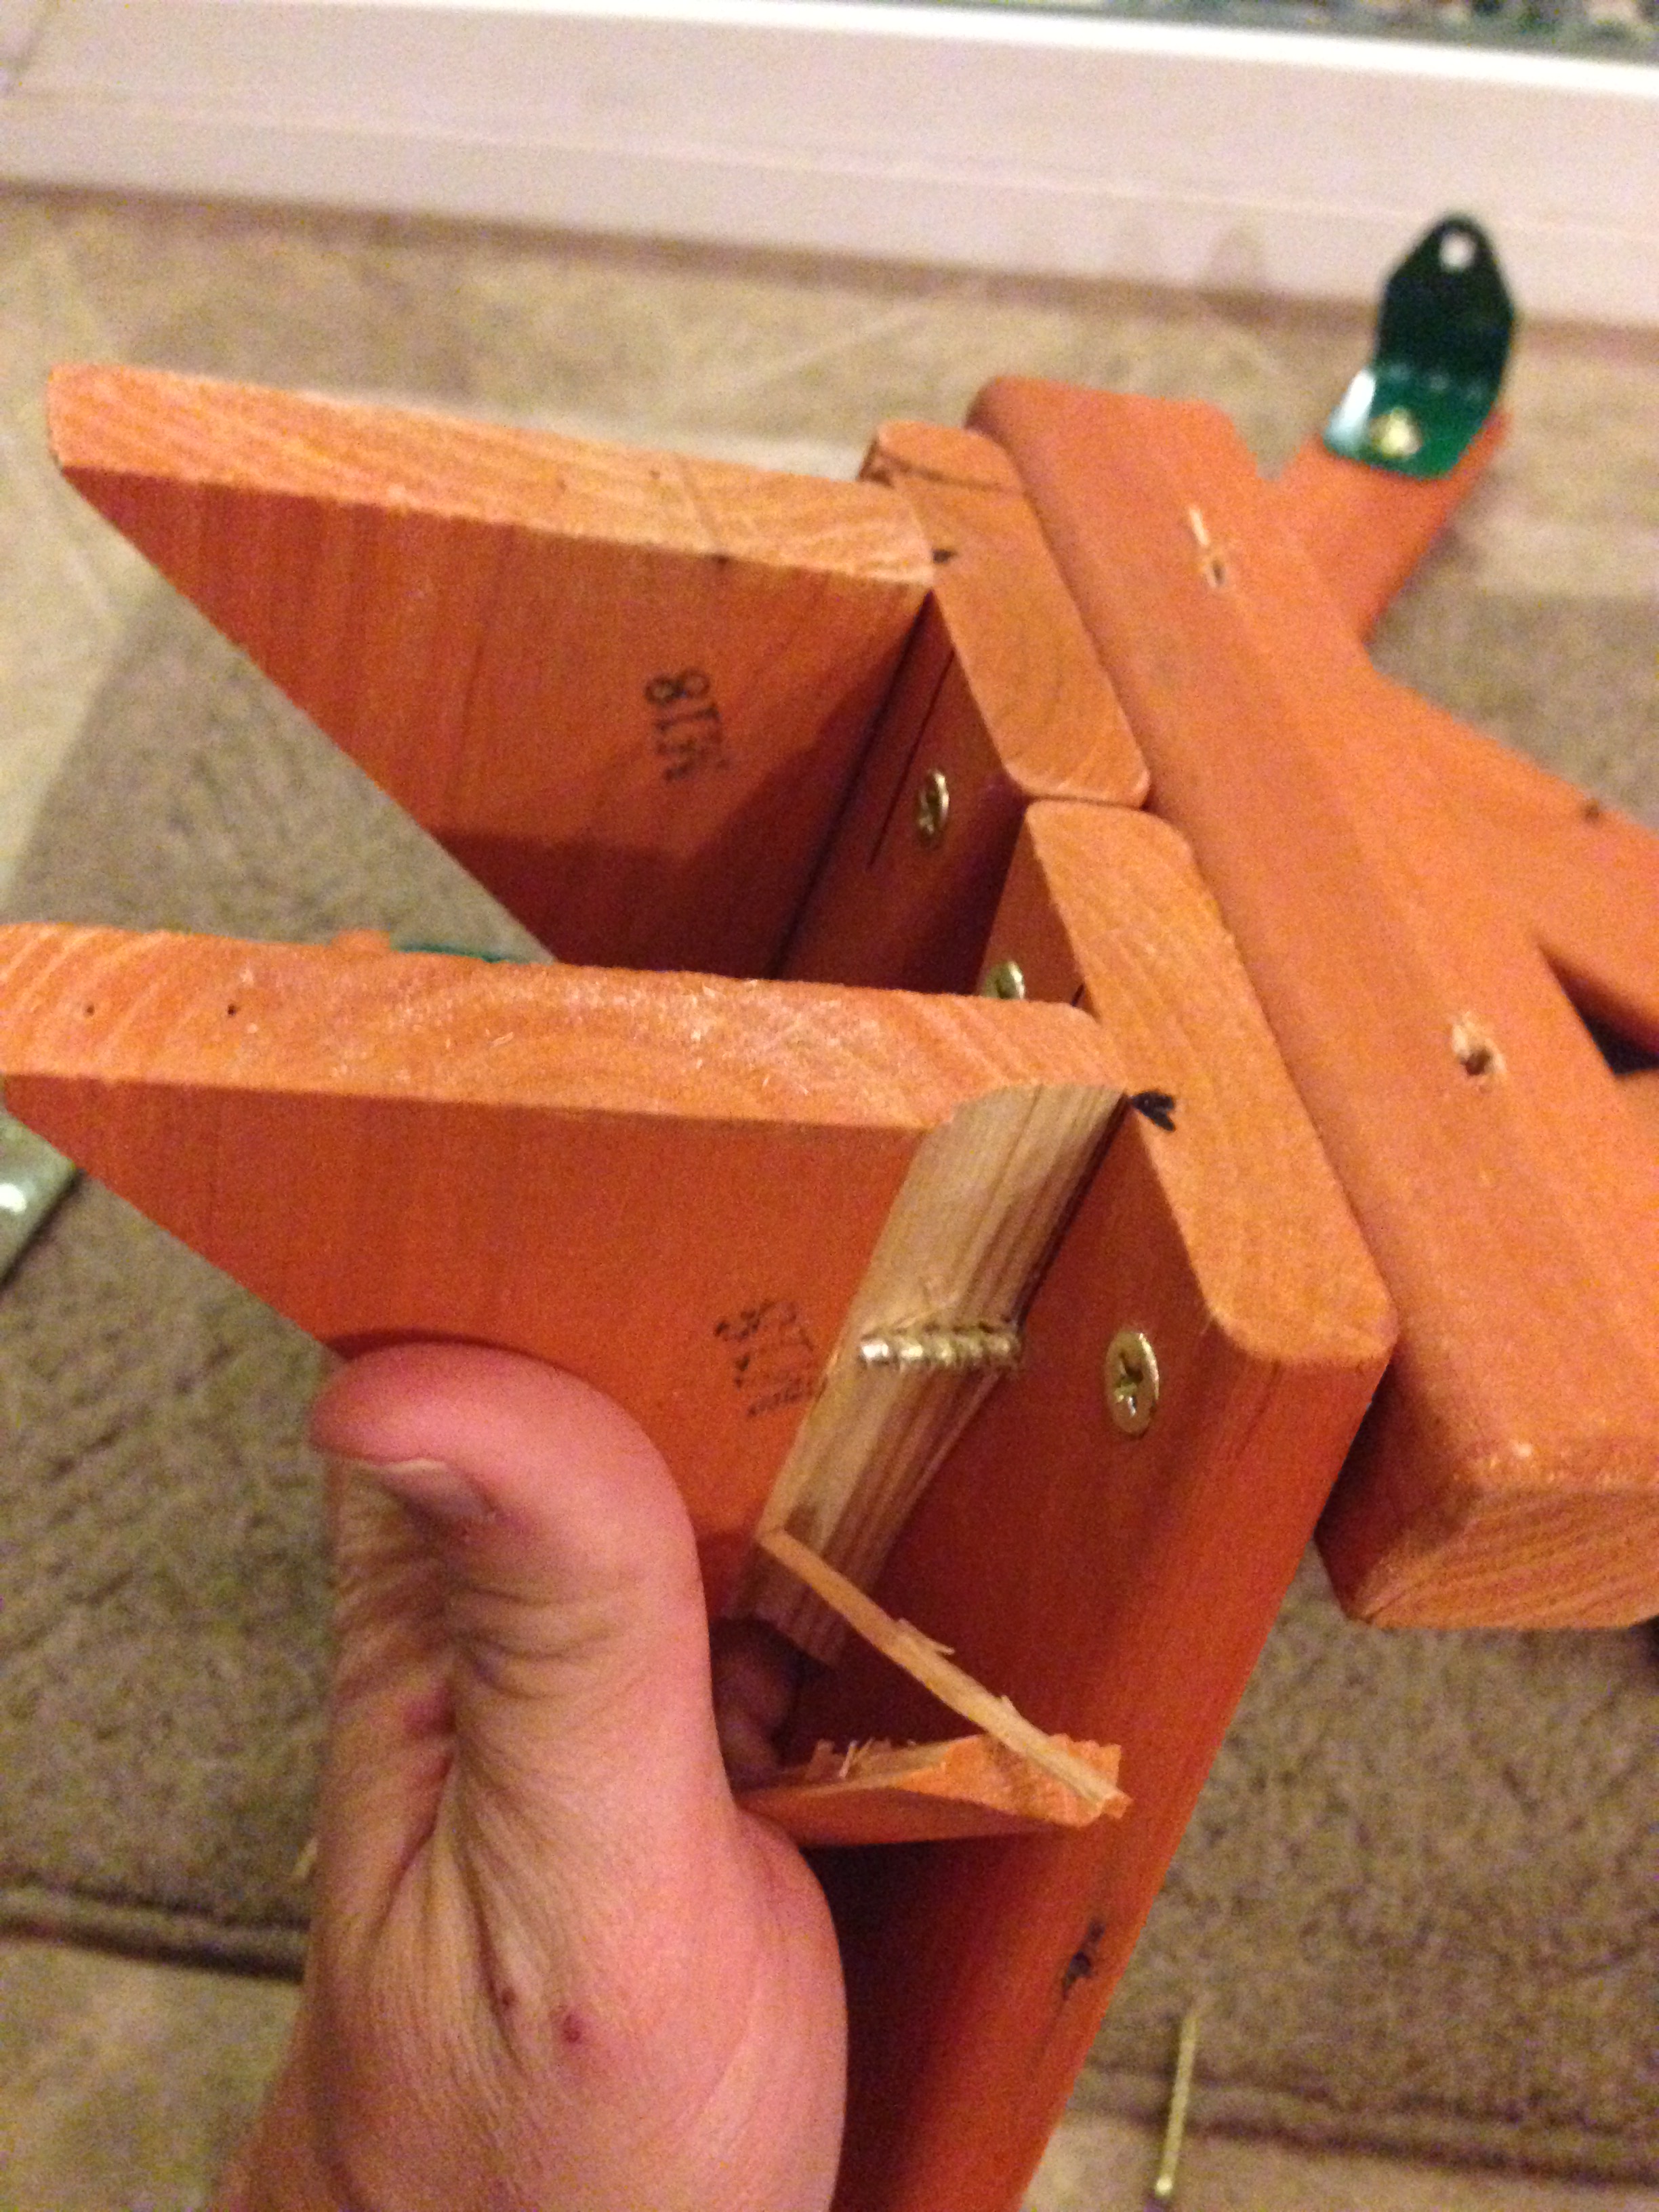
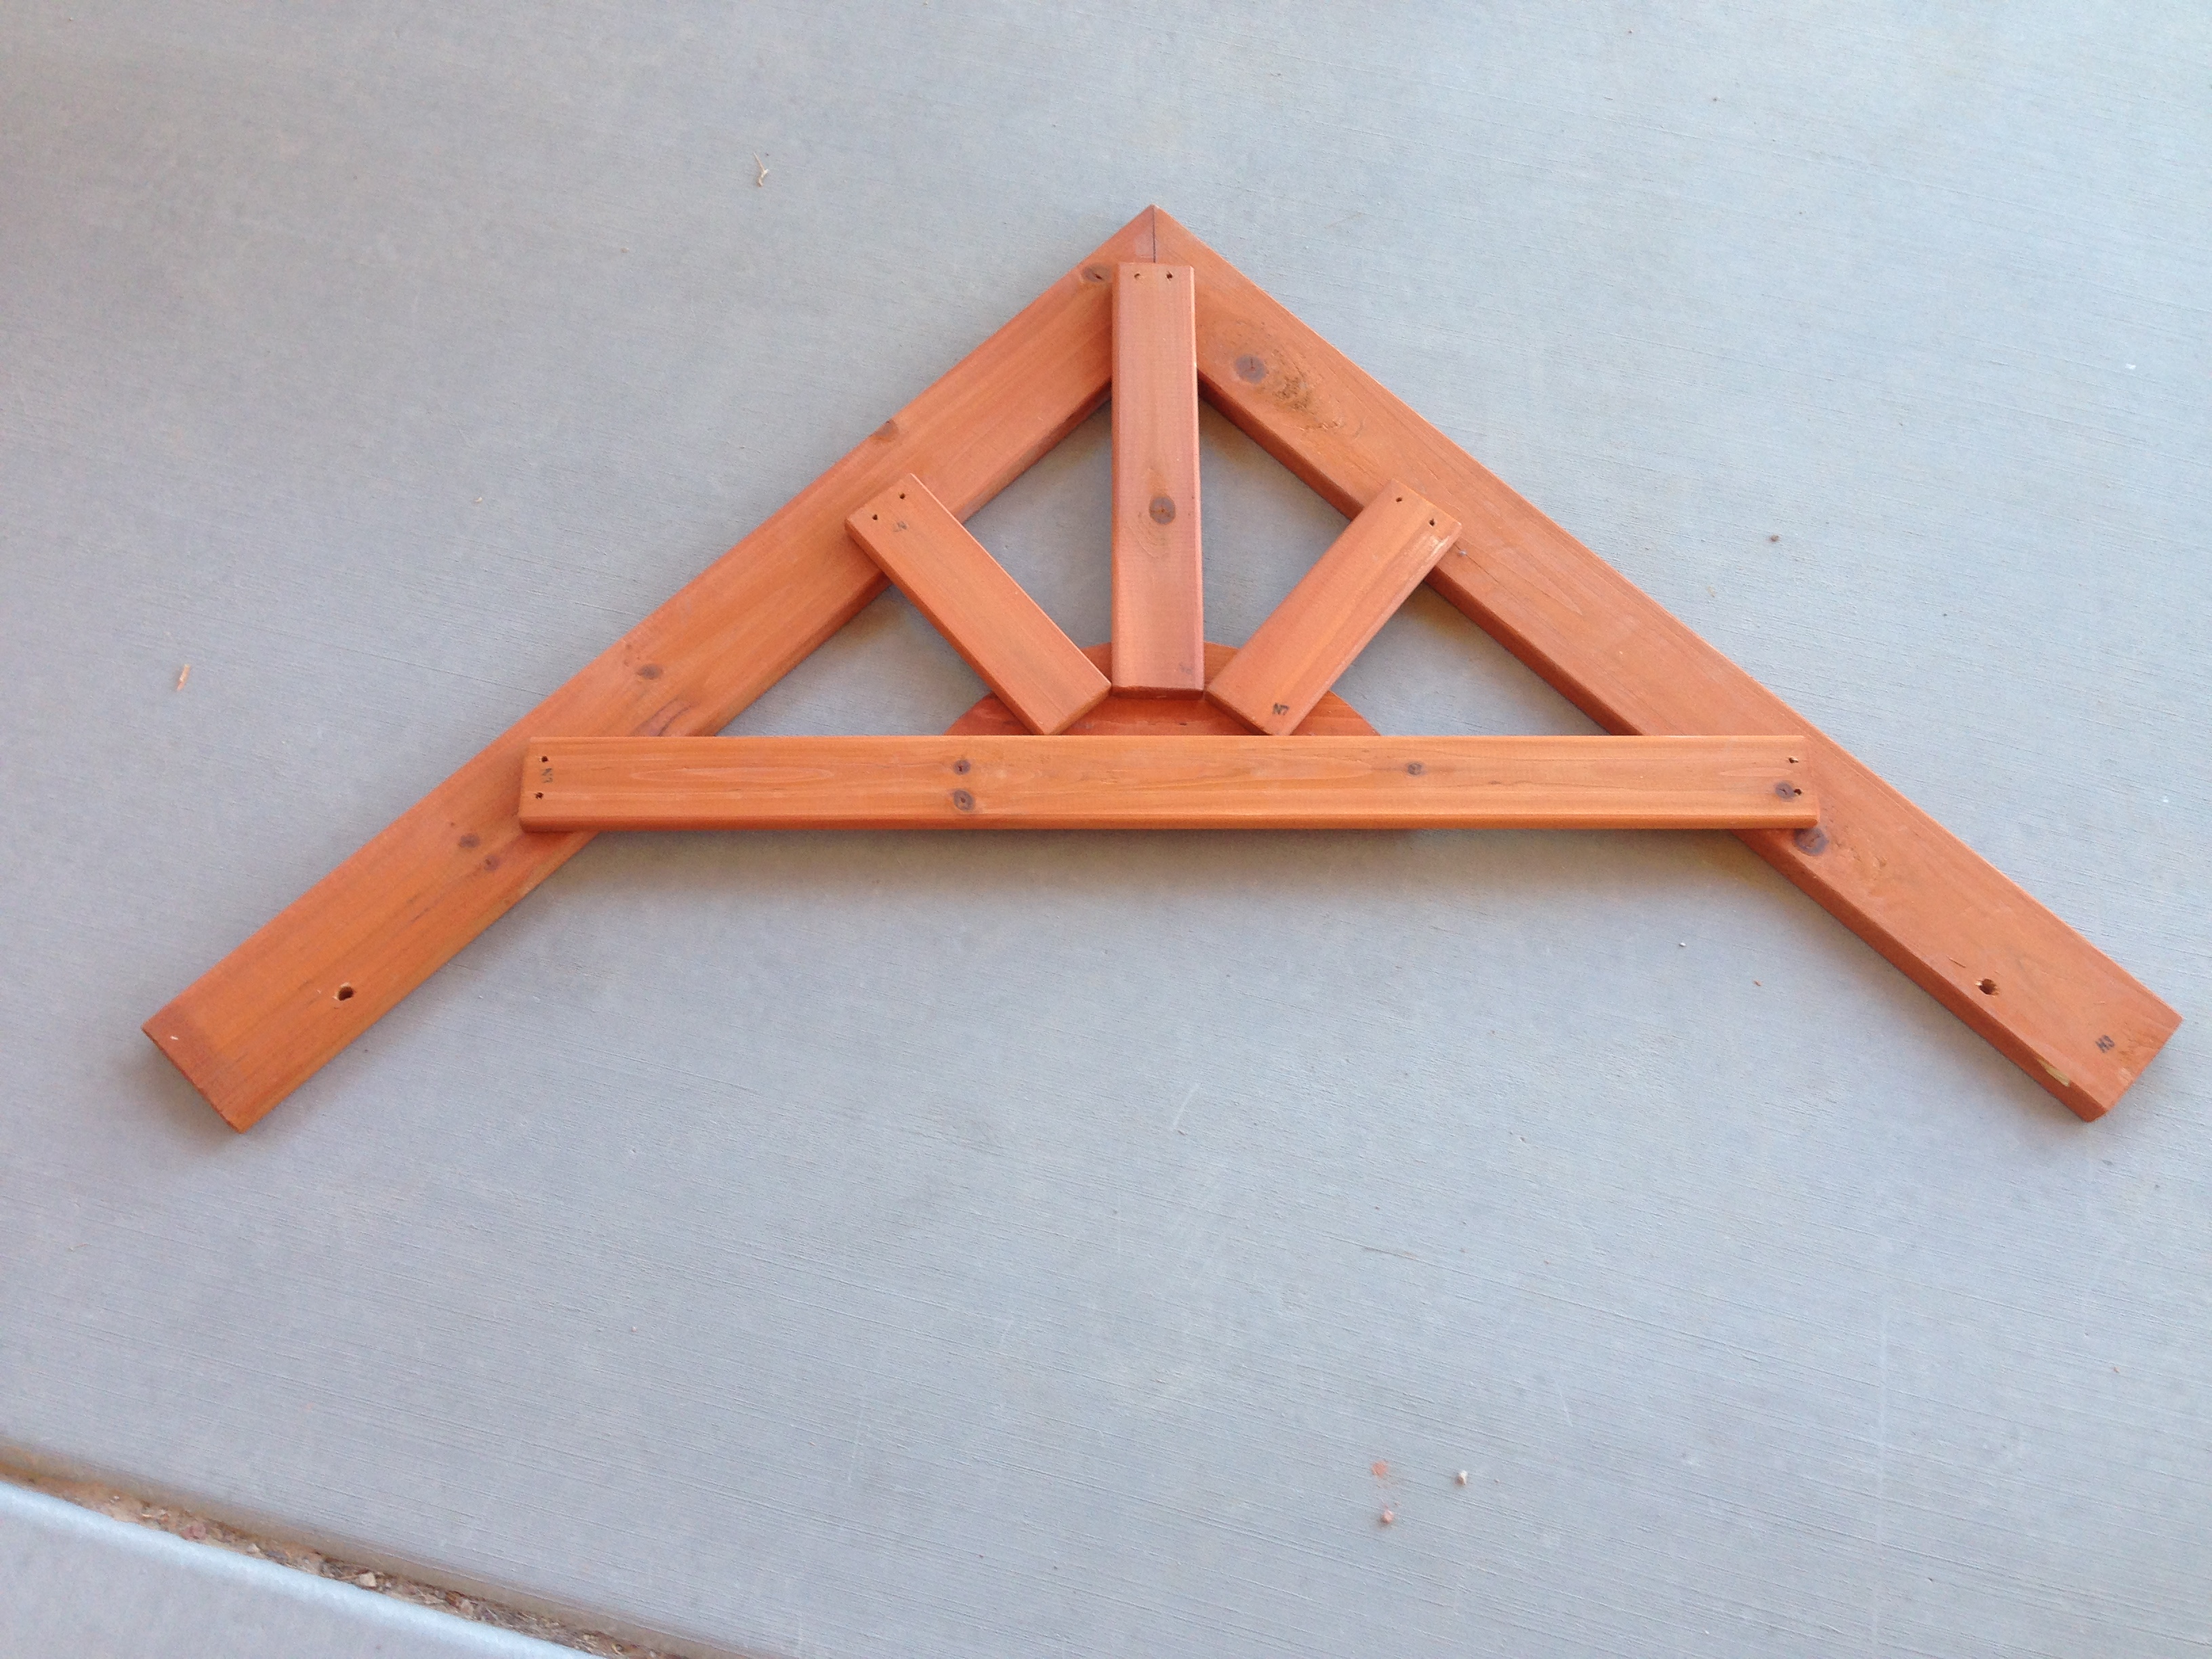
During the bench assembly, shown below, I needed to align the triangle supports that weren't pre-drilled with the bench leg board which had a pre-drilled hole in it. So I drew a line from the hole to the top of the board, so I could see that the triangle support was centered on the hole when I held it in place as I drilled into it through the pre-drilled hole in the leg.

However, just aligning the triangle support with the center marking still left room for error as I didn't know if I was holding the triangle support perpendicular enough that the hole would still line up with the center of thin triangle board edge. So I made a second mark that let me know I was holing the triangle support accurately perpendicular such that the hole would be in the center of the board.
Its hard to fully describe with a few pictures all that I did for alignment, but if you take nothing else from this section, just know that making marks will help you better align the pieces before assembling, such that your build will be in the best alignment possible, especially in critical areas like the floor joist.
When to be Sure to Pre-Drill Holes
The directions often state, in every instruction that doesn't include pre-drilled holes in one of the adjoining boards, that you should pre-drill each hole on your own.
In practice, this isn't often totally necessary, and would mostly be a waste of time to have to do. For instance, I didn't pre-drill the 99 screws for all the floor boards. I just drove those screws directly in as they are fairly small screws that self-tap easily. The wood is soft enough and the screws are thin enough that when the screw drives into a wide section of wood, the wide section of the softer wood is able to fully absorb the displacement volume of the screw.
However, there are times when you definitely want to pre-drill holes so that you don't split the board the screw is tapping into. That's when the section of wood the screw is going into isn't big enough to distribute the compression from the displacement, and the wood therefore splits.
The first is when the screw is going into the thin edge of a board like the screws going into the edge of the "H5" board in the picture above. There isn't enough wood in the receiving board's cross section to absorb the amount of wood displaced by the screw, as the width of the board is only maybe 3-5 times the width of the screw, so it will likely split.
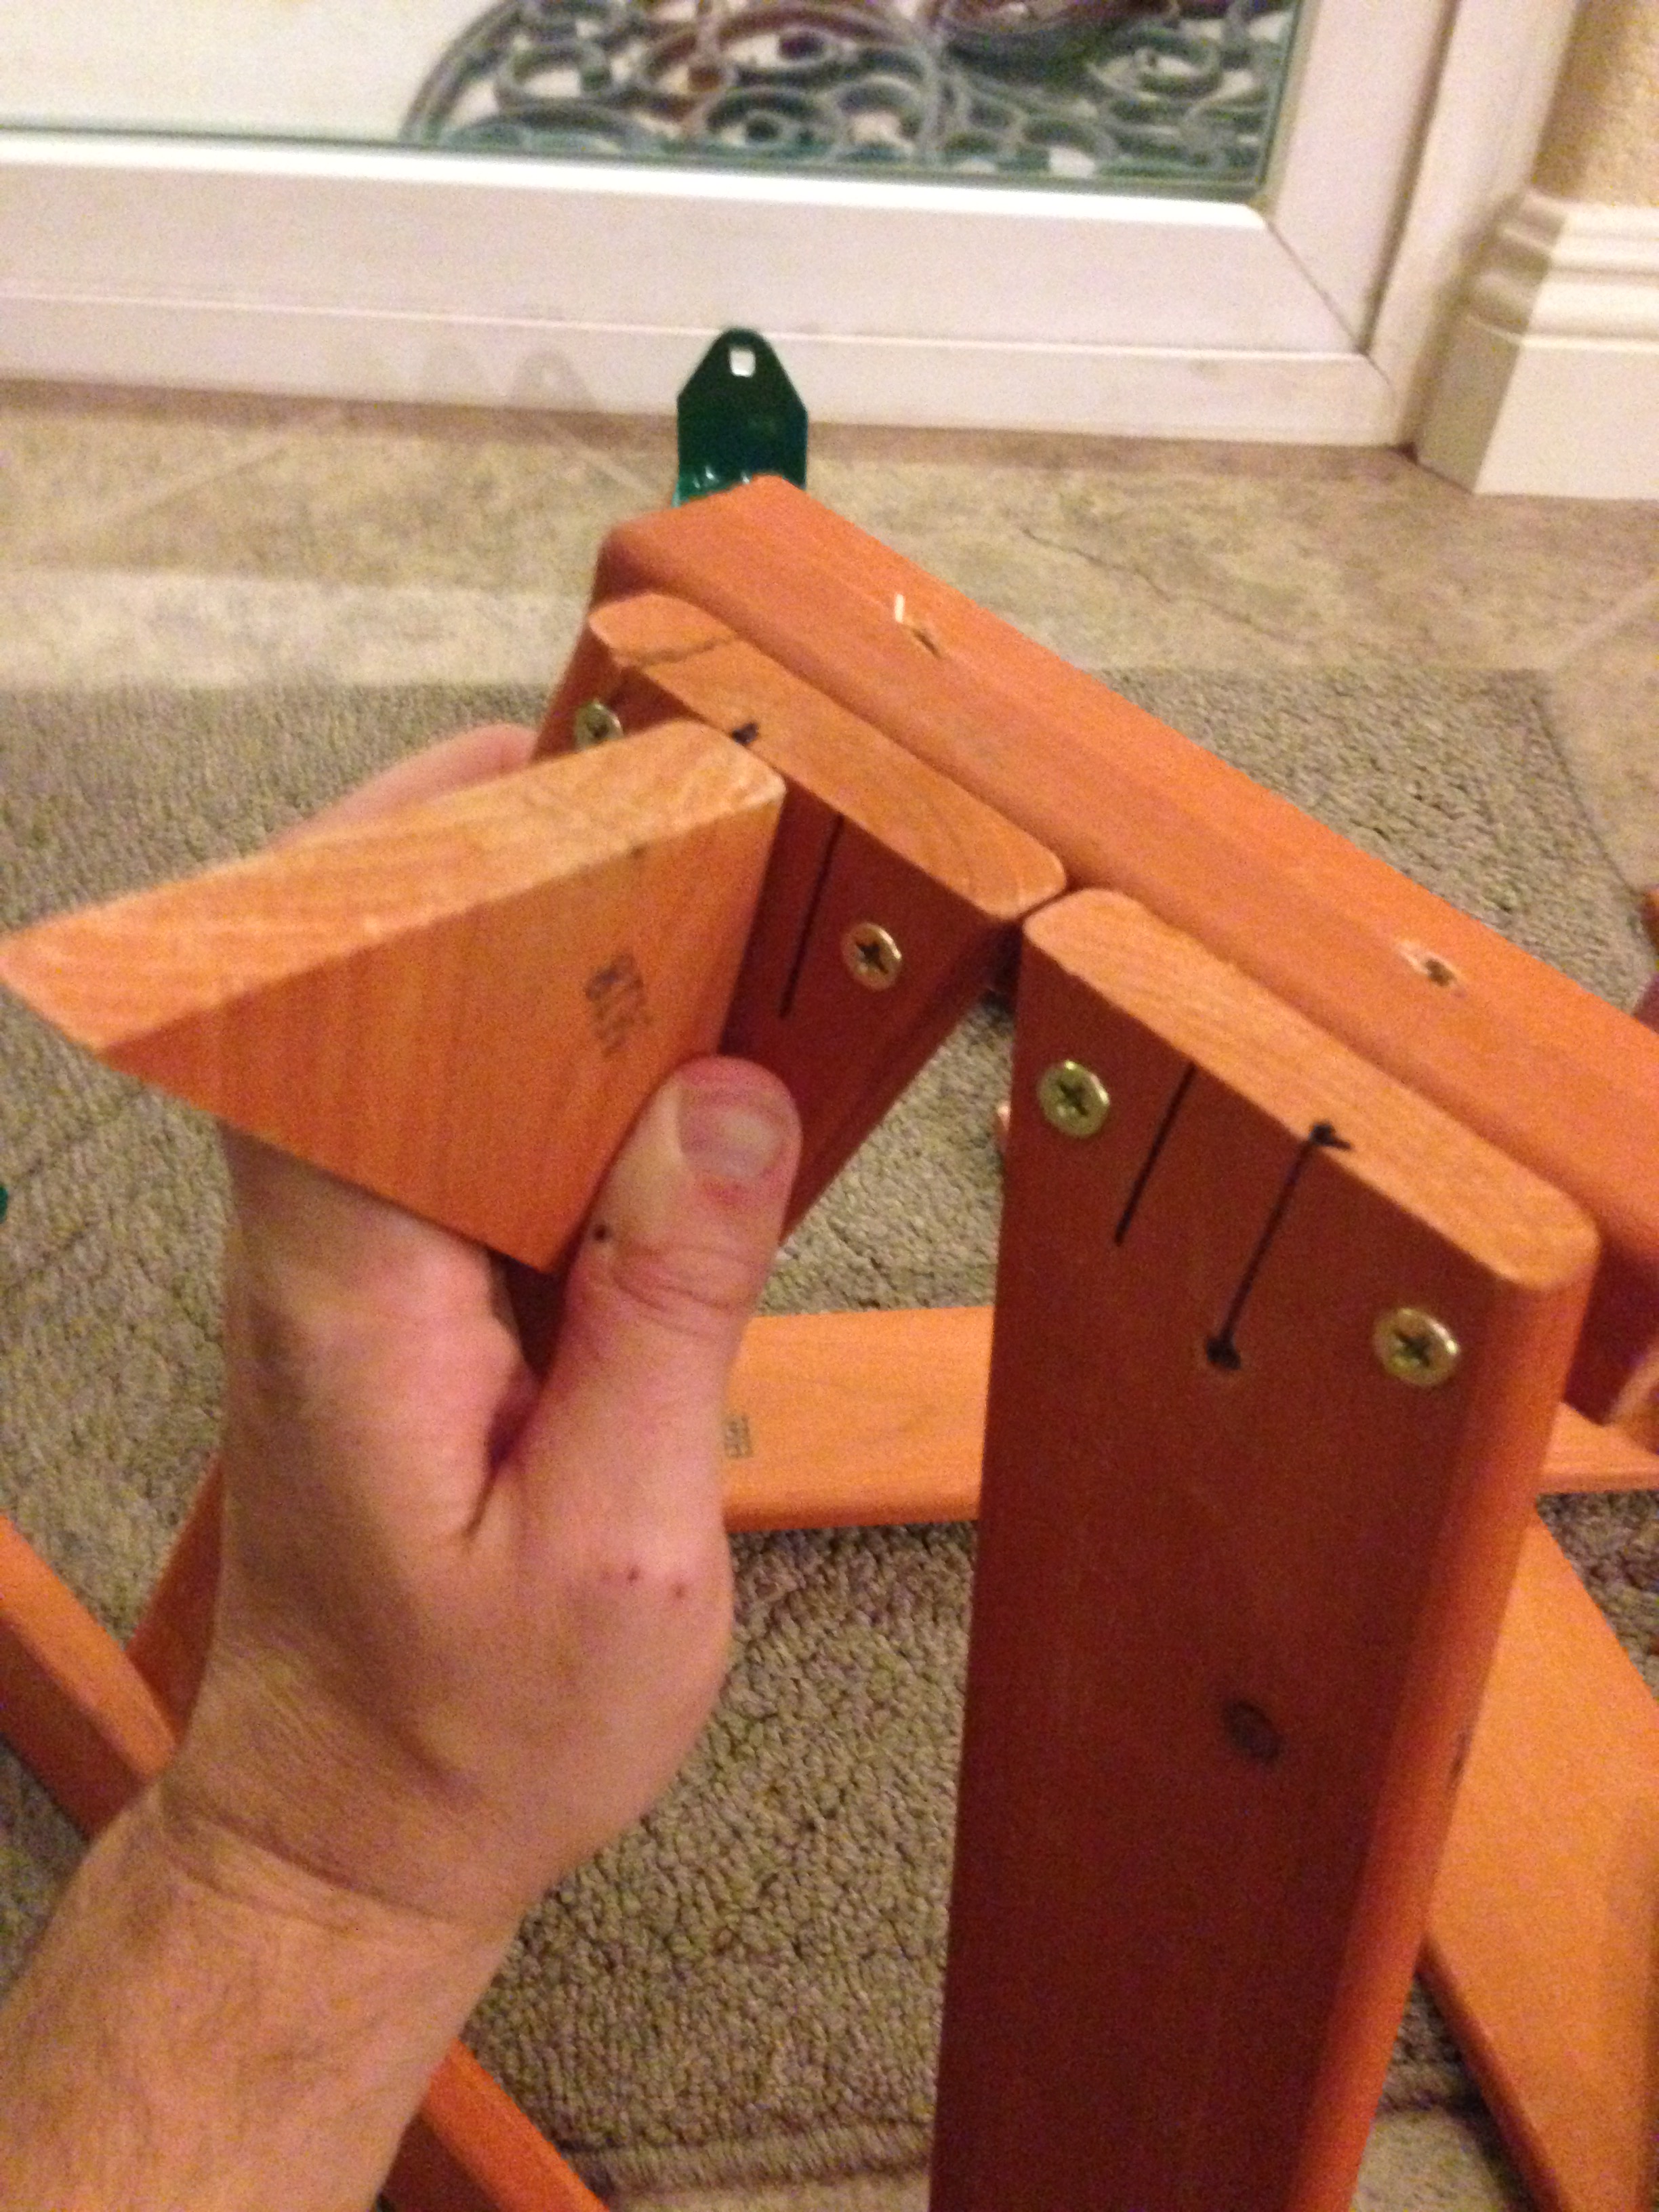
As you can see in the picture below, I should have pre-drilled a hole in the triangle support because just screwing directly into it caused it to split. The screw had to push the wood out of the way as it went in, and there wasn't enough width in the wood area to absorb the displacement through compression, so the wood splits.
The second time, and really this is virtually the same as above, to pre-drill is when you drive one of the larger lag screws in. Those screws have so much girth that they displace more wood than even a larger piece of wood can absorb without splitting.

Above is a picture of a larger lag screw and a smaller lag screw. The larger lag screw will virtually always split the wood if driven directly into the wood without a pre-drilled hole. The smaller lag screw can be driven directly into a wider piece of wood without too much worry of splitting the wood, but a hole still needs to be pre-drilled if driving it into the thin end of a board.
Lay Out Pieces Before Assembling
The Big Backyard Swing Set is fairly well designed in that a majority of the time, its difficult to put together incorrectly. Most of the boards are symmetrical such that you can't put them in the wrong way. However, there are times when mistakes can be made.
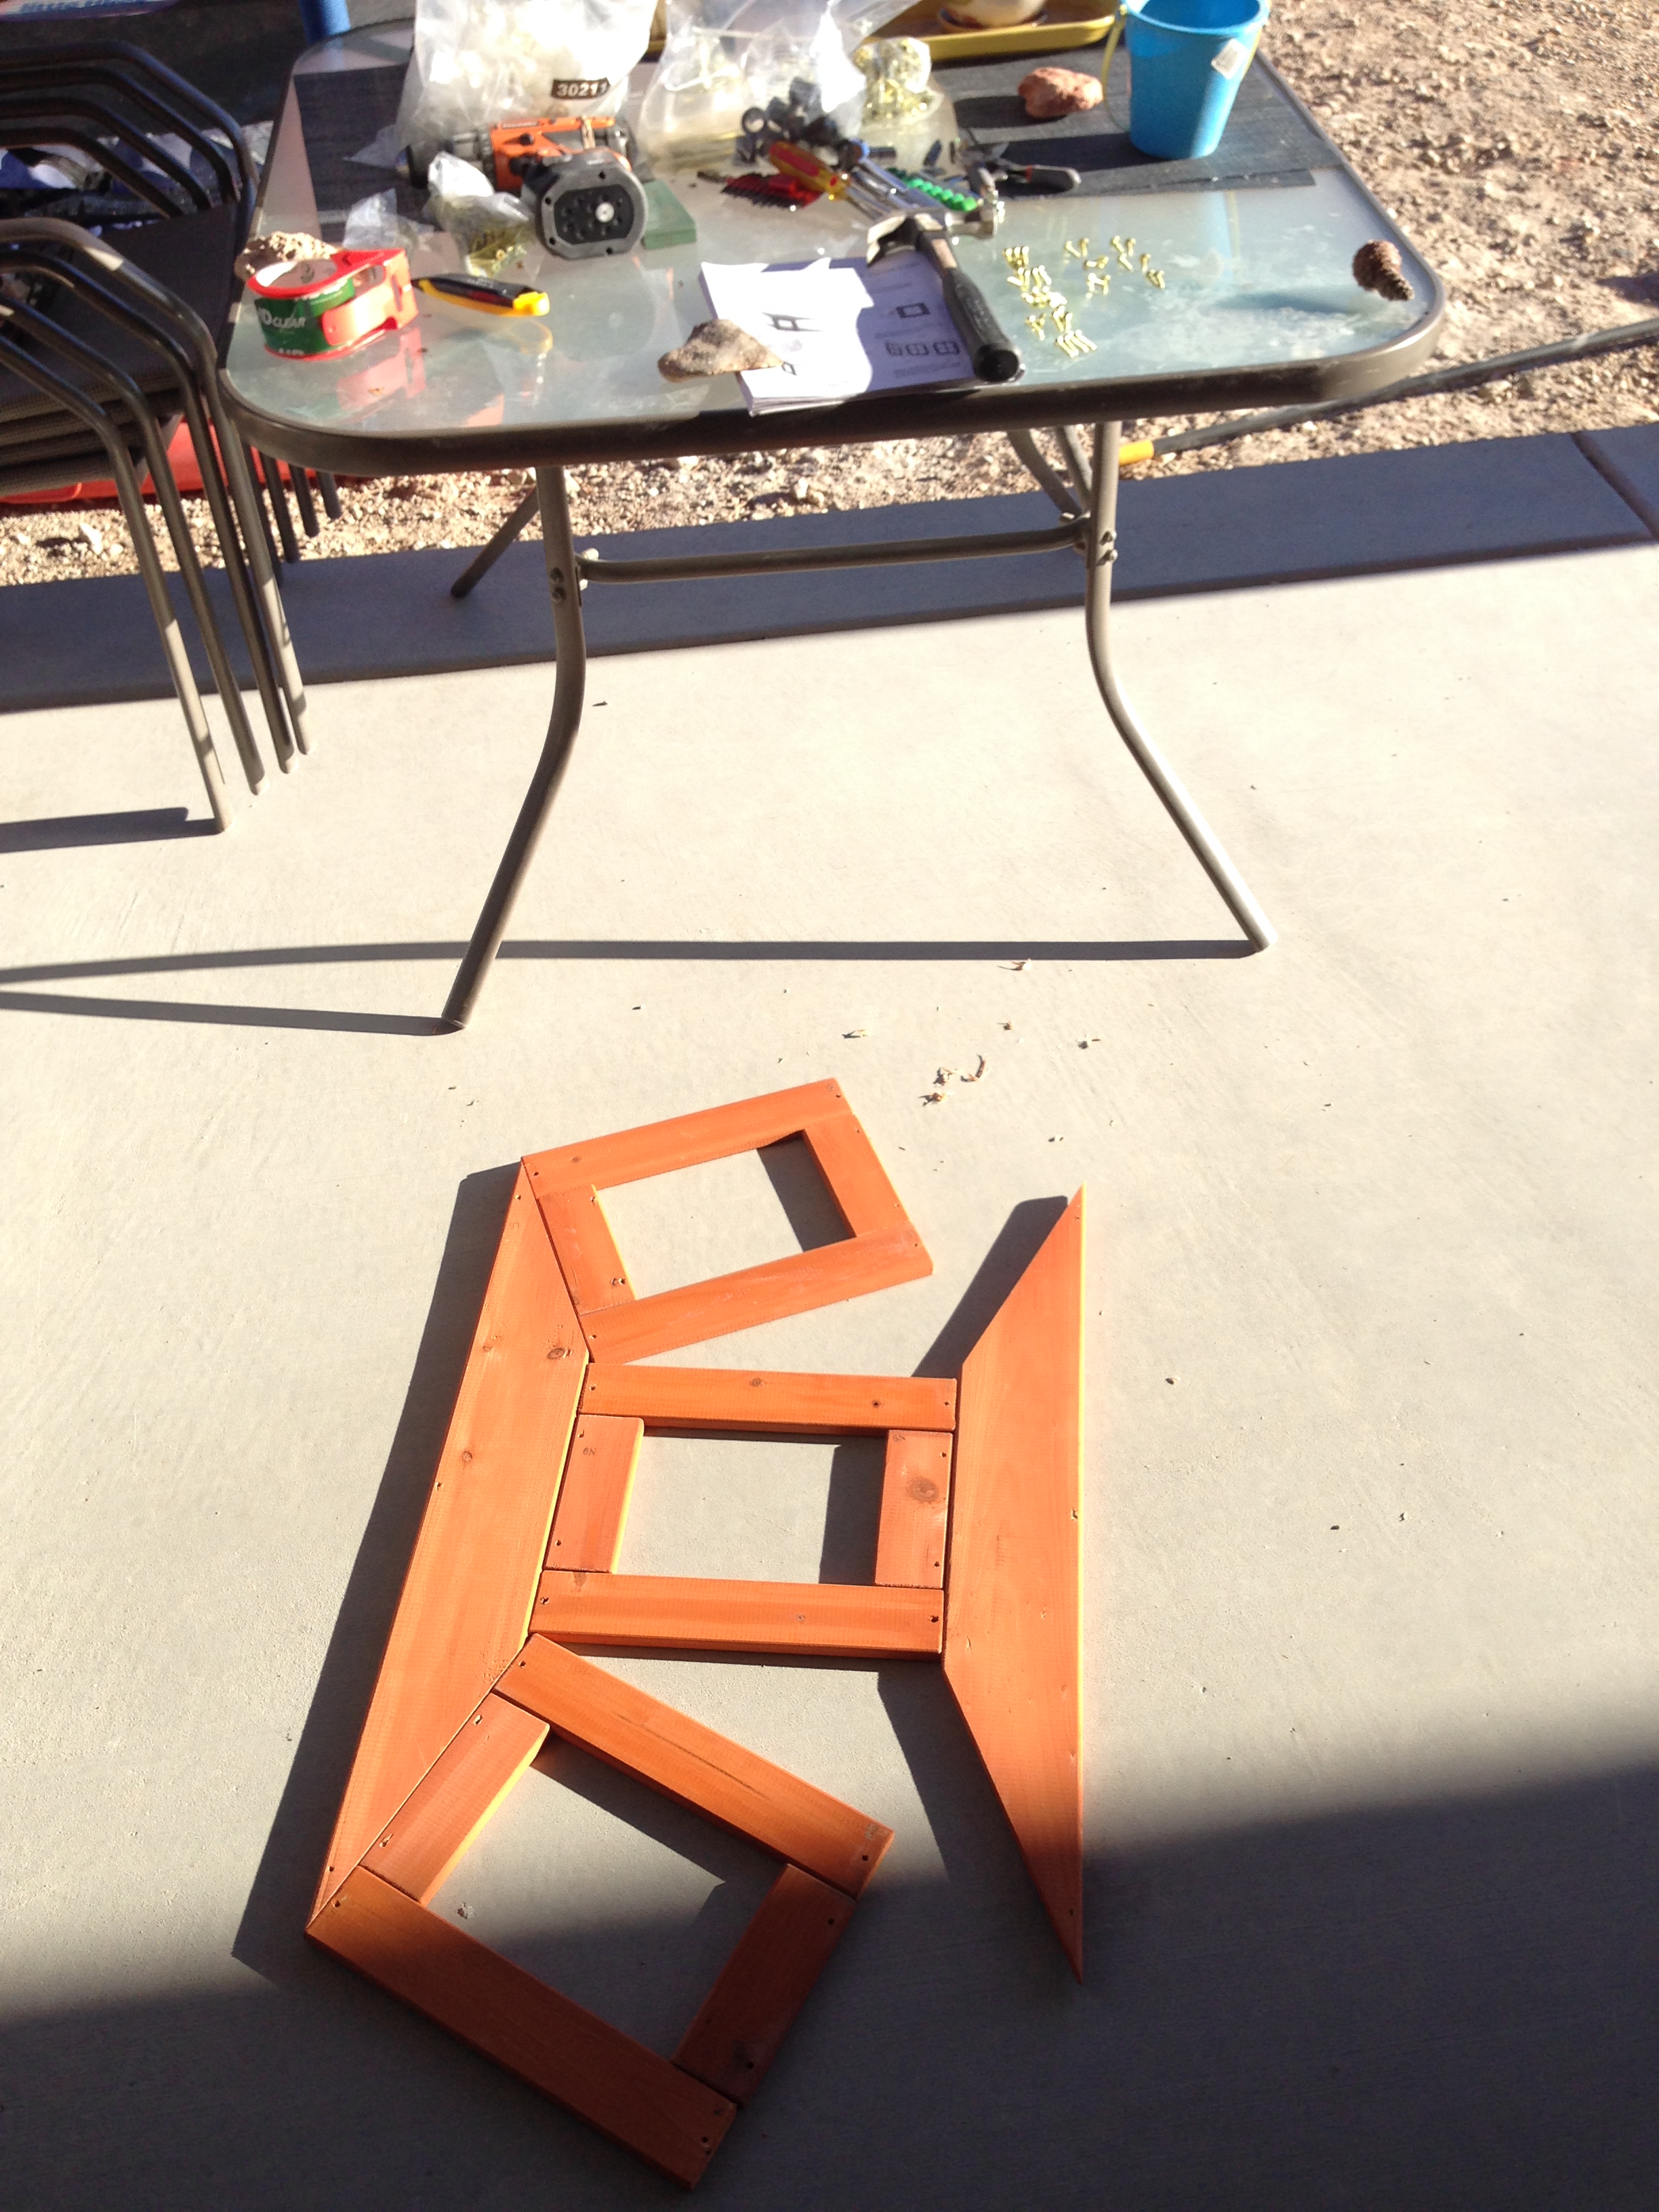
I chose to always lay out the pieces on the ground as they are in the instruction (wherever possible) before screwing or bolting them together. This allowed me to add another yet verification that I had all the pieces and that they were the correct ones.
It also gave me a chance to see how the component would physically look before it was assembled, such that I could visually verify the physical assembly against the instruction layout.
Below are just a few of the components I laid out before assembling.

(Try to) Wait to Fully Secure the Frame Assembly
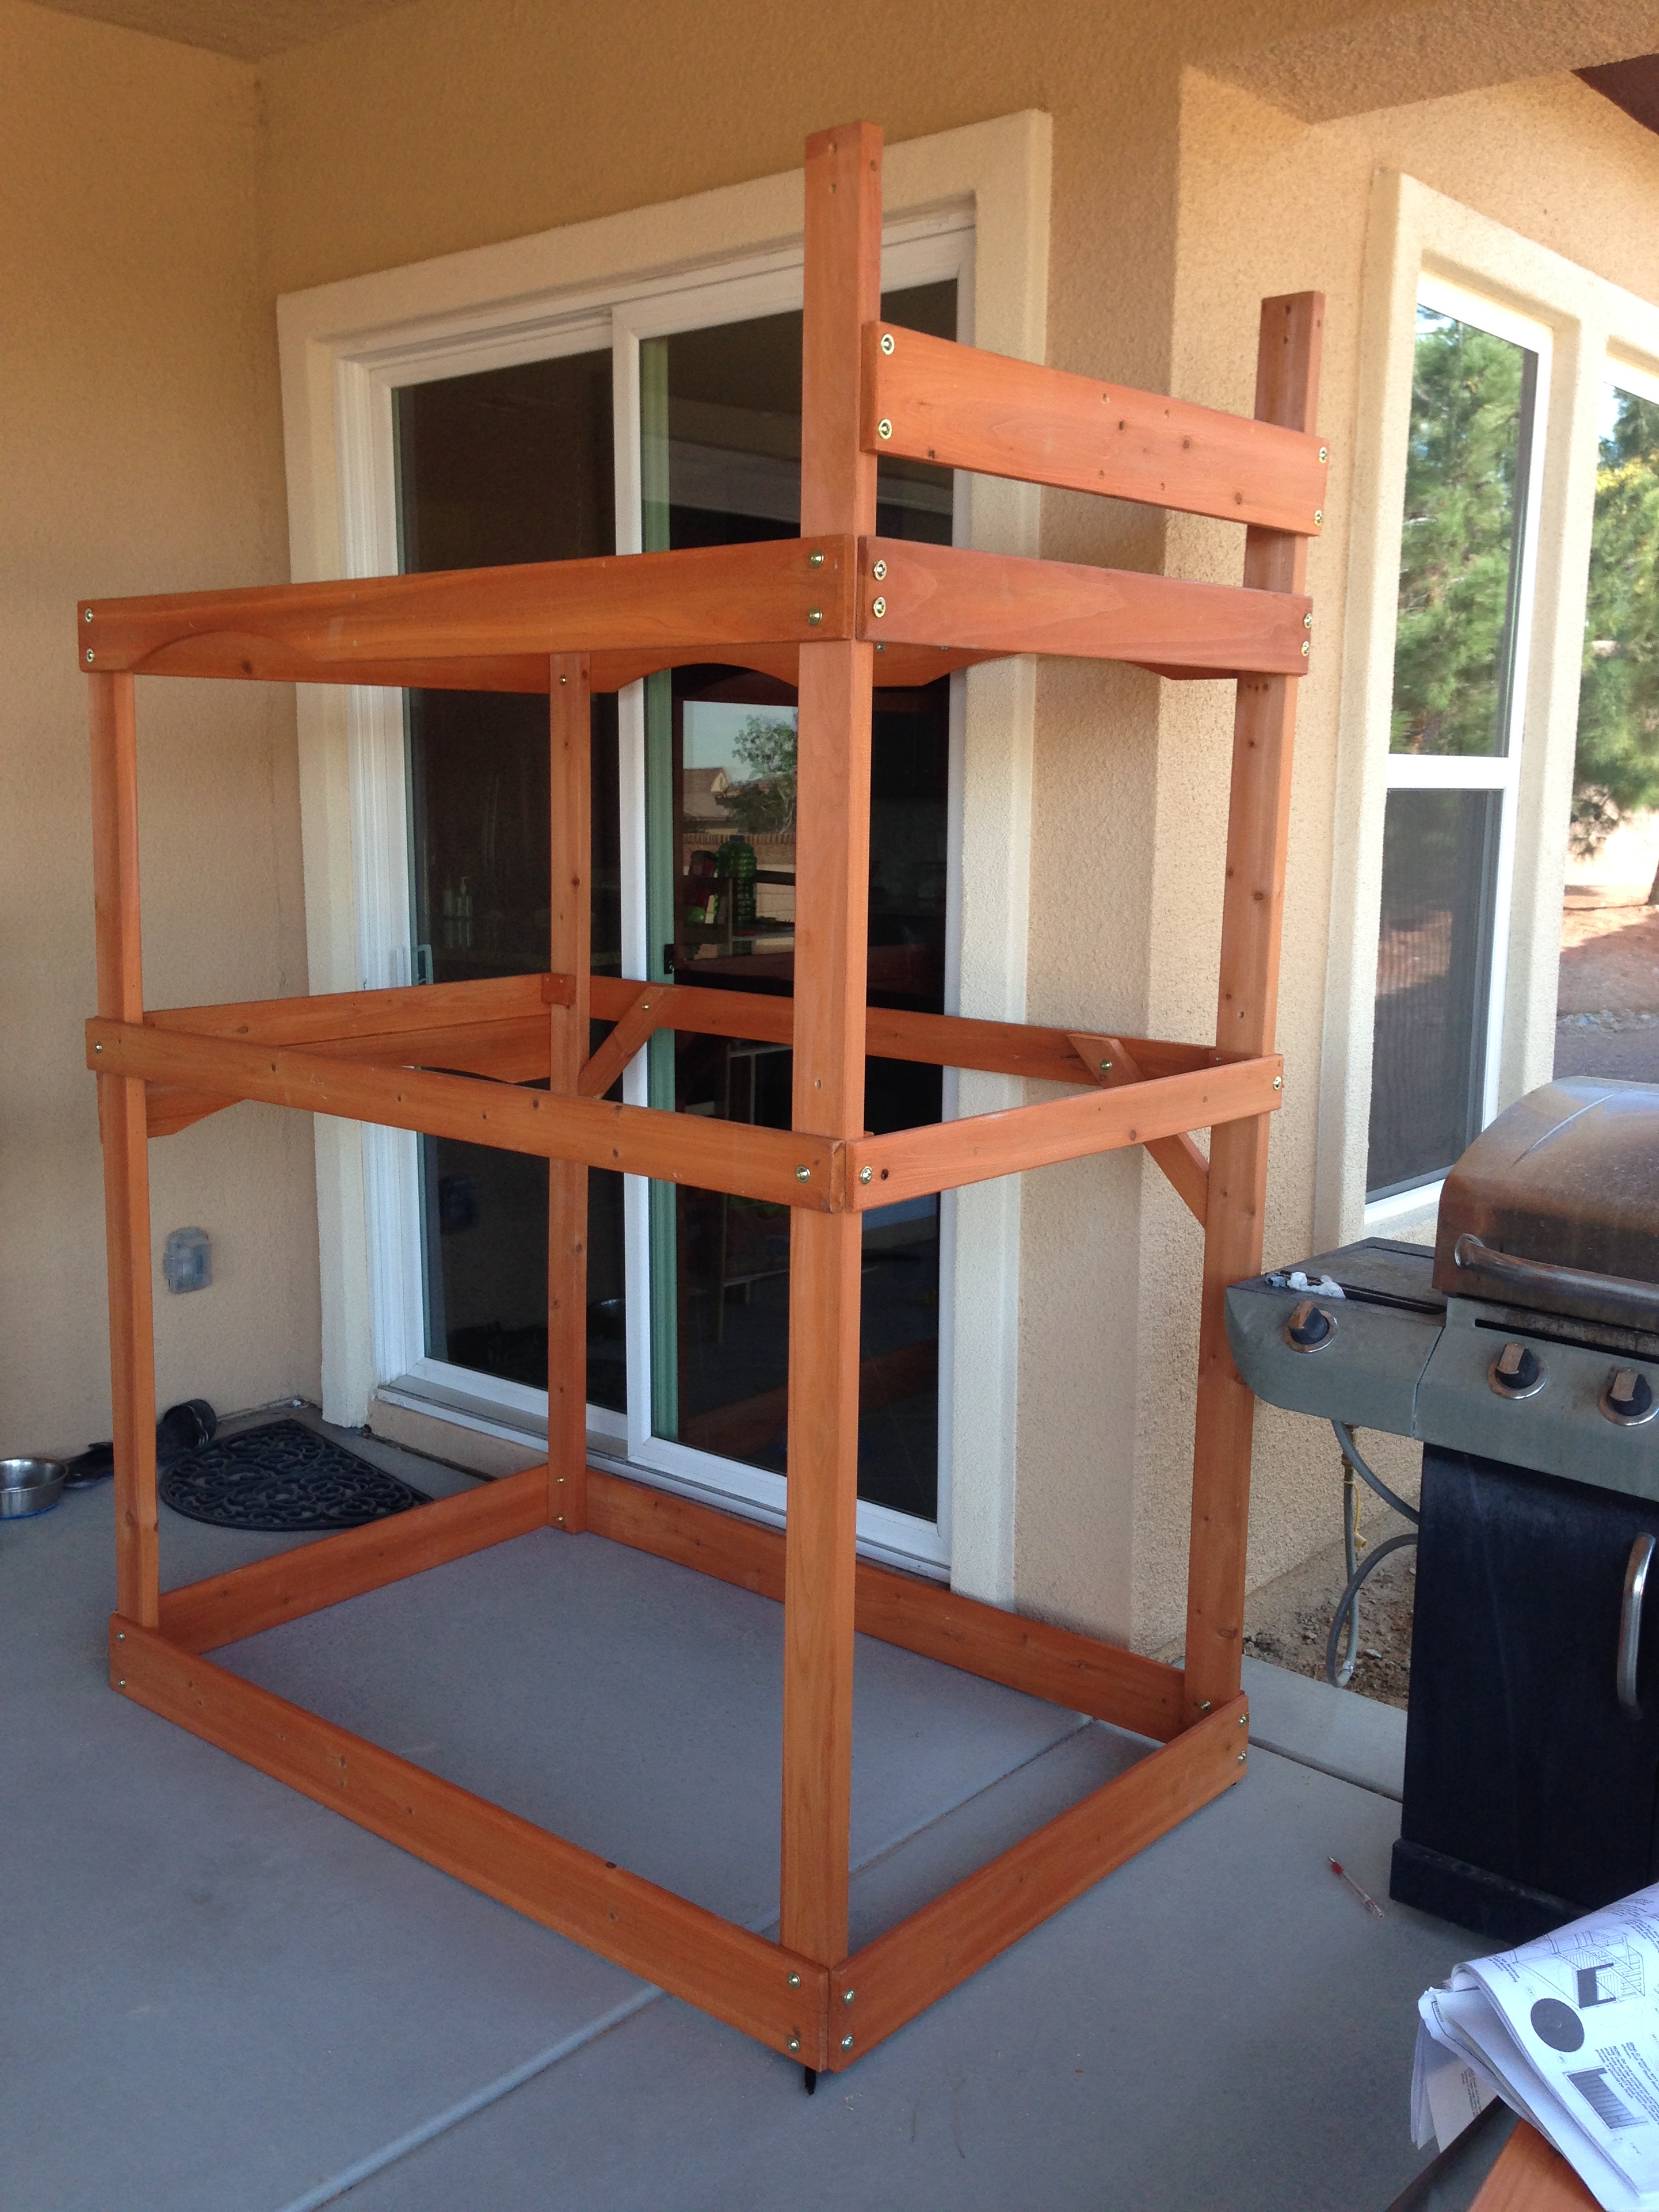
The instructions have you build the two side pieces of the frame before connecting the front and back pieces to make the frame box. In my build, I put both side frames together, using a level to get them as level and plumb as possible and I fully fastened the bolts in each component to complete tightness.

Looking back, I wish I had only tightened all these screws until they just met the wood and not so that they were fully tightened, such that they dug into the wood. Then I would have been able to later make adjustments in the full frame to get it completely plumb and level before locking them all in with full tightness.
Because the wooden swing set is made of a soft cedar, when you tighten the bolts they really sink into the wood. I could be wrong, but I didn't want to have to loosen them to make adjustments, and subsequently re-tighten the bolts in a different place for it was my thinking that the previous tightening's impression would decrease the long term stability of the bolt because it would have an easier chance of slipping out of place with long term age. Granted, if the assembly was so out of whack from level, I would choose to adjust the bolts over leaving the assembly crooked.
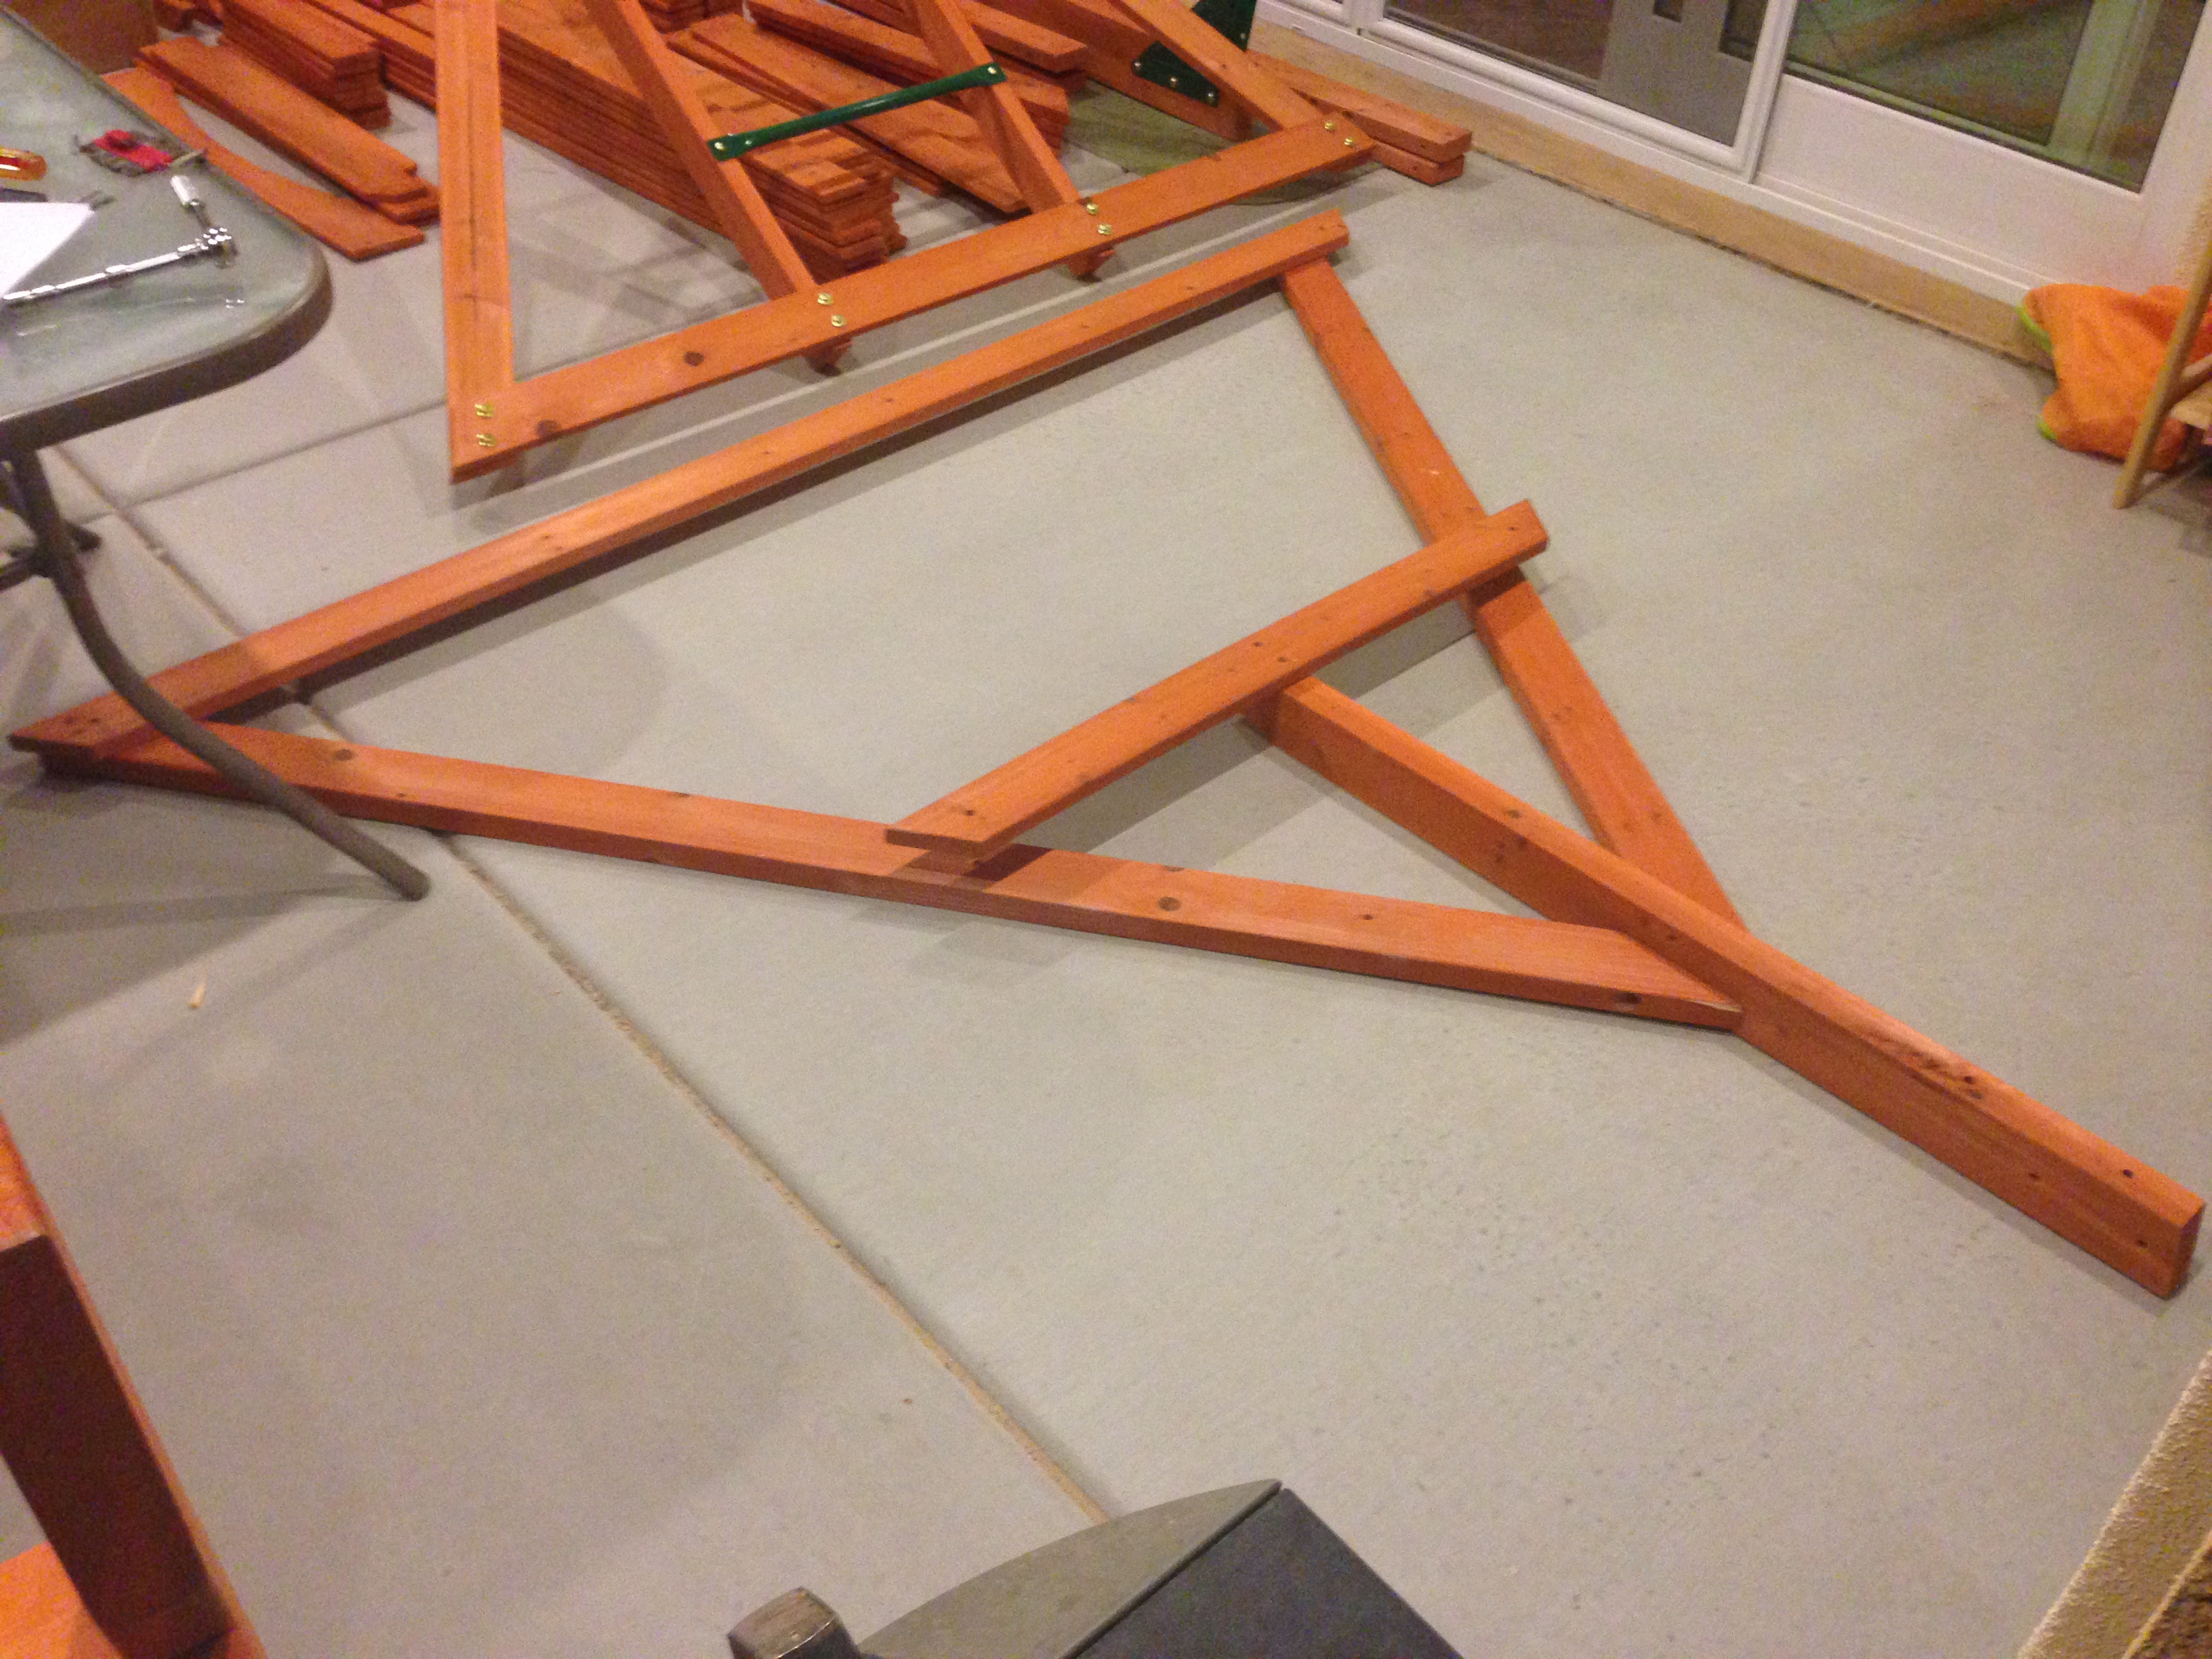
If I were to build this swing set again, I would try to make it to the point in the picture below where the frame is nearly fully assembled before beginning to tighten all the bolts. And I would have tightened them in some form of a crossing pattern to distribute the "pull" of each tightening so that tightening one board wouldn't pull the whole assembly away from plumbness or levelness.
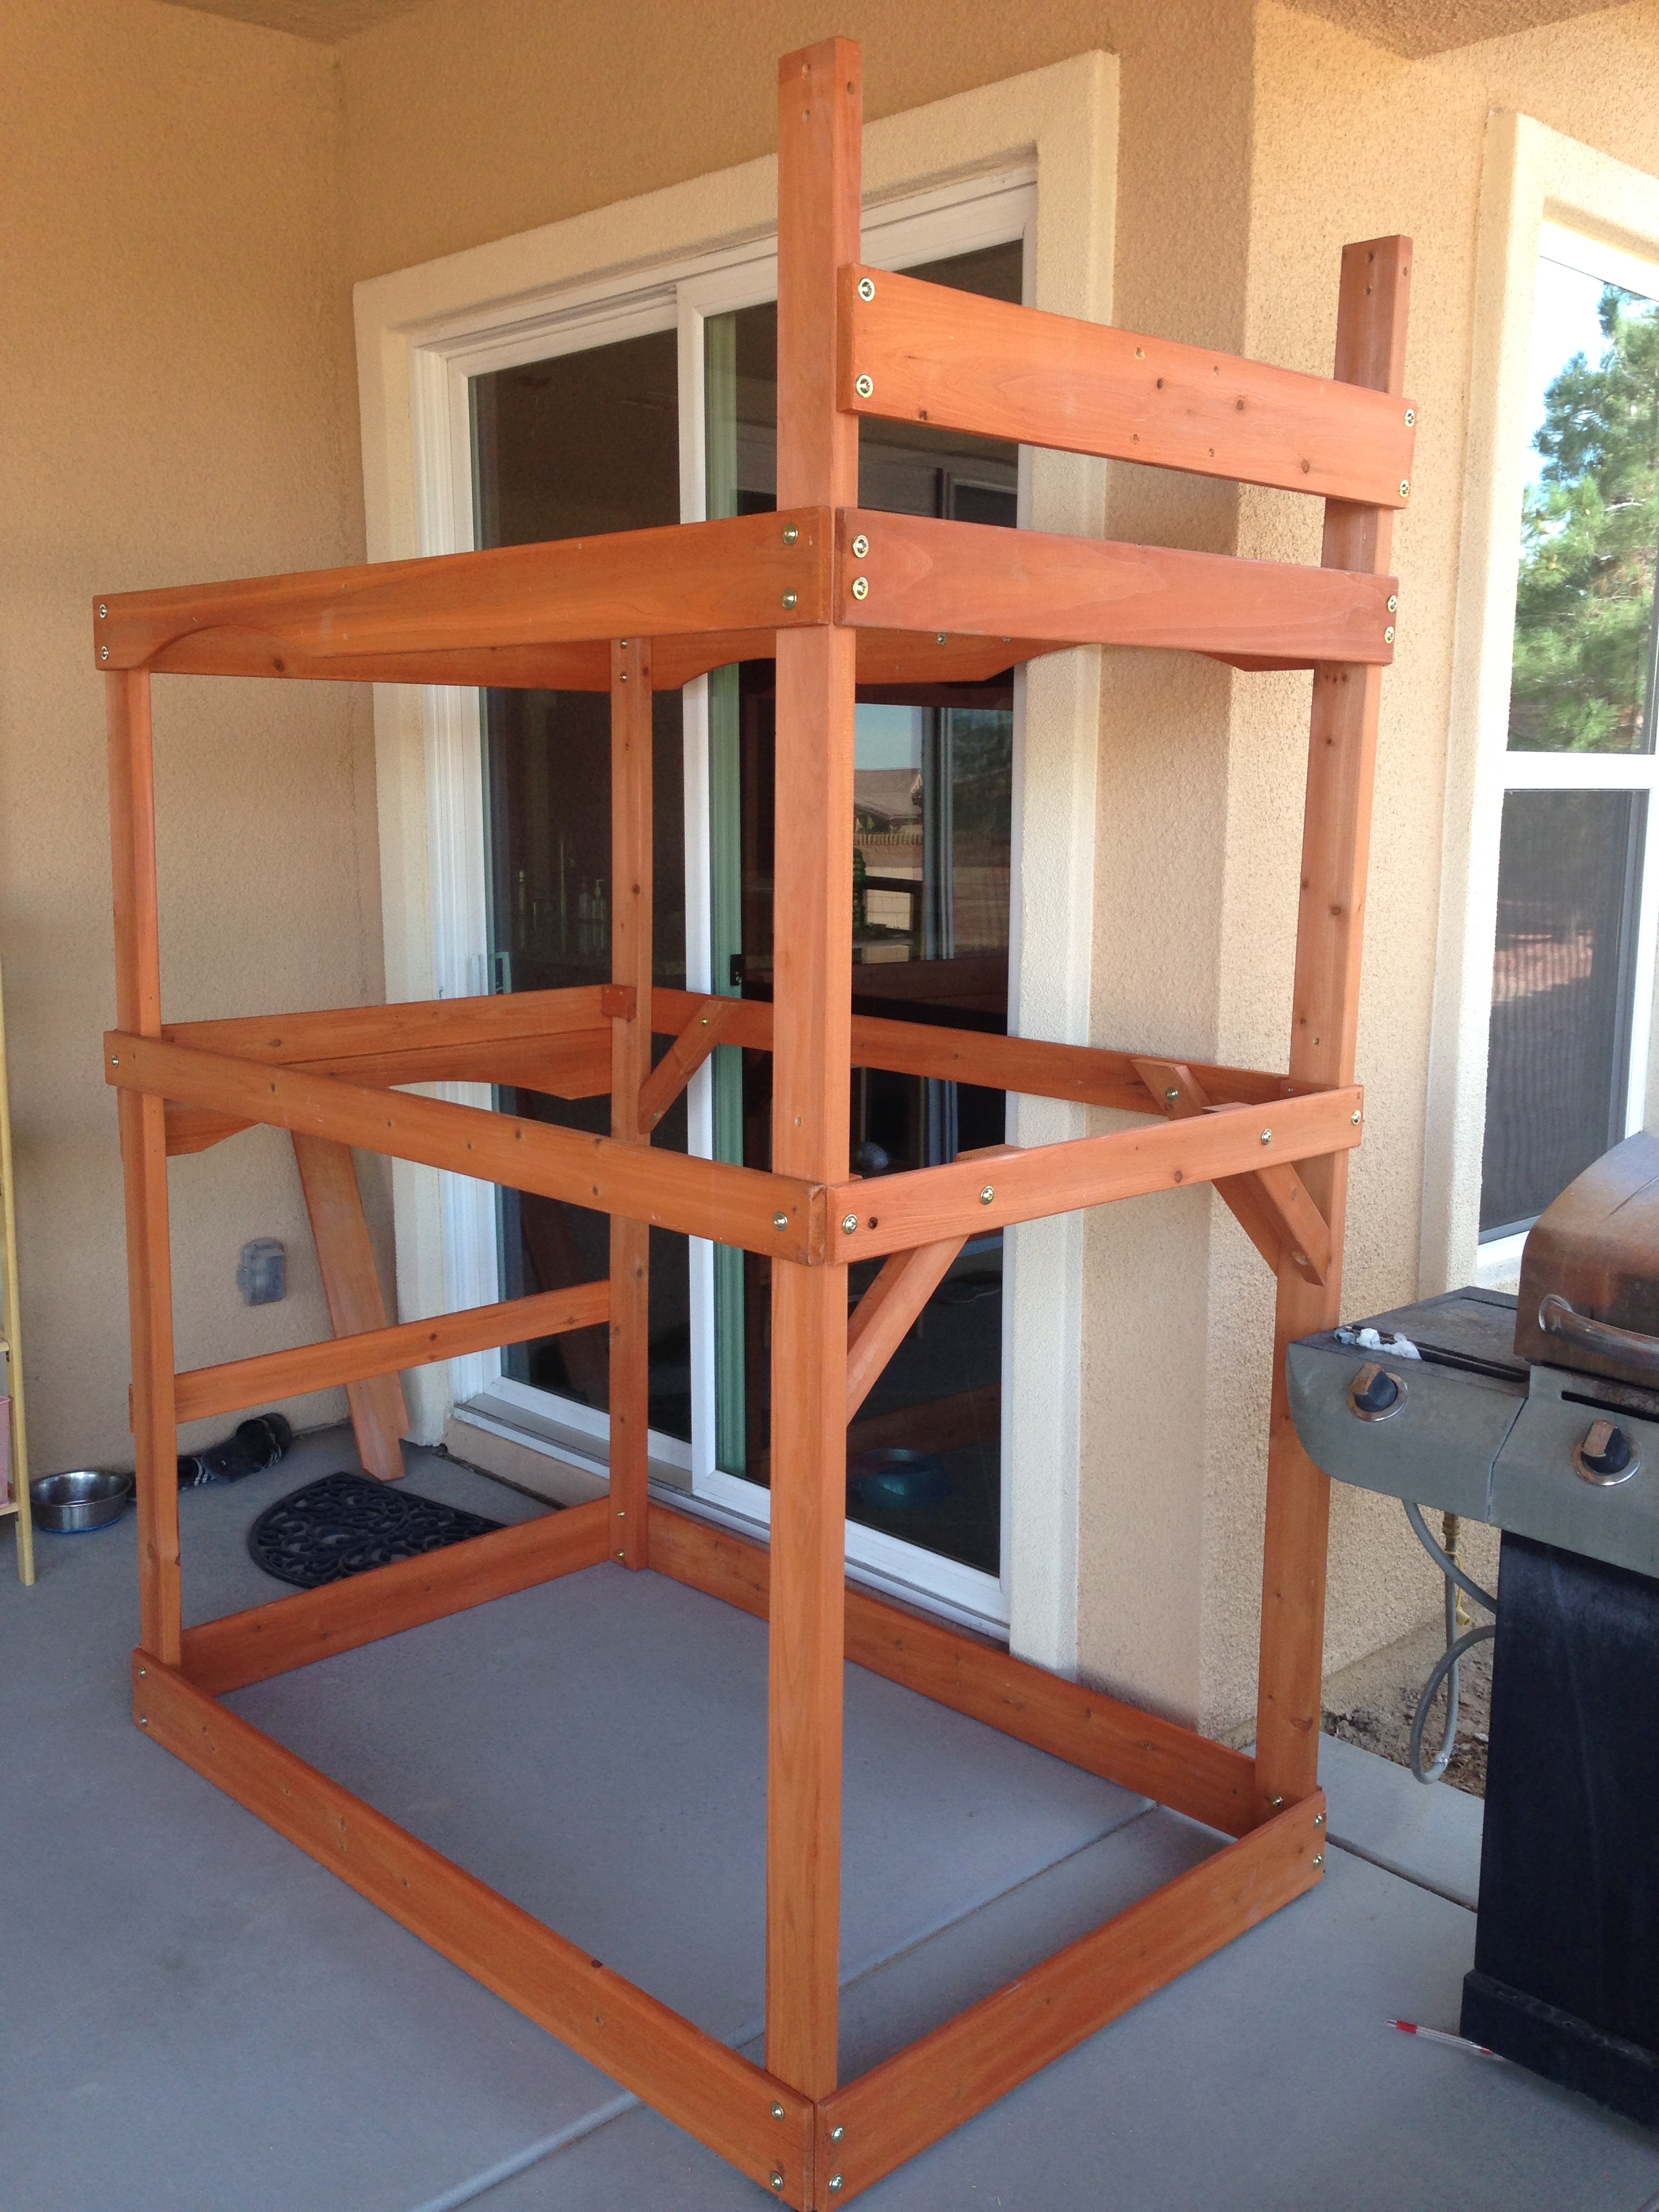
I'm not sure if it would have held together well enough that I could have waited this far to start fully tightening, or if it would have sagged too much that it wouldn't stay upright, but I believe it would have made it easier get fully fastened while keeping it plumb and level.
In contrast, I was fully tightening each board as I added it, and with each board, though I was trying to keep the assembly plumb and level, the frame started to pull out of whack.
Also, after getting the sides connected plumb and level with the top and bottom boards, I didn't do a great job of checking with each additional board I fastened on that it wasn't coming out of wack. It wasn't until I got to stage above that I did a final check and realized it had slipped away from square.
However, overall though it did slip away from plumb and level, the amount was only mild and doesn't seem to affect the stability (and therefore safety) of the swing set. Its really a strong and well designed assembly. As you can see in other pictures in this series of articles, I am able to stand on the platform and its very stable; there isn't and rocking or swaying.
If nothing else, just take from this section that its going to be difficult to keep the assembly plumb and level as you build it. Pay attention to this fact and do the best you can to keep it in line, such that when you get to the end, you aren't so far out of whack that the build looks and feels (though bad structure) like its going to fall over.
Assemble on Level Ground
One thing to note is that when you build your frame, you'll want to do it on level ground. I built the frame on my back patio and was aware enough to realize that the patio itself is not level.
The patio cement is not level because it needs to drain away from the foundation when it rains, so it actually slopes away from the house. So if you tighten the frame boards to be plumb and level on an unlevel surface, when you later move the assembly to a level surface, it will be out of whack.
Granted if you build it to be plumb and level where its going to live, then I guess you don't need to worry too much if the ground is completely level, just know you won't be able to later move the swing set to a different place in the yard.
To compensate, I put spacers under the lower side (furthest from the house) of the frame as I built it. ...and by "spacer" I mean I was lazy and just stuck a marker under the legs on the lower side of the patio as that was about the height of the cement drop. Ideally I should have used a wedge.
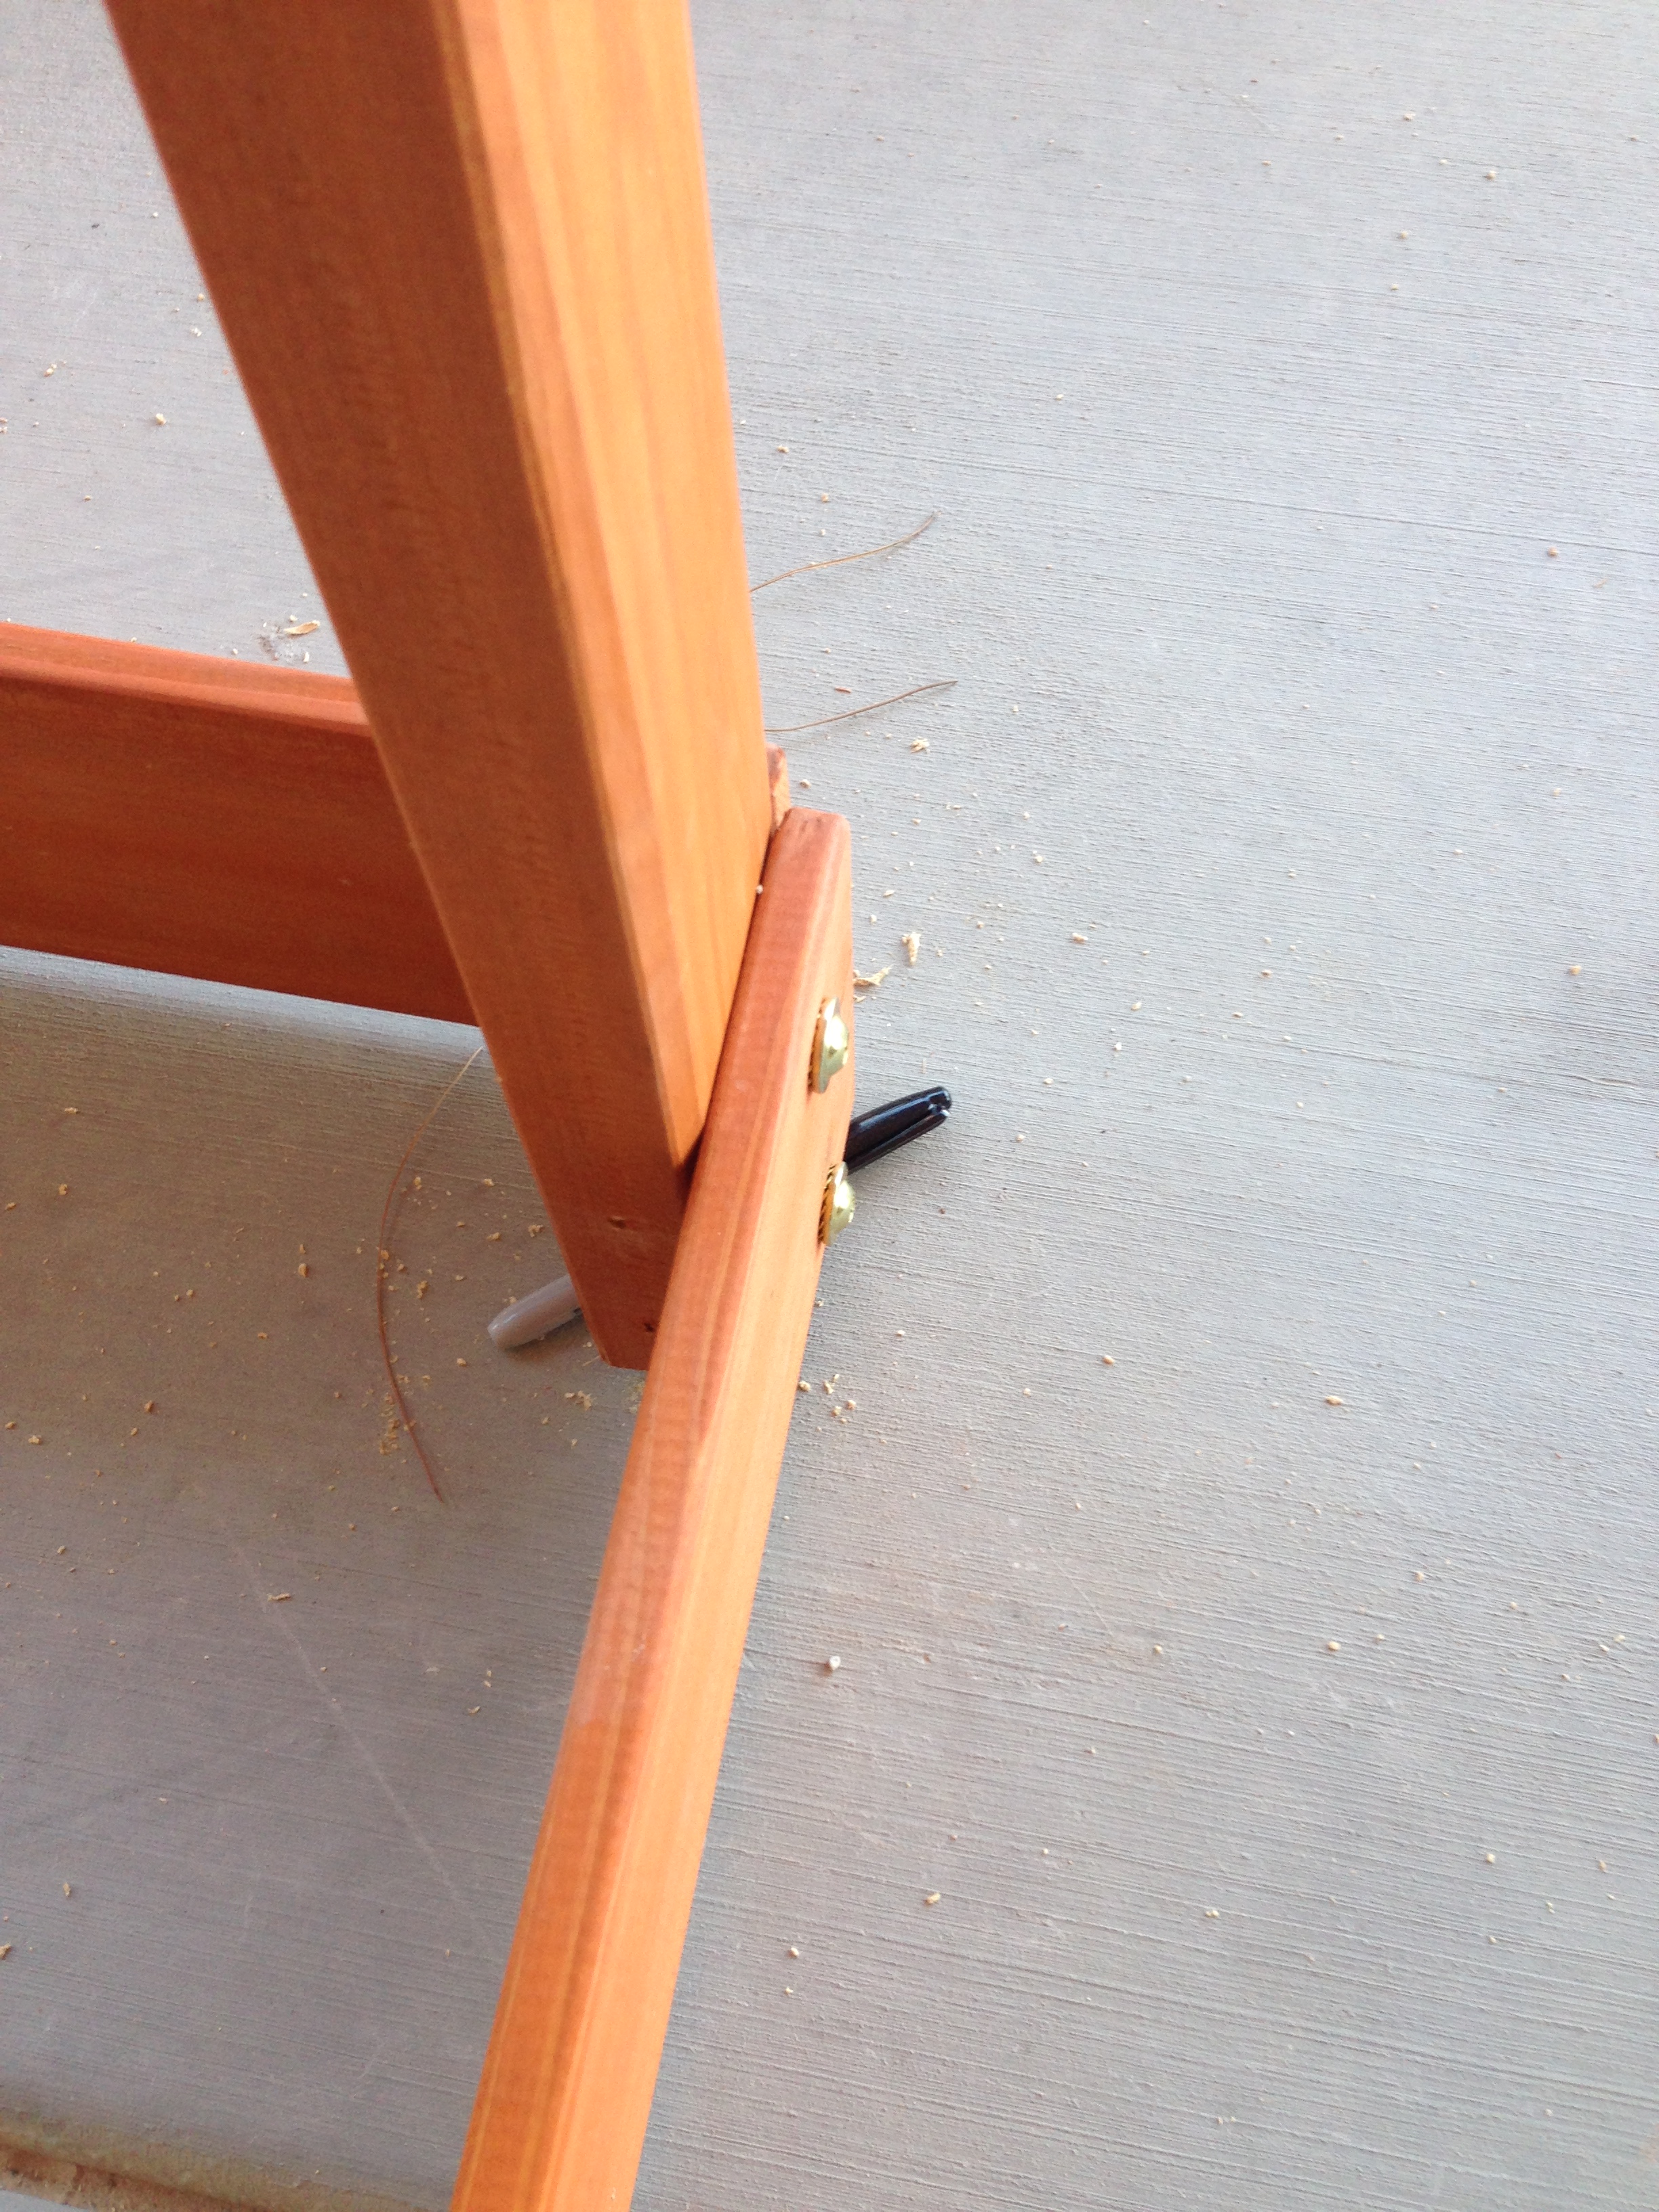
In the picture above, you can see the marker just sticking out of the closest corner at the far right side of the frame. You can't really see the marker on the other corner (closes to the grill), but you can see the space between the wood and the concrete.
Wall Board Spacing
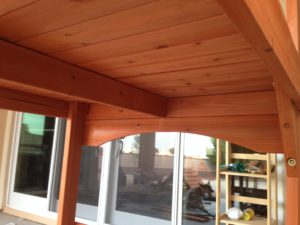
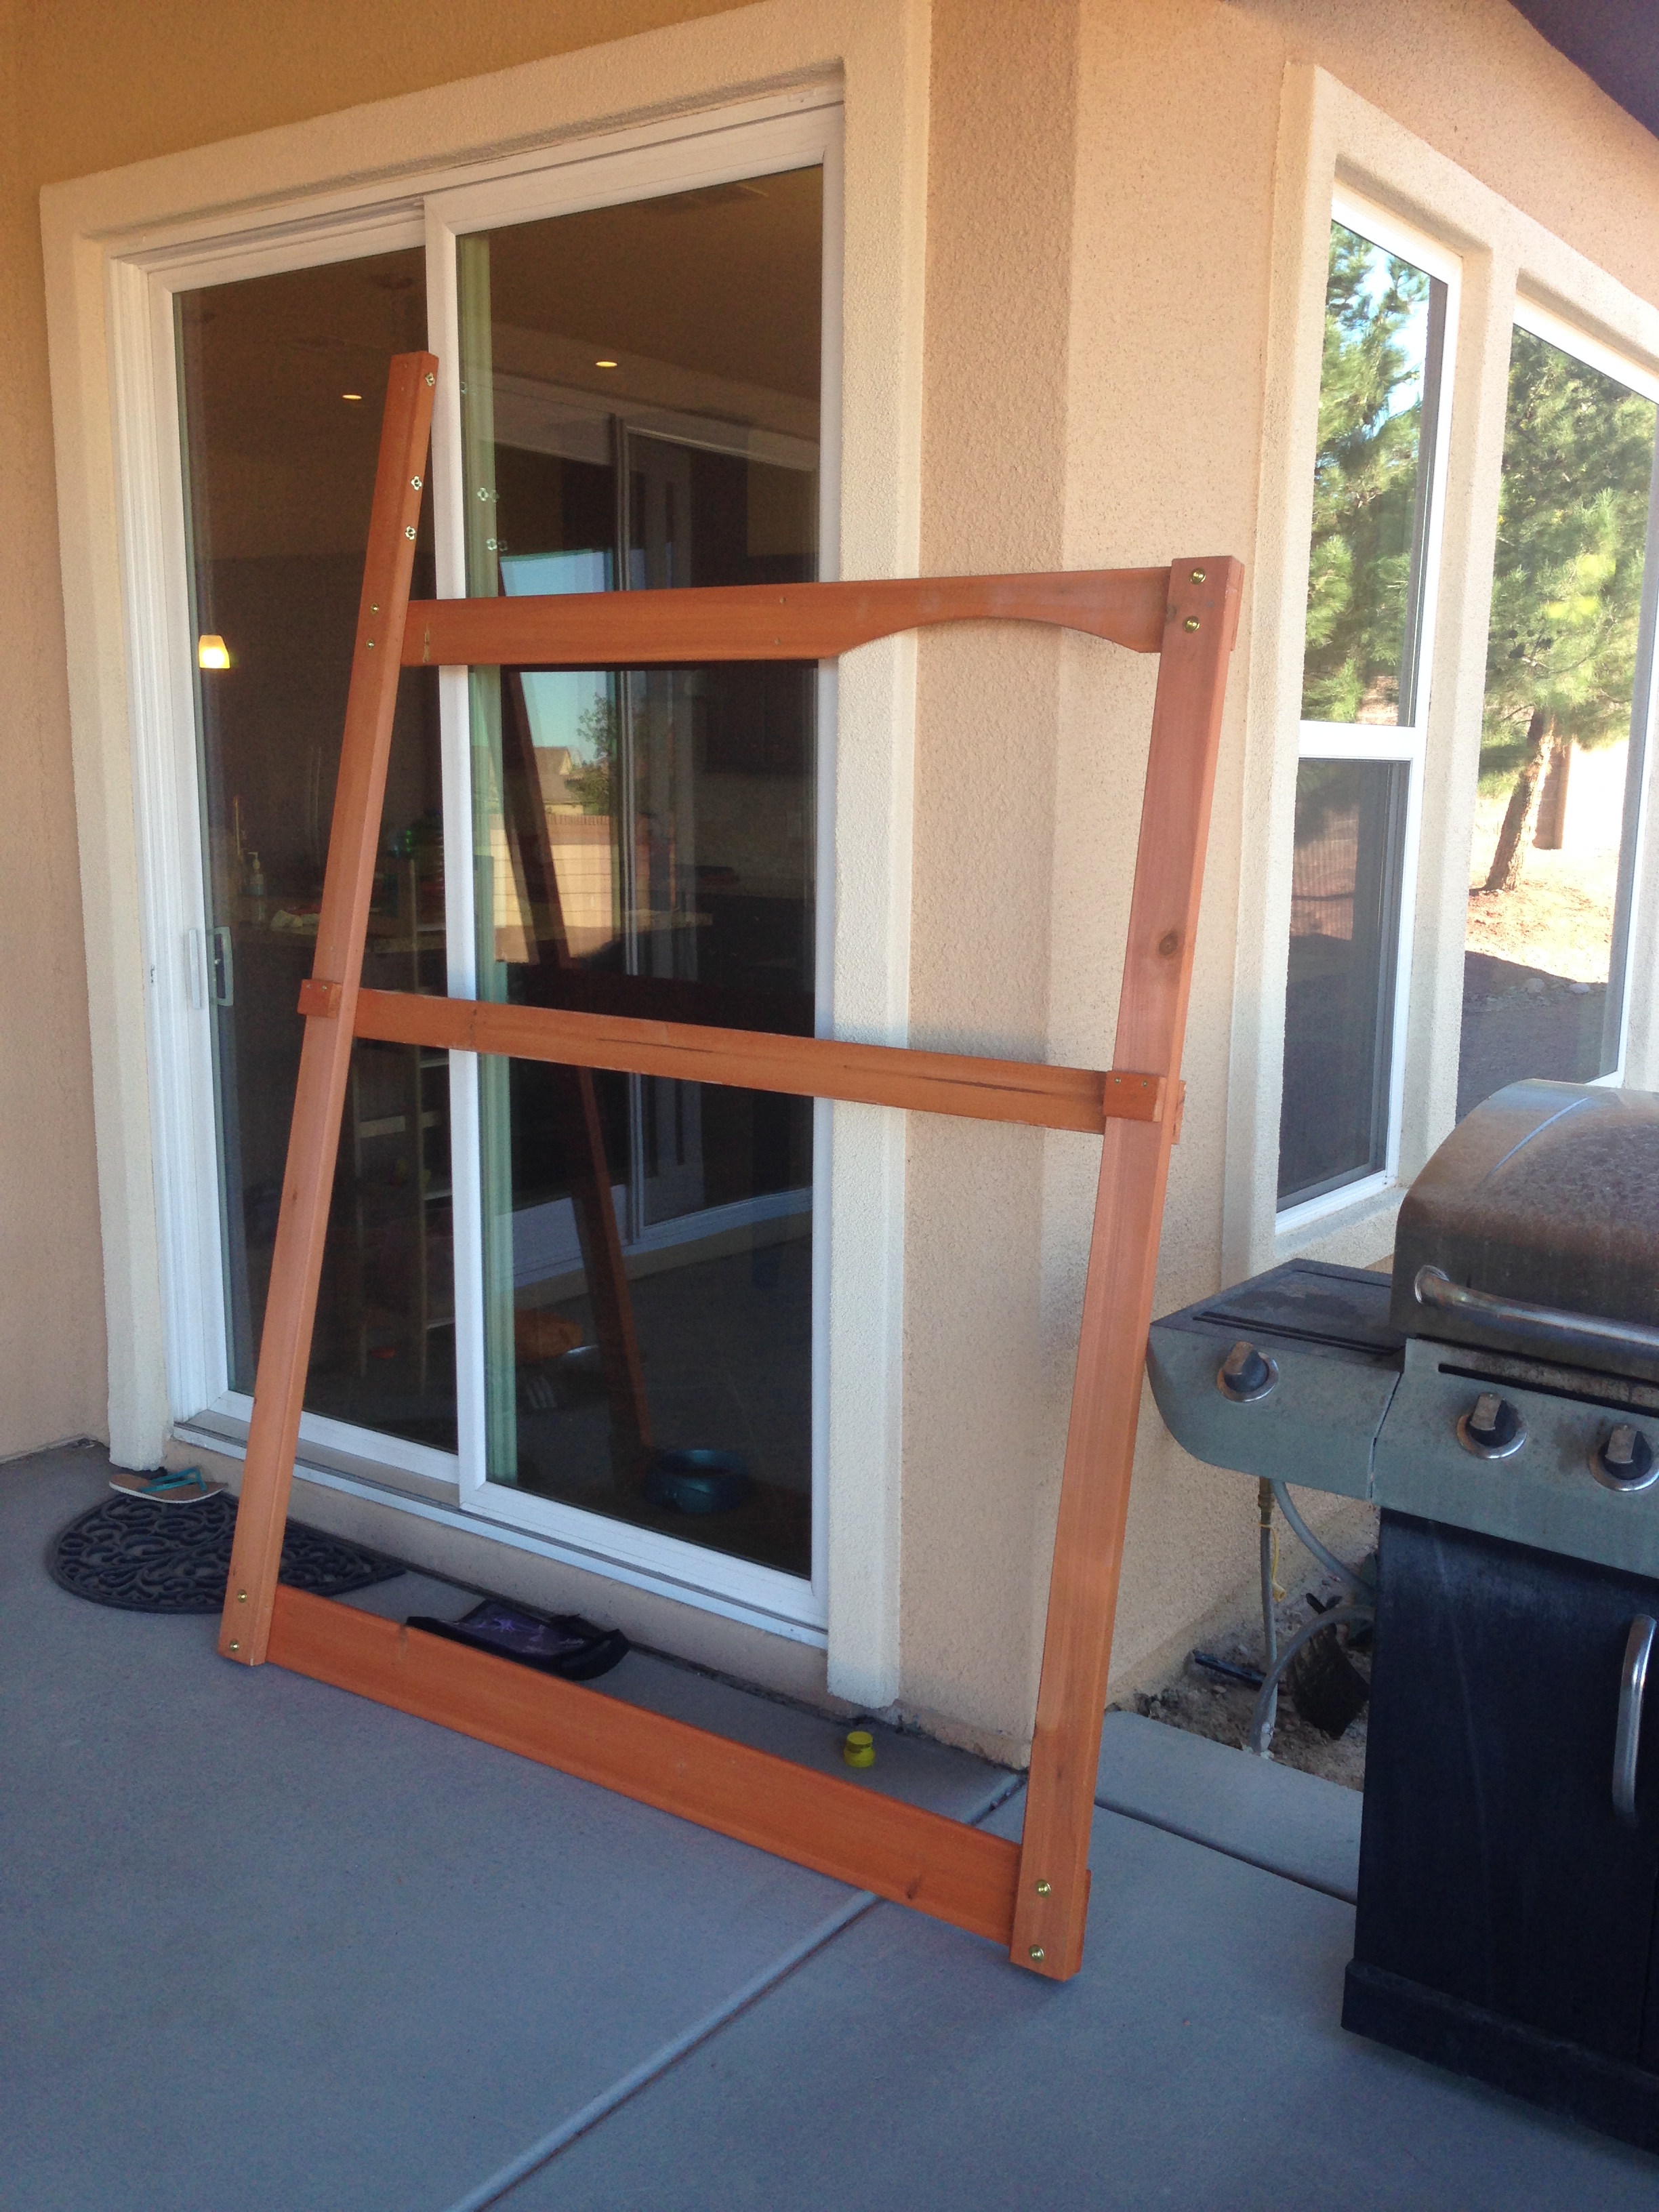
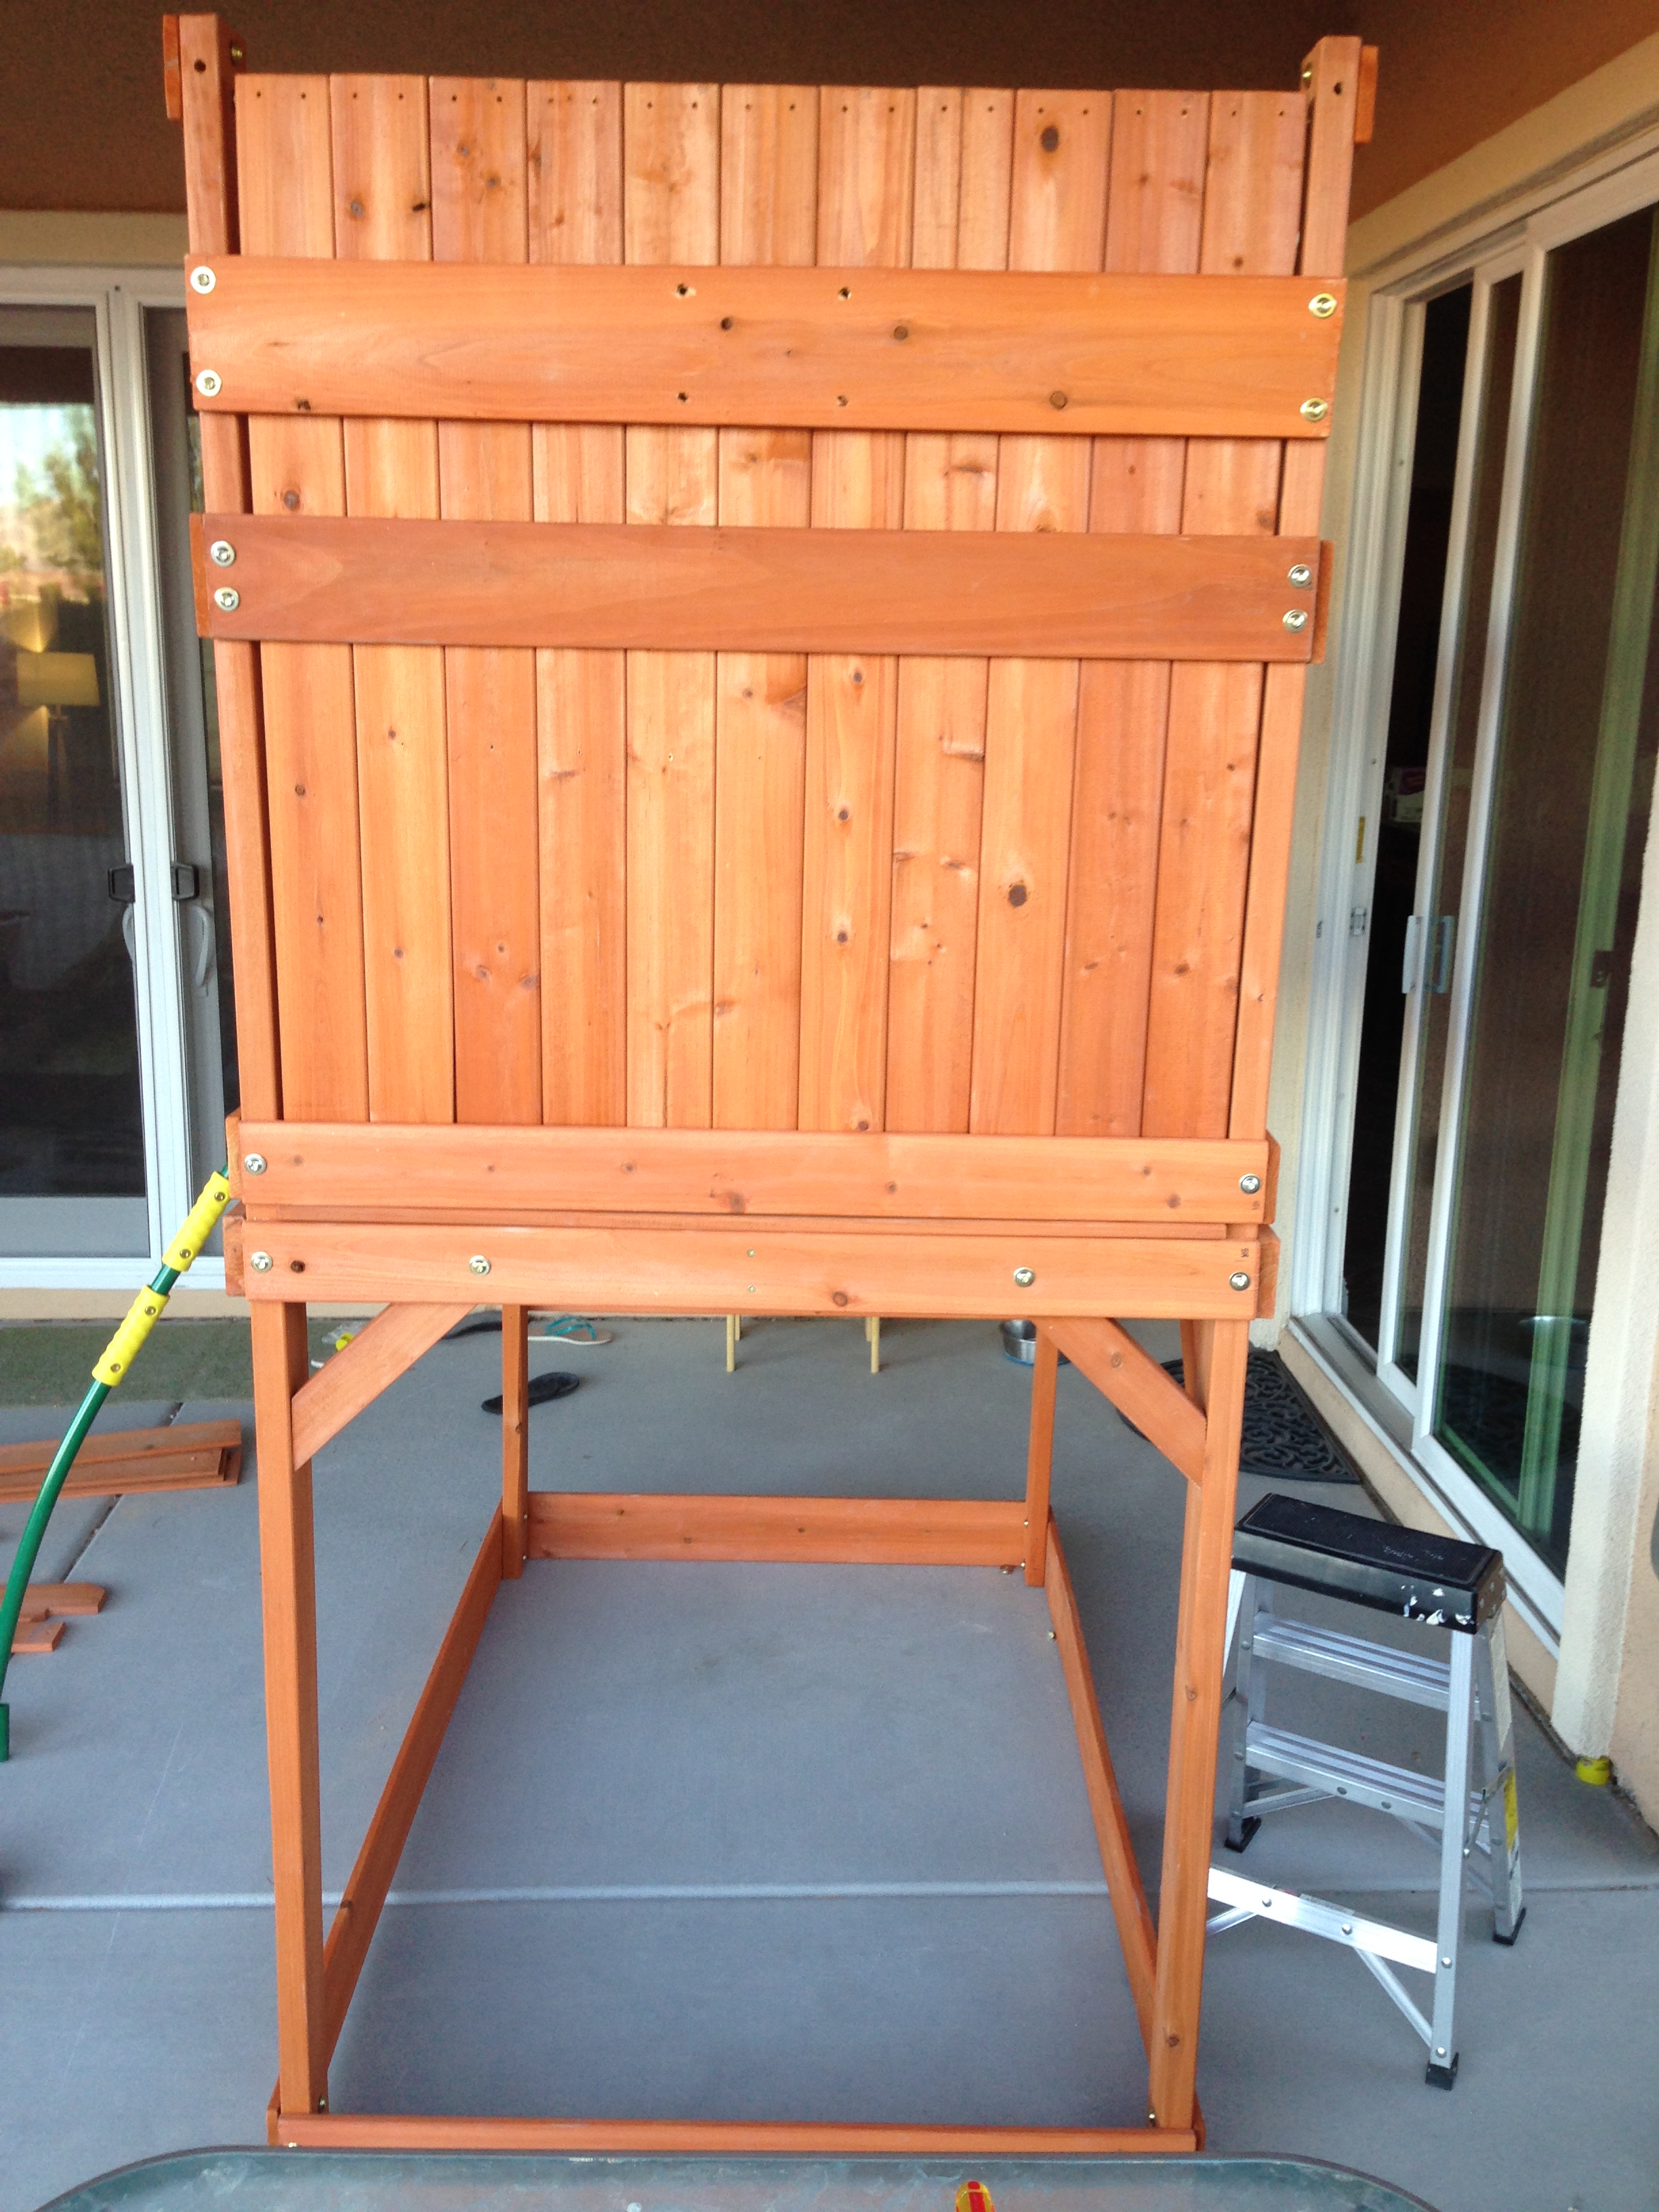
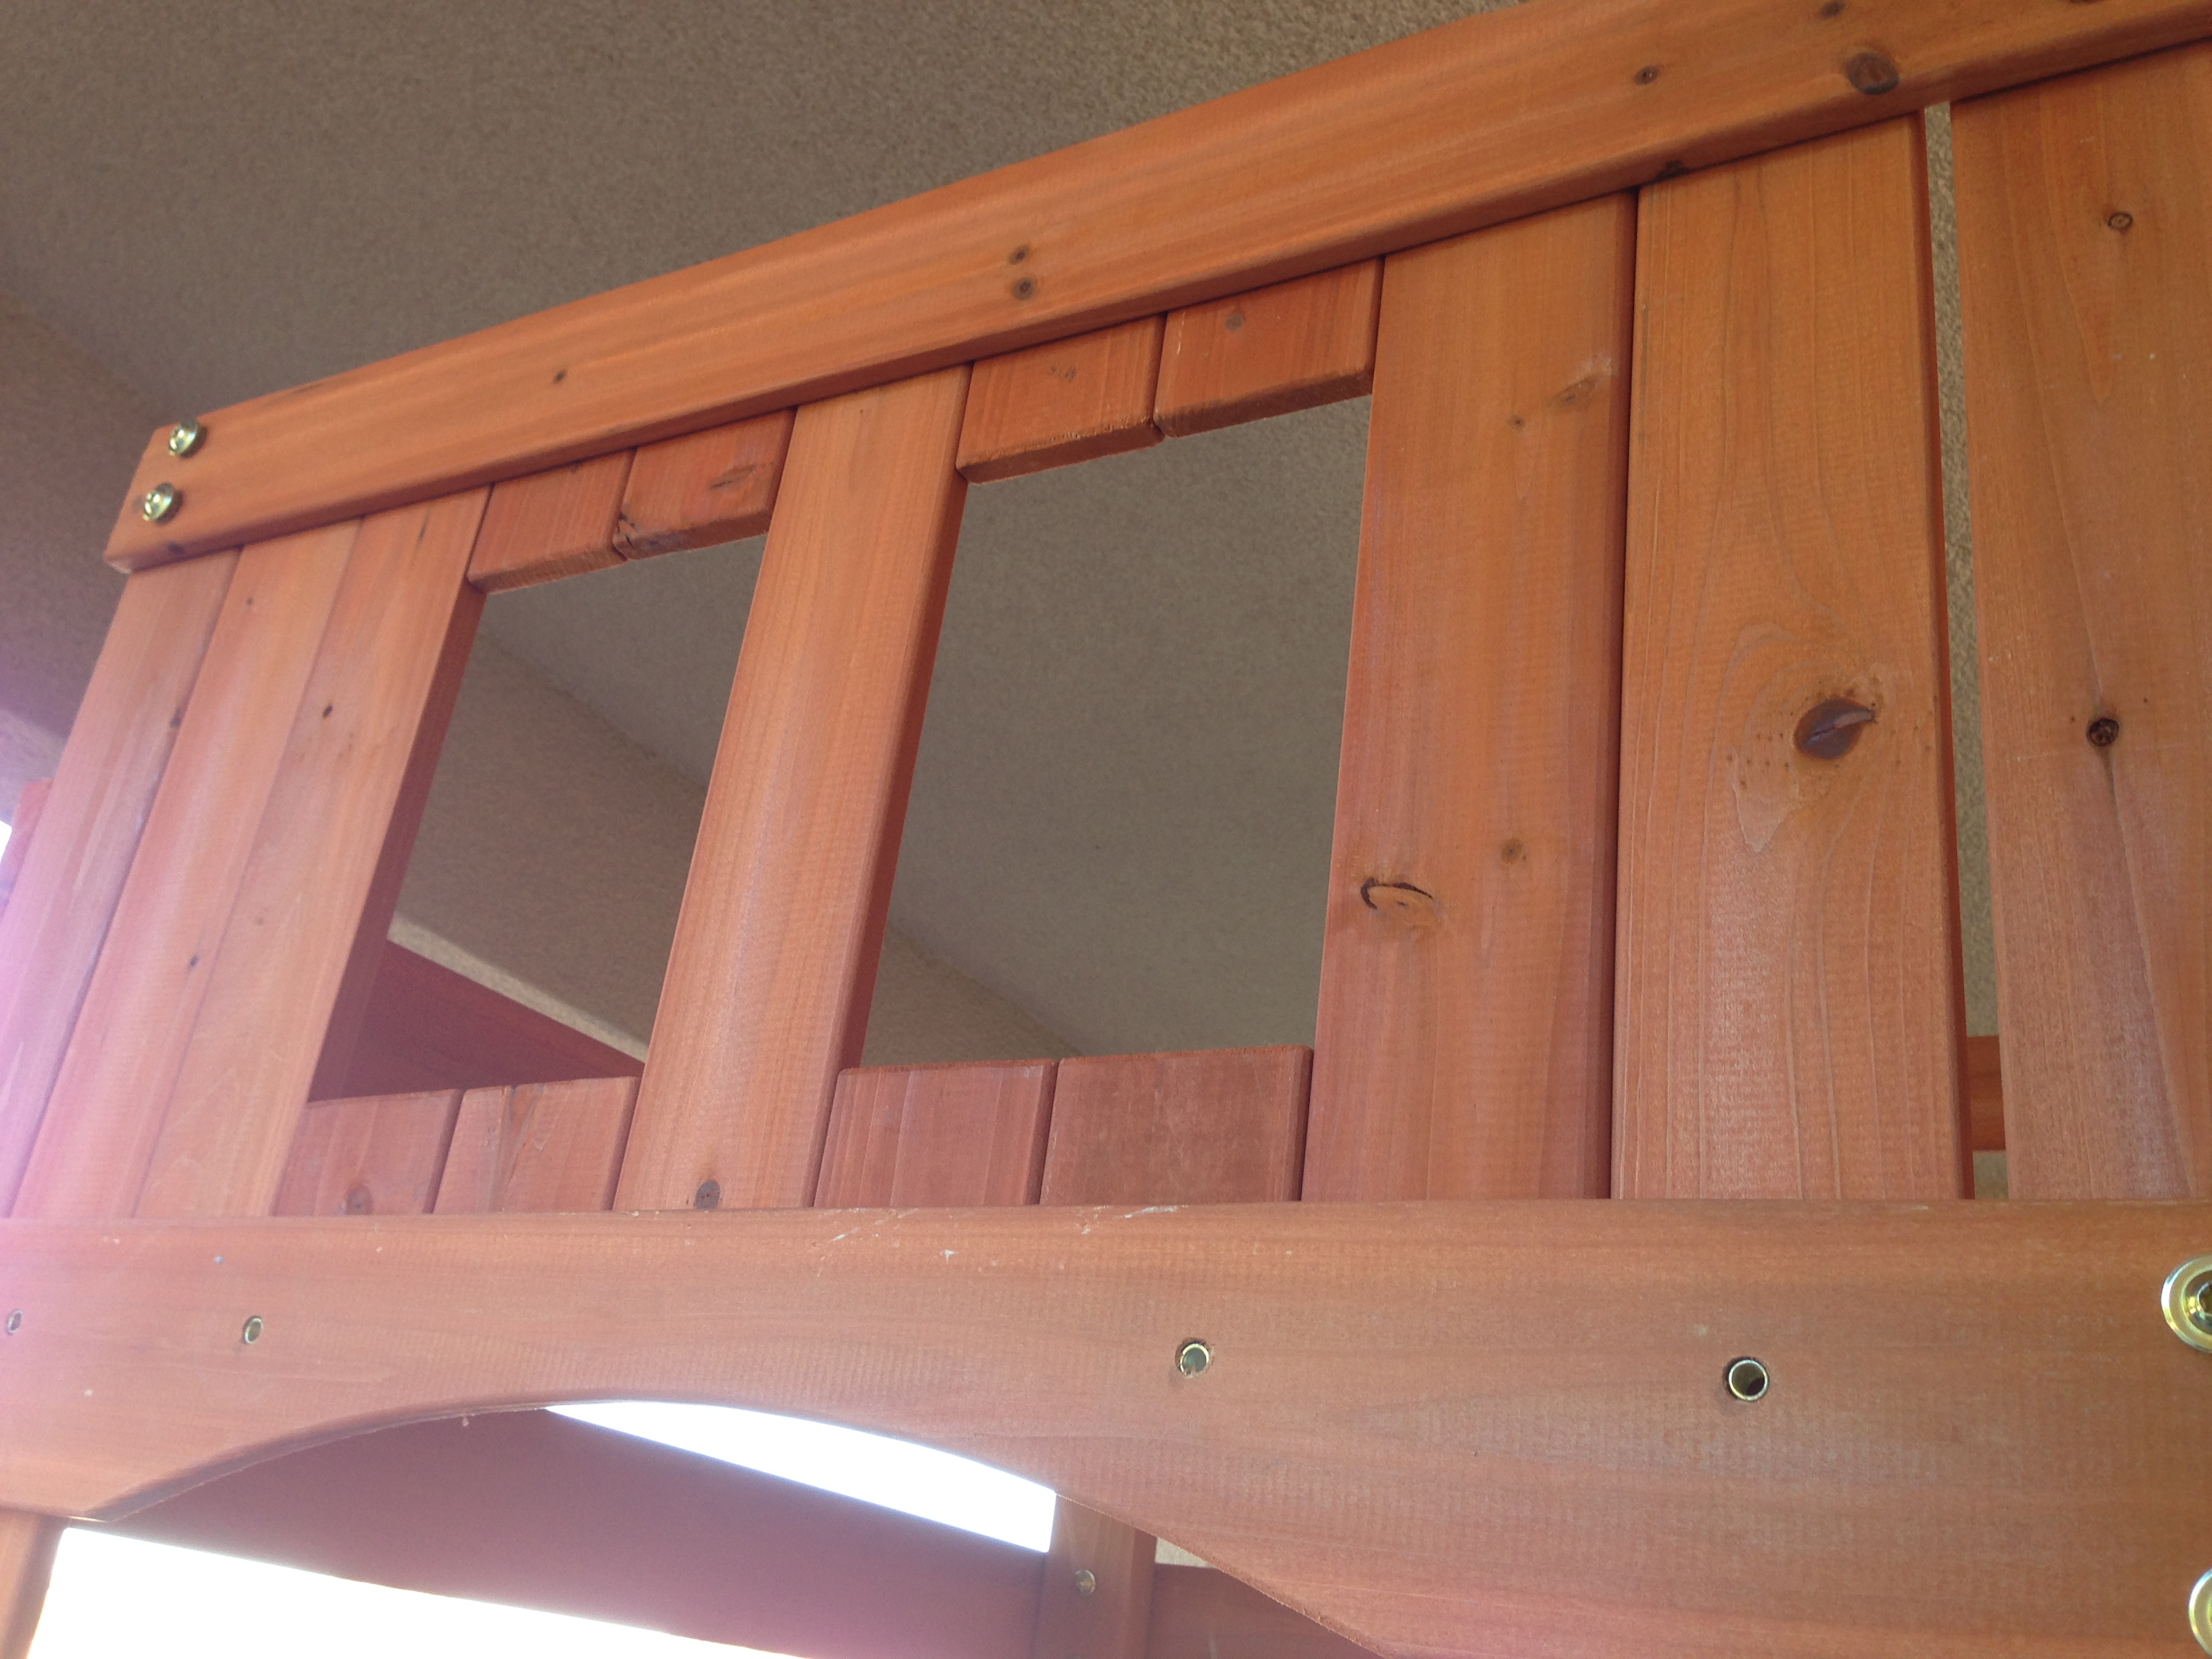
There are a few places where you'll screw in a bunch of parallel wall boards to make a complete wall. This is where you'll really get to see if you made your frame plumb because when you add that last wall board, you'll likely see that there's more space at the top of the board than the bottom (or vice versa).
As you can see on the left side of the picture below, there is a bigger gap between the top of last wall board and the frame board, than there is at the bottom. That frame board was a bit off and it shows. The same thing is happening on the right side, but not to the same degree; that frame board was more plumb.
 .
.
Filling in the wall slats involved a learning curve. I missed the instruction to put 1/8 to 1/16 inch gaps between the boards.
Above is my first attempt and as you can see, I didn't put any space in between each of the individual boards. I also started on the left side and worked my way to the right. So all that spacing that was to be between the boards showed up on the right side between the last board and the frame board. Since this was just a cosmetic issue and wouldn't hinder structure, I left the gap and decided to learn from my mistake.
On the next set of wall boards, I was decided to start in the middle and work my way to the sides so that any errors would show up equally distributed on either side. I did put spacing between the wall boards, but I obviously didn't put enough spacing as there were still gaps on the sides after each final wall board was attached (plus there was the issue discussed above where the gaps were bigger at the top than the bottom because the frame boards weren't fully plumb).
On the last round of wall boards, I finally did fairly professional work. As the instructions did indicate (thought not to this level of detail) I laid the boards out and measured their combined width. Then I measured the width of the space between the end frame boards. I subtracted the two measurements to give a total "gap" distance to be distributed between the boards. Divide the total gap by the number of spaces and you've got the amount of space between each board.
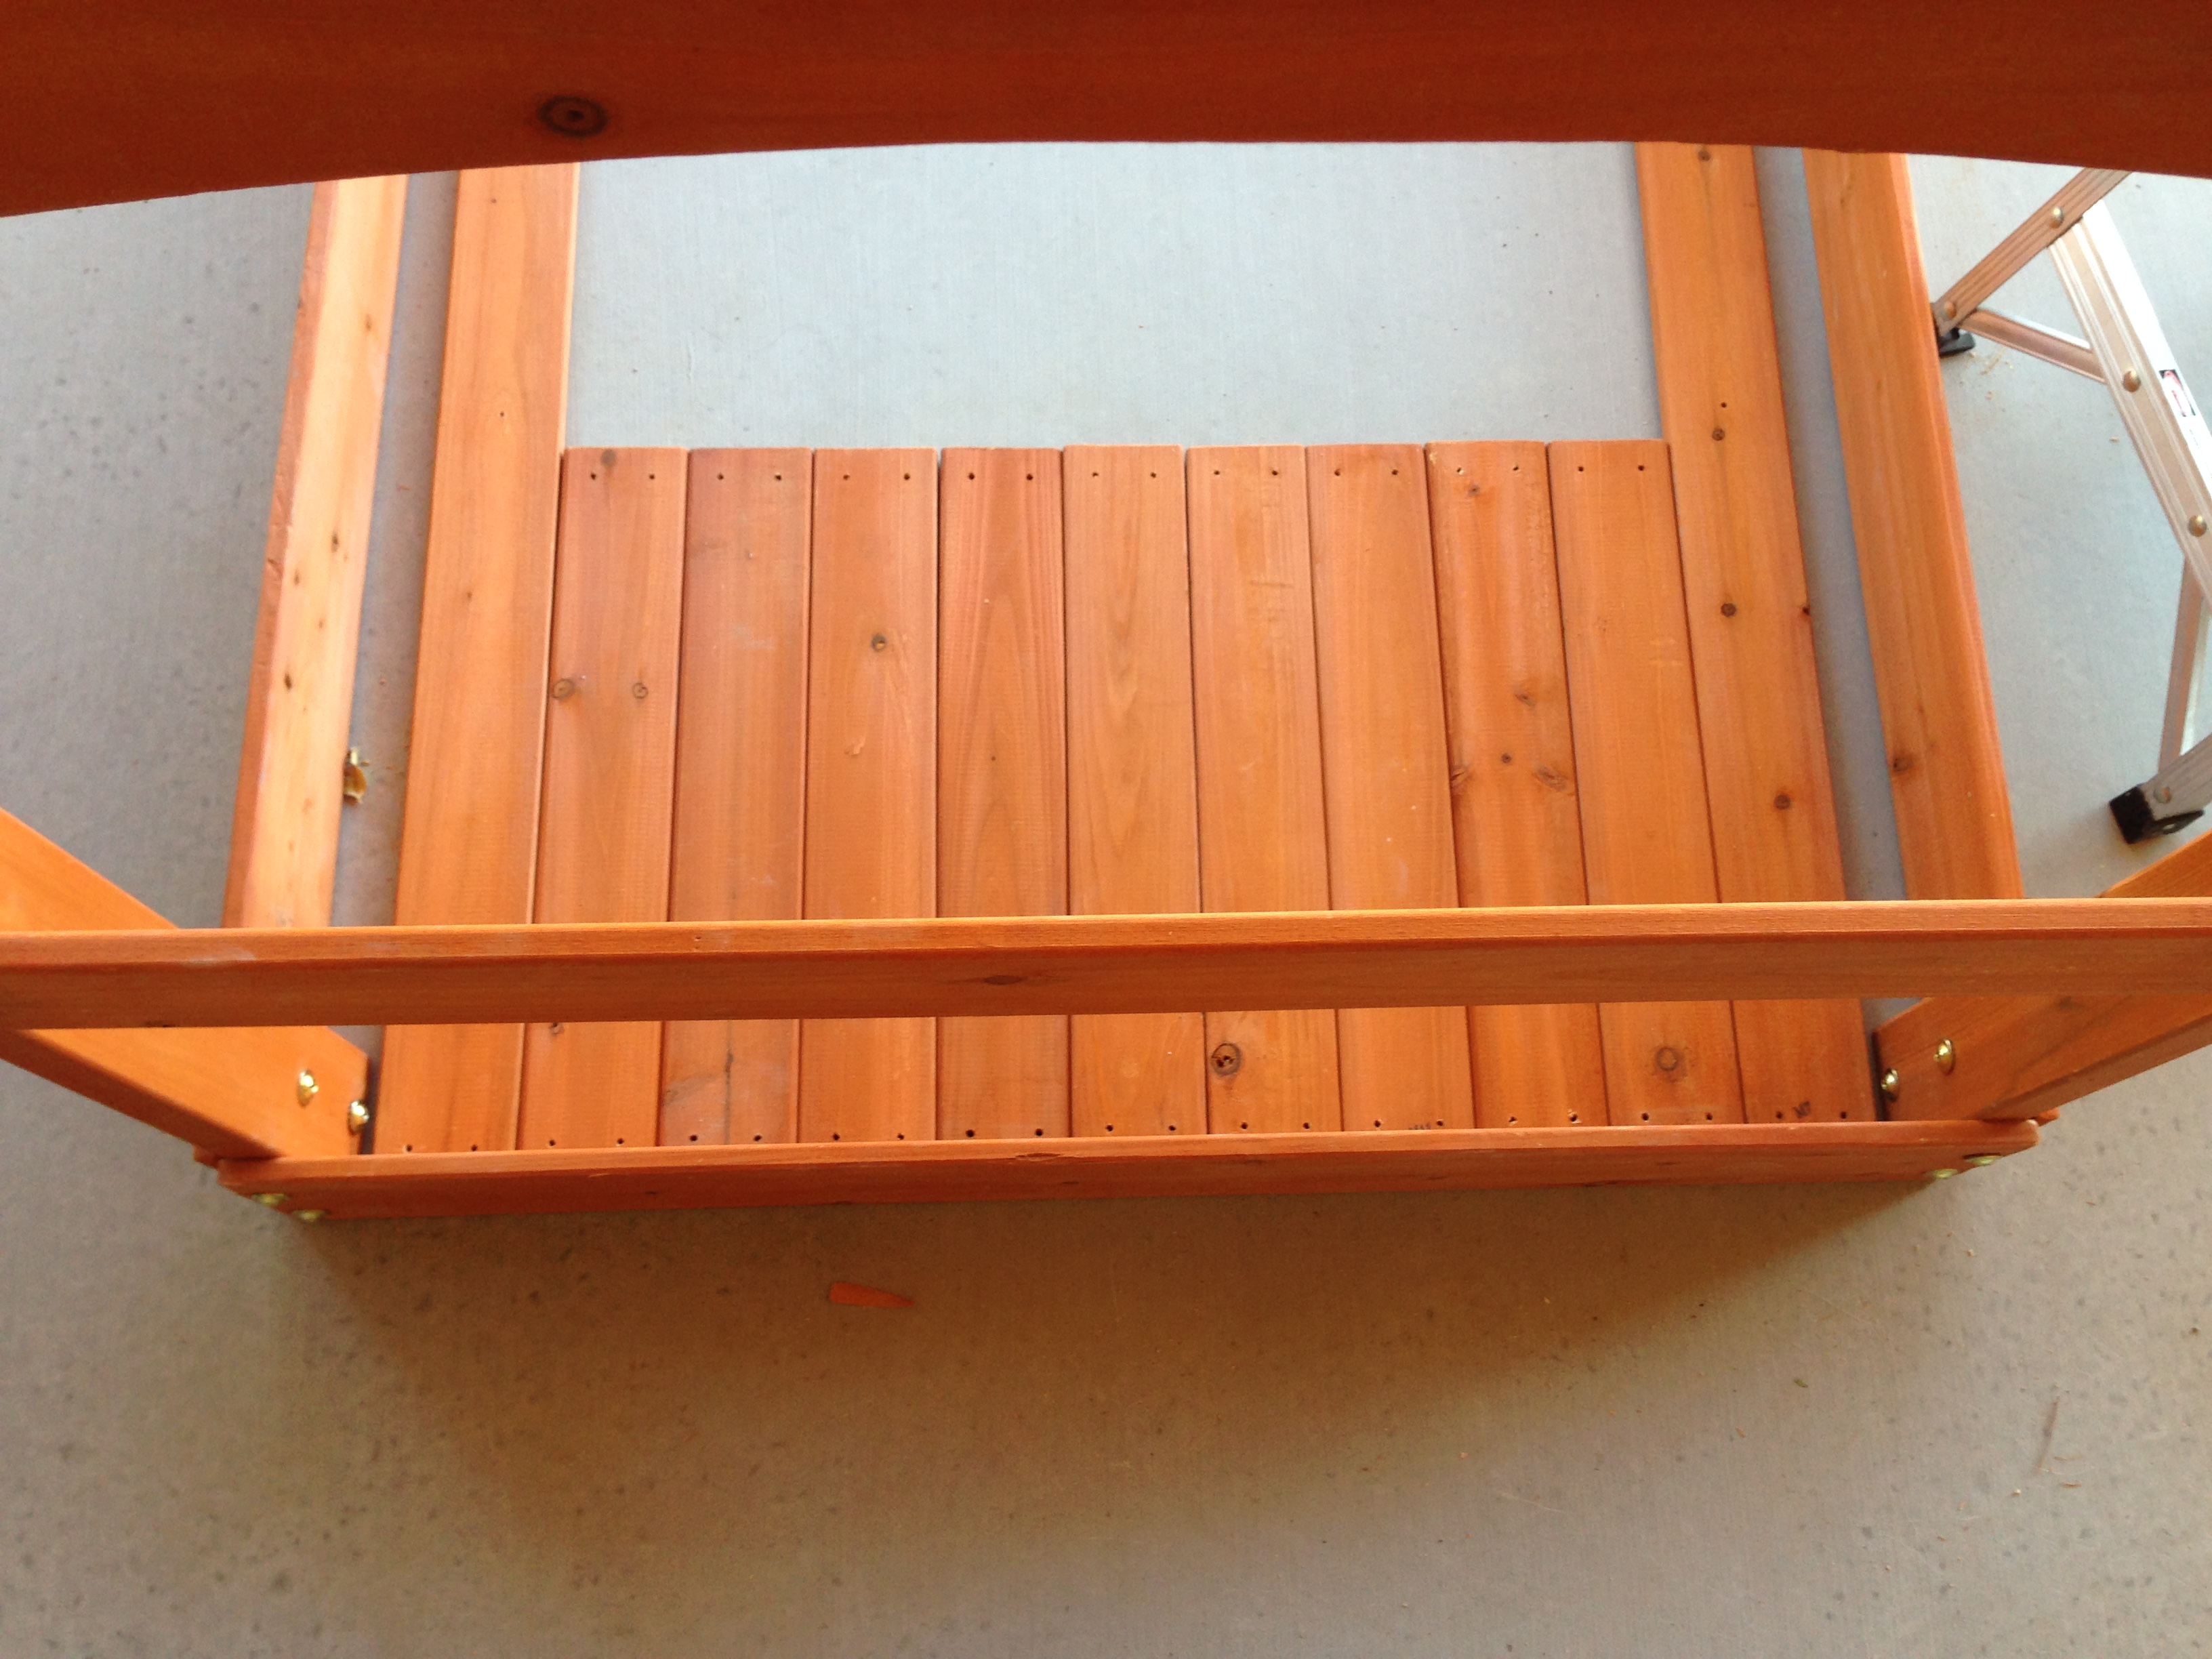
The picture below shows the work of my final wall board set assembly and you can see I did a good job of distributing the full gap space equally across all the gaps such that it looks professionally assembled.

In all, this is entire section is cosmetic. Its not a big deal to be a little off as I was in my build and most people won't notice your inaccuracies until you point them out. Its similar to how we have a couple of stains on our granite counter tops and a repaired chip in the tile floor; nobody can readily see them even though they are blatantly obvious to me be cause I know what I'm looking for and where to look for it.
Be Creative: Use Props To Help Assembly
<to be written>
Roof Issue
<to be written>
The roof is A frame boards aren’t correct for the distance the bottom holes should be apart
Bay Window Insertion
<to be written>
Built the window and got luck that it fit. Should have waited to tighten the top board
This article is part of a series of articles on my experience purchasing and building a swingset from Walmart.com.
PLEASE NOTE: This article is not fully complete. Additional edits, clarifications, pictures, etc still need to be added as I'm able to find time.
Leave a Reply
Recent Posts

Reolink Argus 2 Review: From an Owners Perspective

I Made the World a Little Safer!
A Typical Parenting Moment from the Parent of a Child with FASD

Volunteering
We Were Sent Home From the Hospital with Instructions that Could Have Killed Our Son

After School Programs: Your Child May Not Be As Safe As You Think

FAS - You Wouldn't Say That About My Child If It Was Autism
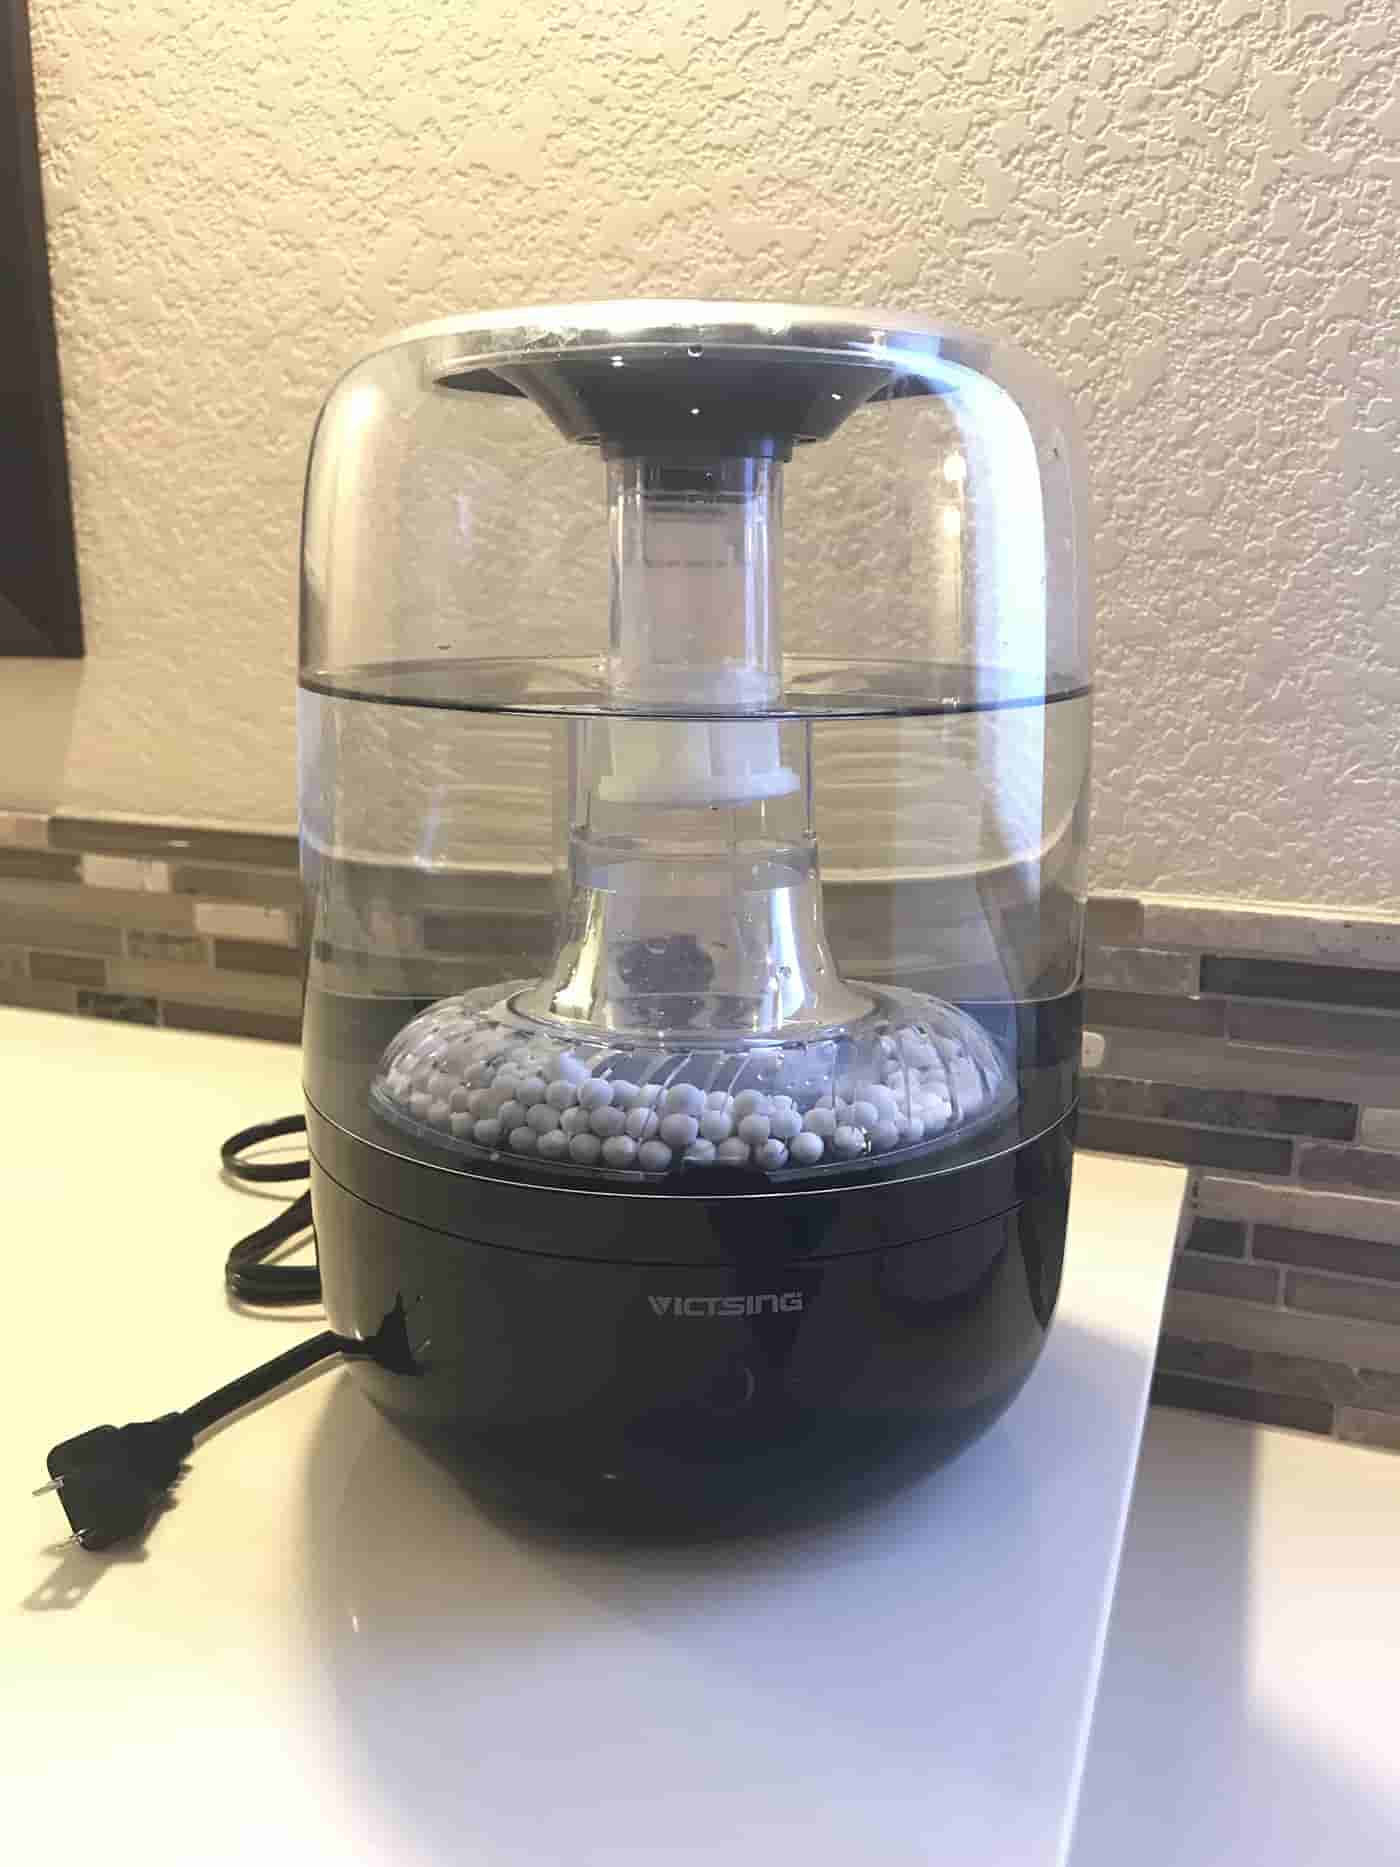
VicTsing Filterless Cool-Vapor Humidifier Review
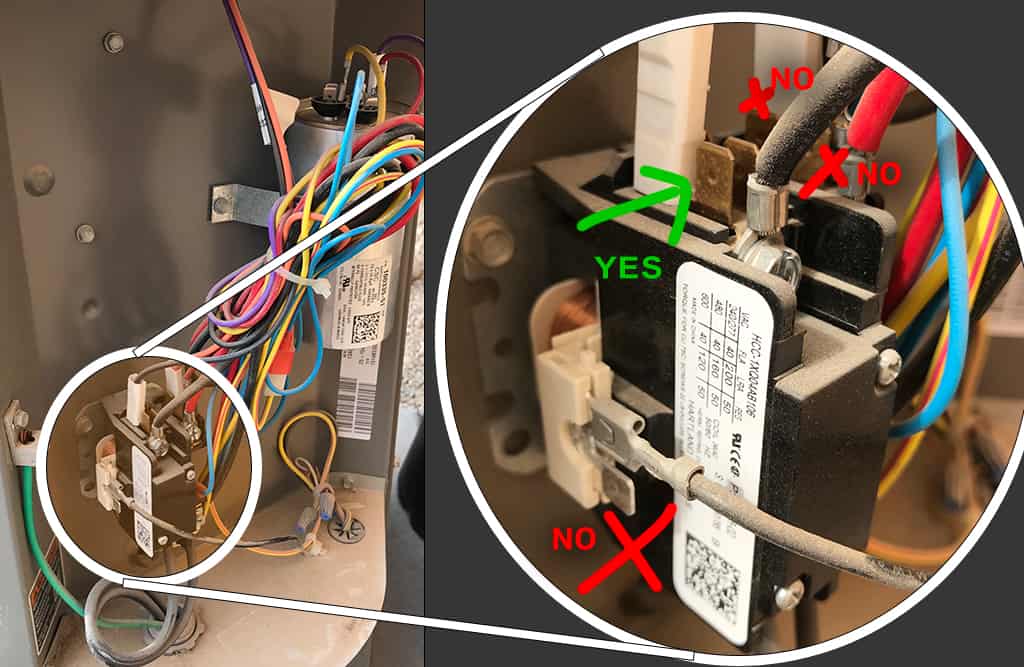
Increasing the Life of Your Air Conditioner: How to Install a 'Hard Start' Kit

A/C Hard Start Kit: A $1,600 Per Hour Story